

Introduction: Why Cherry Tomatoes Are the Perfect Gateway to Home Food Production
Cherry tomatoes represent the ideal entry point into home vegetable gardening. They’re forgiving of beginner mistakes, produce abundantly in confined spaces, thrive in containers on apartment balconies, and deliver harvests within weeks of planting. Unlike many vegetables requiring extensive space, sophisticated equipment, or lengthy growing seasons, cherry tomatoes flourish in conditions most homeowners possess—a sunny window, modest planter, and basic care.
Beyond practicality, cherry tomatoes satisfy something deeper: the human desire for fresh, flavorful food grown by your own hands. Store-bought cherry tomatoes, picked unripe for shipping durability, cannot match the concentrated sweetness of sun-ripened tomatoes harvested at peak flavor. A handful of homegrown cherry tomatoes offers more satisfaction than pounds of commercial equivalents.
The economics appeal equally. A single cherry tomato plant costing $3-5 produces 50-150+ individual tomatoes across the season—easily $15-30 worth of store-quality produce. Beyond raw economics, homegrown tomatoes eliminate pesticide residues, food-miles carbon impact, and packaging waste. They provide psychological benefits (pride in production, stress reduction from gardening), nutritional superiority (picked-ripe nutrition concentration), and culinary versatility (salads, sauces, snacking, preservation).
This guide walks you through everything needed to successfully grow cherry tomatoes at home, whether you possess a sprawling backyard garden or only a sunny apartment balcony. We’ll cover variety selection, starting from seeds or transplants, optimizing growing conditions, managing common pests, and maximizing harvests.
Why Cherry Tomatoes Outshine Traditional Varieties for Home Gardeners
Space Efficiency and Container Suitability
Standard slicing tomatoes (Beefsteak, Big Boy, Brandywine) require substantial space: 3-4 feet between plants, tall stakes or cages, and generous soil volumes. Cherry tomato varieties reach manageable heights (2-4 feet typically) and thrive in containers as small as 5-gallon pails. A single 12-by-36-inch windowsill could support 4-6 productive cherry tomato plants; equivalent slicing tomato production requires 20+ square feet of dedicated garden space.
Prolific Production and Extended Harvests
Cherry tomato productivity astounds beginners. A single healthy plant produces 100-150+ individual fruits across 2-3 months of active production. Continuous harvesting triggers the plant’s biological imperative to produce more fruit—unlike vegetables with single harvest windows (lettuce, carrots, peas), cherry tomatoes reward frequent picking with perpetual flowering and fruiting.
This abundance allows diverse uses: fresh eating (highest satisfaction), sharing with neighbors (building community), preservation (sauces, drying, canning), and experimentation (cooking techniques you wouldn’t risk on expensive store-bought produce).
Pest Resilience and Disease Management
Cherry tomatoes’ smaller fruit size and branching architecture create conditions less favorable to certain pests (notably tomato hornworms, which prefer massive fruits). Their prolific leaf cover provides habitat for beneficial insects predating pests. Most importantly, losing a few cherry tomatoes to pest damage (versus losing half a premium Beefsteak) remains emotionally and practically acceptable.
Flavor Concentration and Culinary Versatility
Cherry tomatoes’ high sugar-to-acid ratio and concentrated flavor exceed standard slicing varieties for many purposes. Their size makes them perfect for whole tomatoes in salads, pasta dishes, roasting, or simply eating fresh warm from the garden.
Rapid Gratification and Success Psychology
Cherry tomatoes flower and fruit within 50-70 days of transplanting—providing measurable success quickly. This early gratification keeps beginning gardeners motivated and confident. Contrast this with peppers (90+ days to first fruit) or standard tomatoes potentially requiring staking, pruning, and intensive management before production. Cherry tomatoes deliver rewards quickly, building enthusiasm for expanded gardening.
Understanding Cherry Tomato Varieties: Selecting Your Champions
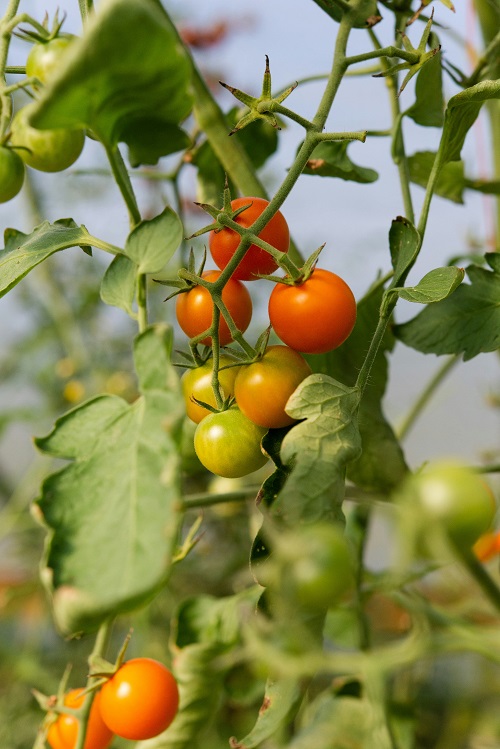
Hundreds of cherry tomato varieties exist, ranging from classic red round types to yellow, orange, pink, striped, and even purple varieties. Selection depends on your climate zone, available growing season, and flavor preferences.
Popular Proven Varieties for Home Gardeners
‘Sweet 100’ – The reliable workhorse. Indeterminate (vining, continuous production), prolific production of small sweet fruits, adaptable to most climates. Seeds and transplants widely available. USDA zones 3-12.
‘Sungold’ – Premium flavor variety producing golden-orange fruits of exceptional sweetness. Slightly more demanding (appreciates consistent warmth and moderate nitrogen), but flavor rewards justify attention. Requires 2-3 years seed saving or annual seed purchase (often hybrid). USDA zones 3-11.
‘Tiny Tim’ – Ultra-compact determinate variety (12-18 inches), perfect for container growing and apartments. Produces abundant full-size cherry tomatoes on minuscule plants. Excellent for patio containers, window boxes, and space-constrained environments. USDA zones 3-12.
‘Yellow Pear’ – Heirloom indeterminate variety producing distinctive pear-shaped yellow fruits. Excellent flavor, prolific, somewhat sprawling (requires staking). Reproduces reliably from saved seed. USDA zones 3-11.
‘Black Cherry’ – Dark purple-black fruits with complex sweet-tart flavor. Indeterminate, moderate production, gourmet appeal. Best in warm climates; longer growing seasons required for consistent production. USDA zones 4-11.
‘Hundreds and Thousands’ – Extremely prolific small fruits on branching plants. Each plant produces literally hundreds of small cherry tomatoes. Excellent for sauce production or maximizing harvest volume. USDA zones 3-11.
‘Black Currant’ – Smallest variety (marble-sized fruits), dramatic dark color, concentrate tart-sweet flavor. Gourmet option for gardeners seeking novelty and unique flavor. Moderate production; excellent for fresh eating. USDA zones 3-11.
Determinate vs. Indeterminate Considerations
Determinate varieties (bush types) grow to fixed height (typically 18-36 inches), produce most fruit simultaneously, then largely finish production. Advantages: compact, no pruning needed, all-at-once harvest allowing preservation projects. Disadvantages: concentrated production window (2-3 weeks of peak harvest), shorter overall productivity period.
Indeterminate varieties (vining types) grow continuously throughout season, produce flower clusters sequentially, and produce fruit until frost. Advantages: extended harvest (June through October in most climates), continuous fresh production. Disadvantages: require staking/support, larger plants, need occasional pruning for manageability.
Recommendation: Beginners starting with containers should prioritize determinate ‘Tiny Tim’ or similar compact varieties. Gardeners with space and patience appreciate indeterminate varieties for extended harvests.

Starting Your Cherry Tomato Garden: Complete Step-by-Step Guide
Step 1: Choose Your Growing Location
Sunlight Requirements – Non-Negotiable:
Cherry tomatoes demand 6-8 hours minimum direct sunlight daily; 8+ hours optimal. Less than 6 hours produces sparse flowering, minimal fruit, and increased fungal disease susceptibility. Locations receiving afternoon shade in scorching-hot climates (SW deserts, southern zones 9-10) may benefit from afternoon protection; most North American climates benefit from maximum available sunlight.
Assess your potential location throughout the day, noting sunrise/sunset shadows from buildings, trees, and structures. South and west-facing locations typically maximize sunlight in Northern Hemisphere locations.
Air Circulation and Wind Tolerance:
Good air movement prevents fungal diseases, strengthens stem development, and improves pollination. Slightly breezy locations outperform completely sheltered spots. However, extremely windy locations (coastal areas, exposed rooftops) may require temporary windbreaking; violently wind-whipped plants stress and slow production.
Temperature Considerations:
Cherry tomatoes grow in USDA zones 3-12 (with appropriate variety selection), but thrive in zones 5-9 where temperatures regularly reach 70-85°F during day and 55-70°F at night. They tolerate cold nights (temperatures below 55°F reduce flowering) and extreme heat (above 95°F reduces fruit set). In frigid climates, timing transplanting for after last frost and protecting with cold frames or cloches extends production seasons.
Step 2: Select Growing Containers or Prepare Garden Beds
Container Growing Options (Recommended for Beginners):
Container growing offers flexibility, portability, and simplified management. Specific container characteristics matter:
Minimum Size Requirements:
- Determinate (bush) varieties: 5-gallon container minimum (12-inch diameter minimum)
- Indeterminate (vining) varieties: 10-gallon container minimum (14-18 inches diameter preferred)
Drainage Imperative: Every container must have drainage holes. Waterlogged soil kills roots and promotes fungal diseases. If using decorative containers lacking holes, use them as outer sleeves with drainage-equipped containers inside.
Material Considerations:
- Plastic pots: Lightweight, affordable, durable 3-5 years, heat up in direct sun (potentially stressing roots)
- Fabric/grow bags: Excellent air circulation preventing root-bound conditions, photodegradable (lifespans 1-3 years), light-weight, promote healthier root systems
- Ceramic/terra cotta: Beautiful, heavy (difficult to relocate), porous (require more frequent watering), variable drainage
Recommendation: Fabric grow bags or recycled plastic food-service buckets (with added drainage holes, costing $1-3 each) offer excellent cost-to-performance ratios.
Garden Bed Preparation (If Not Using Containers):
Garden beds should be elevated (6-12 inches above ground) or ground-level with excellent drainage. Before planting:
- Test soil pH (target 6.0-6.8)
- Amend with compost or aged manure (2-3 inches incorporated into top 8-10 inches)
- Add perlite or coarse sand if soil is clay-heavy (improves drainage)
- Space plants 18-24 inches apart (determinate varieties can be closer)
Step 3: Prepare Growing Medium
Quality growing medium dramatically influences success. Avoid garden soil (compacts, contains pathogens, drains poorly). Instead, use:
Recipe for Excellent Cherry Tomato Growing Mix:
- 30% high-quality compost or aged bark
- 30% coconut coir or peat moss
- 20% perlite or vermiculite (improves drainage and aeration)
- 20% aged manure or worm castings
This combination provides nutrient availability, excellent drainage, and appropriate water retention.
Alternatively: Pre-made potting mixes specifically formulated for vegetables work excellently; brands like Miracle-Gro, Espoma, or FoxFarm produce reliable results. Avoid “topsoil” or “garden soil” mixes in containers.
pH Optimization: Cherry tomatoes prefer slightly acidic soil (pH 6.0-6.8). If uncertain, test soil with inexpensive pH test kit ($5-15). If pH exceeds 7.0, add sulfur per package directions; if below 5.5, add lime.
Step 4: Start from Seeds or Transplants
Starting from Seed (6-8 weeks before last frost):
Seed starting requires minimal equipment but demands attentiveness:
- Timing: Count backward from your last frost date. Cherry tomatoes need 6-8 weeks before transplanting outdoors.
- Seed Starting Medium: Use sterile seed-starting mix (fine-textured, promotes germination). Fill seed trays or small containers.
- Planting: Place 2-3 seeds per cell, 1/4-inch deep. Press seeds gently into moist medium.
- Moisture and Temperature: Keep medium consistently moist (not waterlogged). Tomato seeds germinate best at 70-75°F. Bottom heat (heating pad under seed tray) accelerates germination to 5-7 days; without heat, germination takes 10-14 days.
- Light: Once sprouted, provide bright light immediately (grow lights 2-3 inches above seedlings, 12-14 hours daily; or bright south-facing window). Without adequate light, seedlings become spindly and weak.
- Thinning: Once true leaves appear, remove weaker seedlings, keeping strongest in each cell.
- Hardening Off (7-10 days before transplanting): Gradually acclimate seedlings to outdoor conditions—increasing outdoor exposure daily, starting with 1 hour in shade, progressively increasing sun exposure and duration.
Purchasing Transplants (Easiest for Beginners):
Garden centers and nurseries sell cherry tomato transplants in 4-pack or 6-pack cells (typically $3-8). Advantages include bypassing seed-starting complexity and providing immediate gratification. Select stocky, dark-green transplants with visible root systems—avoid leggy, pale seedlings.
Harden off purchased transplants similarly before transplanting outdoors (5-7 days if grown in greenhouse; less critical if purchased from outdoor growing areas).
Step 5: Transplant to Final Locations
Timing:
Transplant outdoors only after last frost date has passed and nighttime temperatures consistently remain above 50°F. In most U.S. regions:
- Zone 3-4: Late May to early June
- Zone 5-6: Mid-May
- Zone 7-8: Early-mid May
- Zone 9-10: March-April
Transplanting too early into cold soil stresses plants, slowing growth despite warm air temperatures.
Transplanting Procedure:
- Harden off seedlings or purchased transplants 5-7 days before transplanting (gradually acclimate to outdoor conditions)
- Dig planting holes slightly deeper than container height (tomatoes tolerate deeper planting; roots develop along buried stems)
- Gently remove transplant from container, loosening root ball carefully
- Place in hole, backfilling with growing medium; water thoroughly
- Space according to variety (12-18 inches for determinates; 18-24 inches for indeterminates)
- Install stakes/cages immediately (prevents root damage from later installation)
Daily Care: Watering, Feeding, and Support
Watering Protocol – The Most Critical Management Factor
Inconsistent watering creates more cherry tomato problems (blossom end rot, fruit cracking, disease susceptibility) than any other factor. The goal: consistent moisture without waterlogging.
Watering Guidelines:
- Frequency: Daily watering typical in full sun (containers) to every 2-3 days (garden beds with excellent soil)
- Timing: Early morning watering optimal; morning-watered plants dry surface moisture by midday, preventing fungal disease. Evening watering acceptable in dry climates; avoid in humid regions
- Technique: Soil-level watering preferred; avoid wetting foliage (promotes fungal diseases)
- Depth: Water until moisture reaches entire root zone (for containers, water until draining from bottom; for garden beds, 1-2 inches weekly)
Signs of Watering Problems:
- Too Little Water: Wilting plants, hard soil, blossom end rot (brown leathery spot on fruit bottom)
- Too Much Water: Yellow lower leaves, soft stems, musty soil smell, accelerated fungal disease
Moisture Consistency Strategy:
Mulch containers and garden beds with 2-3 inches of straw, grass clippings, or compost. This moderate temperature extremes, preserves soil moisture, and reduces watering frequency 20-30%.
Fertilization – Encouraging Production Without Excess
Tomato plants need specific nutrient ratios for optimal production. Excessive nitrogen promotes foliage at the expense of flowers and fruit.
Fertilization Schedule:
At Transplanting:
- Mix balanced slow-release organic fertilizer into growing medium (follow package directions)
Every 2-3 Weeks (Once Flowering Begins):
- Apply fertilizer with higher phosphorus and potassium (second and third NPK numbers), lower nitrogen
- Options: Tomato-specific fertilizers (common commercial products), balanced 5-10-10, or organic alternatives (fish emulsion, seaweed extract, worm castings tea)
- Dilute liquid fertilizers per package directions; apply to soil level only
Home Remedies Proven Effective:
- Crushed eggshell dust (3-5 shells per plant) – provides calcium preventing blossom end rot
- Coffee grounds (dried, worked into surface) – slight nitrogen boost, mild pest deterrent
- Banana peel “tea” (soak peel 24 hours in water, strain, use water) – potassium source supporting fruiting
Nutrient Deficiency Signs:
- Yellow lower leaves (nitrogen deficiency) – increase nitrogen input
- Purple-tinged leaves (phosphorus deficiency) – apply phosphorus-heavy fertilizer
- Pale edges with green centers (potassium deficiency) – apply potassium-heavy fertilizer
Supporting Your Plants – Stakes and Pruning
Staking and Support Installation:
Indeterminate (vining) varieties absolutely require support; determinate (bush) varieties benefit from light staking preventing branch breakage under fruit weight.
Support Options:
- Bamboo stakes (cheapest, 6-8 feet optimal length) – tie plants with soft material (old t-shirt strips, nursery tape) at 12-inch intervals as growth progresses
- Tomato cages (pre-assembled wire supports) – slide over plants at planting; support extends as plant grows through top
- Florida weave/string trellising (professional approach) – horizontal strings supporting plants from overhead structure
- Nylon mesh/trellis – plants naturally climb mesh or lean on trellising
Install support at transplanting time, preventing root damage from later installation.
Pruning Indeterminate Varieties (Optional but Beneficial):
Indeterminate plants benefit from selective pruning:
- Remove lower leaves (once fruit sets) – improve air circulation, reduce fungal disease, redirect energy toward fruit
- Remove “suckers” (secondary shoots between main stem and branches) – if heavy pruning desired (controversial; moderate benefit). Most home gardeners skip this step
- Pinch flowers in late August (in northern climates) – prevents development of fruit that won’t ripen before frost


Pest and Disease Management
Common Cherry Tomato Pests and Organic Solutions
Aphids – Tiny soft-bodied insects clustering on new growth, producing sticky honeydew.
- Solution: Spray forcefully with water (dislodges aphids); neem oil spray effective for heavy infestations
Spider Mites – Microscopic arachnids creating fine webbing, stippled yellowing leaves.
- Solution: Increase humidity (spider mites prefer dry conditions); spray forcefully with water; neem oil if severe
Whiteflies – Tiny white flying insects clustering under leaves.
- Solution: Yellow sticky cards (traps adults); spray with insecticidal soap; neem oil
Hornworms – Large caterpillars with white stripes causing massive defoliation (typically mid-summer, once per season).
- Solution: Hand-pick (satisfying, effective); allow parasitic wasp cocoons to develop if present (white cocoons on worm backs); Bt spray (Bacillus thuringiensis) if heavy infestation
Fruit Flies – Tiny flies hovering over ripe fruit.
- Solution: Apple cider vinegar traps (small containers of vinegar with drop of dish soap); harvest ripe fruit promptly
Disease Prevention and Management
Septoria Leaf Spot – Brown spots with dark edges on lower leaves.
- Prevention: Remove lower leaves; improve air circulation; avoid overhead watering
- Treatment: Remove affected leaves; fungicide spray if severe
Early Blight – Lower leaf yellowing and brown rings progressing upward.
- Prevention: Remove lower leaves; mulch to prevent soil splash; improve air circulation
- Treatment: Remove affected leaves; copper fungicide spray
Powdery Mildew – White powdery coating on leaves (unusual on tomatoes but possible).
- Prevention: Adequate air circulation; avoid excessive humidity
- Treatment: Baking soda spray (1 teaspoon baking soda + 1 tablespoon horticultural oil per gallon water)
Blossom End Rot – Brown leathery spots on fruit bottom (calcium deficiency often triggered by inconsistent watering).
- Prevention: Consistent watering; adequate calcium (eggshell dust application)
- Solution: Already-affected fruit cannot be saved; new fruit production should be normal if watering regularized
Harvesting and Beyond
Knowing When Fruit Is Ready
Cherry tomatoes are truly ripe when:
- Fully red (or fully their designated color if yellow/orange/purple varieties)
- Slight give when squeezed (firm but not rock-hard)
- Separated easily from vine with gentle twist
Harvesting while slightly underripe (50% color, then ripening on counter) is acceptable and sometimes preferable if pests or weather threatening; home-grown underripe tomatoes still surpass commercial quality.
Extending Harvest Season
In Frost-Prone Climates:
- Cover plants with frost cloth or sheets if light frost threatened (32-35°F; prolonged exposure below 32°F kills plants)
- Plant determinate varieties timed for mid-summer production before fall frosts
- Transplant in early season for maximum production window
Indeterminate Varieties in Short-Season Climates:
Consider very early-season starts (seed indoors 8-10 weeks before last frost, transplant immediately after frost) to maximize production before fall frost.
Post-Harvest Uses
Fresh cherry tomatoes taste best consumed within 2-3 days of harvest. Beyond that:
- Canning: Halve tomatoes, pack in sterilized jars, cover with boiling water + salt, process per USDA guidelines
- Freezing: Wash, dry, freeze in single layer on baking sheet, then transfer to freezer bags (thaw for sauces, not fresh eating)
- Sun-drying: Halve, remove seeds, dry in oven at 200°F for 4-6 hours until leathery
- Sauce/Paste: Simmer tomatoes, strain through food mill, reduce to desired consistency
Common Questions and Troubleshooting
Q: My cherry tomatoes aren’t flowering. What’s wrong?
Likely causes: insufficient light (move to sunnier location), excessive nitrogen (reduce nitrogen fertilizer), temperatures below 55°F at night (wait for warmer weather), or still too young (wait 2-3 weeks post-transplant).
Q: My fruits are cracking. Why?
Cause: Inconsistent watering, typically heavy rain/watering after dry period. Solution: consistent moisture, protective covering during heavy rain if possible, mulching to moderate moisture swings.
Q: Are my plants getting enough light?
Indicator: If plants are leggy (tall with sparse leaves), pale green, or slow-growing, suspect insufficient light. Solution: relocate to sunnier location, use supplemental grow lights, thin adjacent plants/structures blocking sunlight.
Q: Can I replant the same containers next year?
Yes, but refresh growing medium (old medium compacts, depletes nutrients). Remove top 4-6 inches, replace with fresh medium mixed with compost. Disinfect containers between plantings (bleach solution: 1 part bleach to 9 parts water, soak 10 minutes, rinse thoroughly).
Q: Can I save seeds from my cherry tomatoes?
Yes! Let ripest fruits remain on vine until over-mature, harvest, scoop seeds into jar with water, ferment 2-3 days (breaks seed coating), rinse thoroughly, dry completely on paper towels (2-3 weeks), store in cool dry location. Note: Hybrid varieties won’t reproduce true; grow heirlooms for reliable seed saving.
Conclusion: From First Seedling to Bountiful Harvests
Growing cherry tomatoes transforms the abstract idea of “home food production” into concrete reality: tangible fruits produced by your specific efforts, tasting incomparably superior to any commercial option, ready for harvest within weeks of planting.
The learning curve is gentle. Cherry tomatoes forgive beginner mistakes—inconsistent watering, suboptimal placement, minor nutrient deficiencies. They reward consistent attention with prolific production. Within a single season, first-time growers typically produce 50+ perfect cherry tomatoes from single plants.
This success builds confidence and knowledge transferable to other vegetables. The tomato skills learned (pest identification, pruning, support systems, fertilization schedules) apply equally to peppers, cucumbers, and herbs. Cherry tomato gardening frequently launches broader vegetable growing enthusiasm.
Your Action Plan:
- This Week: Choose your growing location; assess sunlight exposure throughout the day
- Next Week: Acquire seeds or purchase transplants; gather containers and growing medium
- Following Week: Start seeds indoors or harden off purchased transplants
- Within 2 Weeks: Transplant outdoors (post-frost); install support; begin regular care routine
- Within 60-90 Days: Begin harvesting ripe cherry tomatoes
Your first homegrown cherry tomato awaits. Grow it well.
You may also like: How to Plant Carrots: Step-by-Step Guide for Perfect Homegrown Roots