
Introduction
Growing garlic at home is one of the smartest decisions for anyone seeking a versatile, essential culinary ingredient that requires minimal care yet delivers abundant harvests. Whether you’re tending a small urban balcony garden, a traditional backyard plot, or dedicated raised beds, garlic thrives with basic maintenance and rewards you with months of aromatic, nutrient-dense bulbs.
Contrary to popular belief, cultivating garlic isn’t complicated—it demands patience, yes, but the payoff is substantial. You’ll harvest healthy bulbs that store for months, supply your kitchen with fresh garlic year-round, and potentially generate supplemental income by selling excess to local markets or neighbors.
This comprehensive guide walks you through every stage of garlic cultivation, from selecting quality seed cloves to storing your harvest. You’ll learn the optimal planting windows for your region, master soil preparation techniques, recognize maturity signals, and implement pest and disease management strategies that protect your investment.
Why Growing Garlic Makes Perfect Sense
Nutritional and Health Benefits
Garlic is far more than a seasoning—it’s a nutritional powerhouse backed by scientific research. Understanding these benefits motivates consistent cultivation:
Powerful Active Compounds: Allicin, the compound formed when garlic is crushed or cut, delivers proven antibacterial, antiviral, and anti-inflammatory properties that support overall wellness.
Immune System Support: Regular garlic consumption strengthens your body’s natural defenses, increasing resistance to common infections and seasonal illnesses.
Cardiovascular Health: Garlic helps maintain healthy blood pressure levels and supports cholesterol management, contributing to long-term heart health.
Antioxidant Protection: Rich in compounds that combat free radicals, garlic helps slow cellular aging and supports longevity.
Digestive Wellness: Garlic promotes healthy gut flora and improves digestive efficiency, enhancing nutrient absorption from your entire diet.
Economic and Practical Advantages
Significant Cost Savings: One productive garlic plant yields multiple cloves sufficient for numerous meals. By growing your own, you eliminate recurring supermarket purchases and gain independence from retail pricing.
Extended Storage: Properly stored homegrown garlic maintains quality for six months or longer, providing consistent supply without waste.
Food Security: Develop genuine self-sufficiency by producing food in your own space, reducing dependence on supply chain disruptions.
Flexible Growing Options: Garlic adapts to various environments—small containers, raised beds, traditional in-ground gardens, or commercial-scale fields.
Minimal Startup Investment: Seed clove costs are remarkably low compared to the harvest value, delivering exceptional return on investment.
Supplementary Income Potential: Sell surplus bulbs at farmers markets, community gardens, or directly to neighbors seeking locally-grown produce.
Environmental Impact
Growing your own garlic dramatically reduces your carbon footprint by eliminating transportation from distant farms. Garlic cultivation doesn’t require aggressive synthetic chemicals, supporting soil health and local ecosystem biodiversity. Each plant you grow strengthens your garden’s environmental resilience.
Essential Materials and Setup
Quality Seed Cloves: Your Foundation
Selecting Suitable Cloves:
- Size matters: Choose large, firm cloves weighing 4-6 grams each (approximately the size of a large coin)
- Visual inspection: Cloves should display healthy, unblemished skin with no wrinkles, soft spots, or damage
- Source quality: Source from healthy plants showing no signs of disease or pest damage
- Position preference: The larger outer cloves from each bulb typically perform best
What to Avoid: Small cloves (under 3 grams) produce proportionally small bulbs. Damaged, diseased, or excessively sprouted cloves risk rot. Pre-sprouted garlic indicates age and reduced viability.
Obtaining Quality Seeds:
Professional Sources: Purchase certified seed garlic from reputable suppliers specializing in garlic production. Contact your local extension office for certified supplier recommendations in your region.
Grocery Store Option: Supermarket garlic works but offers less guarantee of purity and disease-free status. Choose bulbs from trusted sources without chemical residues.
Homegrown Selection: After your first successful harvest, reserve your largest, healthiest bulbs for next season’s planting. This approach builds climate adaptation and ensures genetic consistency with your specific growing conditions.
Soil Preparation Materials
- Premium potting soil or garden loam
- Aged compost or worm castings (1:1 ratio with soil)
- Perlite or coarse sand for drainage enhancement
- Organic fertilizer blend (alfalfa meal, bone meal, or balanced NPK formula)
Essential Tools and Supplies
- Hand spade or small hoe for soil work
- Watering can with rose attachment for even distribution
- Measuring tape for accurate spacing
- Pruning shears for cleanup
- Mulch materials (straw, shredded leaves, cocoa hulls)
- Garden markers or labels for variety identification
Container Requirements (For Pot Growing)
Use containers at least 20 centimeters (8 inches) deep with drainage holes. Minimum soil volume per plant: 5 liters. A 5-liter pot accommodates one large clove or up to four medium cloves spaced appropriately.
Space Calculations
Container Gardens: Two square meters (roughly 20 square feet) holds 10-15 plants in individual pots.
Garden Beds: Five to ten square meters provides ideal production for household needs plus surplus.
Spacing Standards: Space cloves 10-15 centimeters apart within rows and 30 centimeters between rows.
Understanding Your Climate: Timing Your Planting
The Garlic Growth Cycle
Garlic is a long-season crop requiring a mandatory cold period (vernalization) to develop properly segmented bulbs. This chilling phase triggers the physiological changes that divide seed cloves into multiple individual cloves within new bulbs, intensifies flavor, and improves storage longevity.
Optimal Planting Timeline by U.S. Region
Cold Climate Zones (Northern states: Montana, Minnesota, Wisconsin, upstate New York):
- Planting window: September through October
- Harvest timing: June to July
- Climate advantage: Intense natural winters create ideal vernalization
- Note: These regions achieve superior garlic quality due to extended cold periods
Temperate Zones (Mid-Atlantic, parts of Midwest: Pennsylvania, Ohio, Indiana, Illinois):
- Planting window: October through November
- Harvest timing: July to August
- Climate consideration: Adequate winter chill with moderate conditions
- Note: Well-suited to both hardneck and softneck varieties
Moderate Climate Regions (Southern states: Virginia, Tennessee, North Carolina, northern Georgia):
- Planting window: November through December
- Harvest timing: May to June
- Climate consideration: Milder winters require careful variety selection
- Note: Choose varieties specifically bred for shorter vernalization periods
Warm Climate Zones (Texas, Oklahoma, southern California, Arizona):
- Planting window: December through January
- Harvest timing: April to May
- Climate challenge: Limited natural chill requires heat-tolerant varieties or pre-chilling
- Note: Artificial refrigeration of cloves for 4-8 weeks before planting improves results
Very Warm Climates (southern Florida, Hawaii, southern coastal California):
- Planting window: January through February
- Harvest timing: March to April
- Climate challenge: Minimal natural vernalization necessitates specialized approaches
- Note: Pre-chill cloves in refrigeration; grow under shade cloth to prevent bolting
Why the Cold Period is Non-Negotiable
Minimum 4-8 weeks of temperatures between 50-59°F (10-15°C) trigger clove segmentation and bulb formation. Without adequate chill hours, seed cloves produce single undivided bulbs rather than multi-clove heads. Planting in wrong seasons or warmer regions results in tiny, unmarketable bulbs or failure to segment.
Soil Preparation: Building Your Success Foundation
Soil Analysis and Assessment
Before planting, evaluate your soil’s fundamental properties:
Optimal pH Range: 6.0-7.0 (slightly acidic to neutral)
Ideal Texture: Loose, crumbly, well-structured soil that crumbles easily in your hand
Drainage: Excellent drainage is non-negotiable; garlic rots in waterlogged conditions
Organic Matter Content: Minimum 3-5% by volume, evidenced by dark color and rich, earthy aroma
Nitrogen Levels: Moderate content; excessive nitrogen promotes leaf growth at the expense of bulb development
Step-by-Step Soil Preparation
Phase 1: Analysis and Correction (Timing: 4-6 weeks before planting)
Conduct professional soil testing through your local extension office. If pH is too acidic (below 5.5), apply agricultural lime 30 days before planting. If excessively alkaline (above 7.5), incorporate elemental sulfur to gradually lower pH.
Phase 2: Site Clearance
Remove all perennial weeds, old root systems, rocks, and debris. Avoid planting garlic in locations where garlic grew within the previous three years to prevent pest and disease accumulation. If reusing space, thoroughly clear debris and add fresh organic matter.
Phase 3: Texture Development
Incorporate 2-4 inches of well-aged compost into existing soil. Loosen compacted soil with a garden fork or tiller to 10-12 inches depth. If severely compacted, perform multiple passes separated by one week apart. The goal is soft, easily-penetrated soil that root systems navigate effortlessly.
Phase 4: Organic Matter Integration
Mix soil components in these proportions:
- 60% native topsoil or garden loam
- 25% finished compost or aged worm castings
- 10% perlite or coarse sand (drainage optimization)
- 5% slow-release organic fertilizer (alfalfa meal or bone meal)
Blend thoroughly with your spade or tiller.
Phase 5: Pre-planting Rest Period
Prepare soil 2-3 weeks before your region’s recommended planting date. This allows natural settling and component integration. If time is limited, wait minimum 3-5 days after preparation before planting.
For Container Growing:
Use a custom blend: 40% quality potting soil, 40% compost, 20% perlite. Fill containers leaving 2 inches from the rim. Lightly compact with fingertips (not firm compression). Water thoroughly for settling.
Preparing Cloves for Planting
Rigorous Clove Selection
Separate cloves from the bulb by gently loosening the head; avoid aggressive pulling that damages clove bases. Keep the papery individual wrapper intact around each clove. Select only the largest, most robust cloves—reject any displaying size, blemishes, or disease symptoms. This ruthless selection process ensures only 60-70% of available cloves advance to planting.
Pre-planting Treatment (Recommended)
Soak cloves for 30 minutes in a trichoderma solution or organic fungicide to prevent fungal infections during early establishment. Air-dry in a ventilated space for 24-48 hours before planting. This preventive treatment significantly reduces disease pressure.
Timing Considerations
Plant cloves within 2-3 days of preparation for maximum viability. If storage is necessary, maintain cool conditions (50-59°F) in a well-ventilated space. Never refrigerate or expose to excessive humidity, both causing premature rot.
Planting Garlic: The Critical Phase
Detailed Planting Procedure
Step 1: Mark Spacing Use string, stakes, or a planting jig to establish straight rows. Mark planting positions: 30 centimeters between rows and 10-15 centimeters between cloves within rows. For containers, place one large clove centrally in small pots or up to four cloves in larger containers.
Step 2: Create Planting Holes Make individual holes or continuous furrows 1.2-2 inches deep (approximately the height of one clove). Use a hand dibbler, finger, or small spade.
Step 3: Position Cloves Correctly This step is critical: orient cloves with the pointed end facing upward and the basal end (root origin site) facing down. Position vertically or slightly angled (30-45 degrees). Never plant cloves horizontally; this disrupts germination and root formation.
Step 4: Secure in Soil Cover holes with prepared soil, compacting gently. Ensure cloves maintain firm soil contact without excessive pressure that compacts soil and restricts air circulation.
Step 5: Apply Mulch Layer After planting all cloves, distribute 2-3 inches of mulch: straw, shredded leaves, or cocoa hulls. Mulch retains soil moisture, moderates temperature fluctuations, suppresses weeds, and prevents soil crust formation.
Step 6: Initial Watering Water thoroughly immediately after planting using a gentle spray that distributes water evenly. Soil should be moist 6 inches deep—you want moisture contact with each clove without waterlogging.
Cultivation Care: Maintenance Routine
Water Management
Irrigation Strategy:
During initial post-planting phase (first 1-2 weeks), water daily until shoots emerge. During active growth (weeks 3-16), maintain consistent moisture with 2-3 weekly waterings in normal conditions. Reduce watering to once weekly during final 4-6 weeks before harvest.
Moisture Testing:
Insert your finger into soil to 2-inch depth. If dry, water. If moist or wet, wait 2-3 days before checking again.
Pre-harvest Water Reduction:
Deliberately restrict water intake 6-10 days before harvest. This concentrates flavors, facilitates post-harvest drying, and triggers natural dormancy preparation.
Sunlight Requirements
Garlic demands minimum 6 hours daily direct sunlight; 8+ hours is optimal. In extreme heat regions (above 95°F), afternoon shade cloth provides protection during peak summer without reducing yields. Monitor plants for pale coloring or thin leaves—signals to increase light exposure.
Fertilization Program
First Application (Weeks 3-4, post-emergence): Distribute 1-1.5 inches of finished compost around plants or apply diluted liquid worm castings (1 part castings to 5 parts water). This stimulates initial leaf development.
Second Application (Weeks 10-12, mid-winter): Apply balanced organic fertilizer (10-10-10 NPK) or distribute bone meal (0.7 ounces per plant). This provides nutrients for bulb formation.
Third Application (Weeks 18-20, early spring): Apply potassium-rich amendment—wood ash or kelp meal—to enlarge bulbs and concentrate nutrients.
Critical Warning: Excess nitrogen produces large leaves at the expense of bulb development. Follow recommendations; don’t increase nitrogen application.

Pest and Disease Management
Common Garlic Pests
White Flies (Bemisia tabaci):
- Identification: Tiny white insects on leaf undersides; rolled leaves
- Damage: Extract plant fluids, weakening vigor
- Prevention: Encourage biodiversity; avoid monoculture
- Control: Spray neem oil every 10 days; remove severely infested leaves
Mites (especially in dry conditions):
- Identification: Yellow-stippled leaves; reddened veins
- Damage: Reduce photosynthetic leaf area
- Prevention: Maintain moisture with mulch layers
- Control: Spray water and insecticidal soap; apply neem if severe
Thrips:
- Identification: Silvery or light-brown streaks on leaves
- Damage: Impair growth and bulb development
- Prevention: Remove nearby weeds (thrips hosts)
- Control: Neem oil or mineral oil during mild weather
Fungal Diseases
Rust (Puccinia porri):
- Symptoms: Yellow leaf spots progressing to reddish-brown with powdery spore masses
- Causes: Warm, humid conditions
- Prevention: Ensure adequate air circulation; water only soil, never foliage
- Treatment: Sulfur dust; remove affected leaves
White Rot (Sclerotinia sclerotiorum):
- Symptoms: White mold at stem base; plant wilting; basal rot
- Causes: Waterlogging and poor ventilation
- Prevention: Excellent drainage and proper spacing
- Treatment: Remove infected plants; avoid replanting that location for 2-3 years
Purple Blotch (Alternaria porri):
- Symptoms: Circular spots with brown centers and purple halos
- Causes: Excessive moisture on leaves
- Prevention: Irrigate soil level only; avoid overhead watering
- Treatment: Bordeaux mixture spray (1% concentration); copper fungicide
Monitoring Protocol
Inspect plants twice weekly. Remove diseased or infested leaves immediately. Increase airflow if disease symptoms appear. Maintain weed-free, debris-clear growing areas to eliminate disease reservoirs.
Recognizing Harvest Maturity
Visual Indicators of Readiness
Leaf Decline Progression: Bottom leaves dry and brown first. Upper leaves gradually yellow and lose rigidity. Approximately half of total foliage is dried when harvest timing is optimal.
Color Transformation: Leaves shift from vibrant green to pale yellow. Outer leaves lose turgidity while inner leaves may retain slight green.
Bulb Confirmation: Carefully unearth one plant. The bulb should display distinct clove separation visible even under soil. You can feel individual clove outlines through soil contact.
Growth Cessation: New leaf emergence stops. Plant height stabilizes. No fresh growth appears over several days.
Regional Harvest Timing
- Northern regions: Late June through July
- Mid-Atlantic and Midwest: July through August
- Upper South: May through June
- Lower South and warm regions: April through May
Harvest Timing Importance
Early harvesting yields undersized bulbs with poor storage. Delayed harvesting results in bulb segmentation and reduced storage longevity. Hit the optimal window for premium results.
Harvesting and Post-Harvest Processing
Pre-harvest Preparation
Seven to ten days before anticipated harvest, stop all watering. This action concentrates nutrients, facilitates post-harvest drying, and prepares plants for natural dormancy.
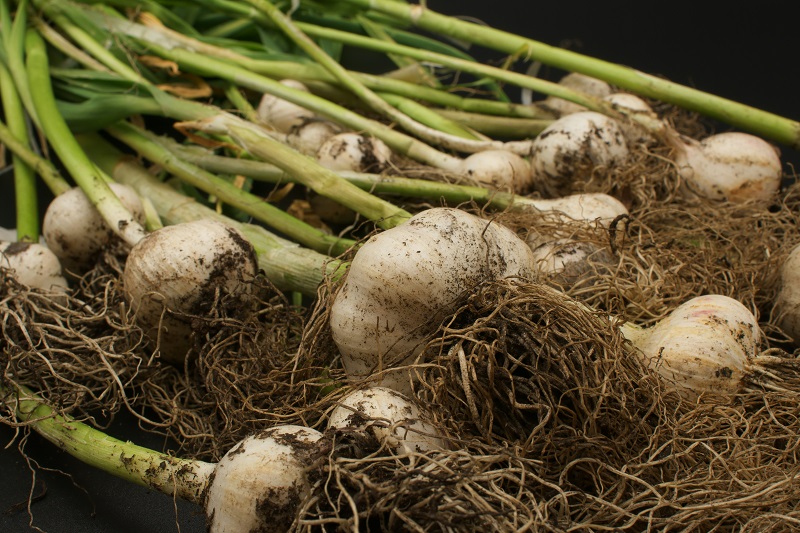
Careful Harvest Technique
Use a spading fork or hand shovel, inserting 2-4 inches away from the plant base. Gently lift surrounding soil as you work the fork deeper, gradually raising the entire plant. Garlic should emerge with intact roots attached.
Avoid washing bulbs (moisture promotes storage problems). Gently remove excess soil by hand, leaving a protective soil layer.
For multiple plants, bundle cloves loosely in small sheaves using twine; avoid tight binding that restricts airflow.
Critical Drying Phase
Drying Location Requirements: Select a warm (68-86°F), dry, well-ventilated space protected from rain and direct sunlight. Options include covered patios, ventilated sheds, garages with open doors, or indoor spaces with fan circulation. Darkness or indirect light preserves nutrient content.
Three-Phase Drying Process:
Week 1: Maintain garlic with leaves and stems intact. Maximize air circulation. Garlic dries rapidly in this phase.
Weeks 2-3: Leaves become completely dry and brittle. Hang in traditional braids (if planning long-term storage) or lay in ventilated containers. Outer skins develop papery texture and bronze-gold color.
Weeks 3-4: Final curing. Trim dried roots with pruning shears. Remove dry stems, leaving a small 0.75-inch stub, or maintain full stems for braiding. Shake bulbs—you’ll hear individual cloves rattling inside, indicating complete drying.
Drying Completion Indicators: Outer skins are crispy and bronze/golden colored. Interior is completely dry (rattle test confirms). Weight has reduced by approximately 70% from harvest weight. Cloves are individually distinct and don’t move within the bulb.
Storage: Extending Your Harvest
Optimal Storage Conditions
Temperature Range: 59-68°F is ideal. Avoid temperatures below 50°F (reduces viability) or above 77°F (promotes premature sprouting).
Humidity Levels: 60-70% relative humidity prevents both drying and fungal development. Below 50% causes shriveling; above 80% encourages mold.
Air Circulation: Continuous gentle airflow is essential. Avoid airtight containers, plastic bags, or sealed storage.
Storage Methods
Traditional Braids (Premium Longevity): Select bulbs with long, flexible stems. Braid 4-5 bulbs together while stems remain pliable. Secure the braid end with twine. Hang in cool, ventilated spaces. Duration: 6+ months. Advantage: individual bulbs are easily removed without disturbing the braid.
Mesh or Cloth Bags: Place cured garlic in breathable mesh or cloth bags. Secure loosely with twine. Hang in ventilated spaces. Duration: 5-6 months. Advantage: compact storage for large quantities.
Wooden Crates with Ventilation: Use wooden fruit or wine crates. Layer cloth between garlic layers. Ensure holes in base and sides for airflow. Stack crates in cool locations. Duration: 5-6 months. Advantage: stackable and durable.
Kitchen Glass Containers (Short-term): Place bulbs in wide-mouth glass jars without lids (allows airflow). Store in dry, protected spaces away from direct light. Duration: 2-3 months. Advantage: visible inventory and easy access.
Storage Duration by Variety
Purple/Red Varieties: 7-8 months storage capacity White Varieties: 4-5 months storage capacity Asian Varieties: 3-4 months storage capacity
Recognizing Deterioration
Early Sprouting: Small sprouts emerging indicates reduced viability but garlic remains edible. Simply remove the central sprout before use.
Softening: Bulb yielding to pressure signals interior rot; discard.
Odor Changes: Fermented or musty smells indicate fungal activity; discard.
Visible Mold: Any mold growth means immediate disposal.
Advanced Cultivation Strategies
Crop Rotation System
Never plant garlic in identical locations within 3-year cycles. Rotating crops prevents pest and disease accumulation:
- Year 1: Garlic
- Year 2: Brassicas (cabbage, broccoli, kale) or legumes (beans, peas)
- Year 3: Ground fruits (strawberries, squash) or diverse vegetables
- Year 4+: Garlic returns safely
This rotation naturally controls garlic-specific pests and pathogenic fungi.
Variety Selection and Adaptation
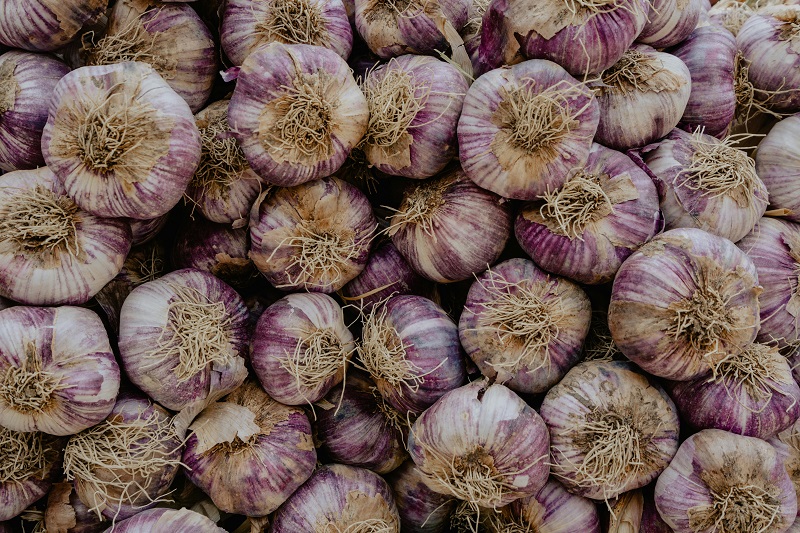
Purple/Red Garlic: Bold flavor, intense aroma, superior storage (7-8 months), performs best in cold climates with intense winters. Ideal for northern regions.
White Garlic: Mild flavor, larger bulbs, moderate storage (4-5 months), adapts better to warmer climates. Excellent for mid-Atlantic and southern regions.
Asian/Chinese Varieties: Large individual cloves, subtle flavor, shorter storage (3-4 months), less cold-hardy. Choose for warm regions or shorter seasons.
Regional Recommendations:
- Cold climates: Purple varieties
- Temperate zones: White or purple varieties
- Warm regions: White or specialized heat-tolerant Asian varieties
Maximizing Production
- Seed Quality: Larger bulbs yield more substantial cloves; select oversized specimens for replanting.
- Balanced Nutrition: Maintain correct N-P-K ratios; avoid nitrogen excess that sacrifices bulb size.
- Correct Spacing: Neither crowded (competition) nor excessive (wasted space).
- Pest Vigilance: Early detection prevents pest population explosions and yield loss.
- Optimal Harvest Timing: Neither premature nor delayed picking ensures maximum bulb development and storage capacity.
Conclusion
Growing garlic transforms your relationship with this essential ingredient. From seed clove to harvested bulb, the journey rewards patience with abundant, flavorful results. Whether you cultivate in containers, raised beds, or traditional gardens, success follows consistent implementation of these proven techniques.
You’ve learned the complete progression from climate assessment and soil preparation through germination, growth management, pest defense, harvest readiness, and long-term storage. Apply these strategies systematically, and you’ll produce restaurant-quality garlic in your own growing space.
Your Next Step: Start planning your garlic garden today. Select appropriate varieties for your climate zone, prepare your soil this week, and mark your calendar for your region’s optimal planting window. Within months, you’ll harvest aromatic, nutrient-dense bulbs that supply your kitchen, impress friends and family, and potentially generate supplemental income. Your garlic-growing journey begins now.
You may also like: How to Grow Leeks: Complete Guide to Planting and Harvesting Leeks