

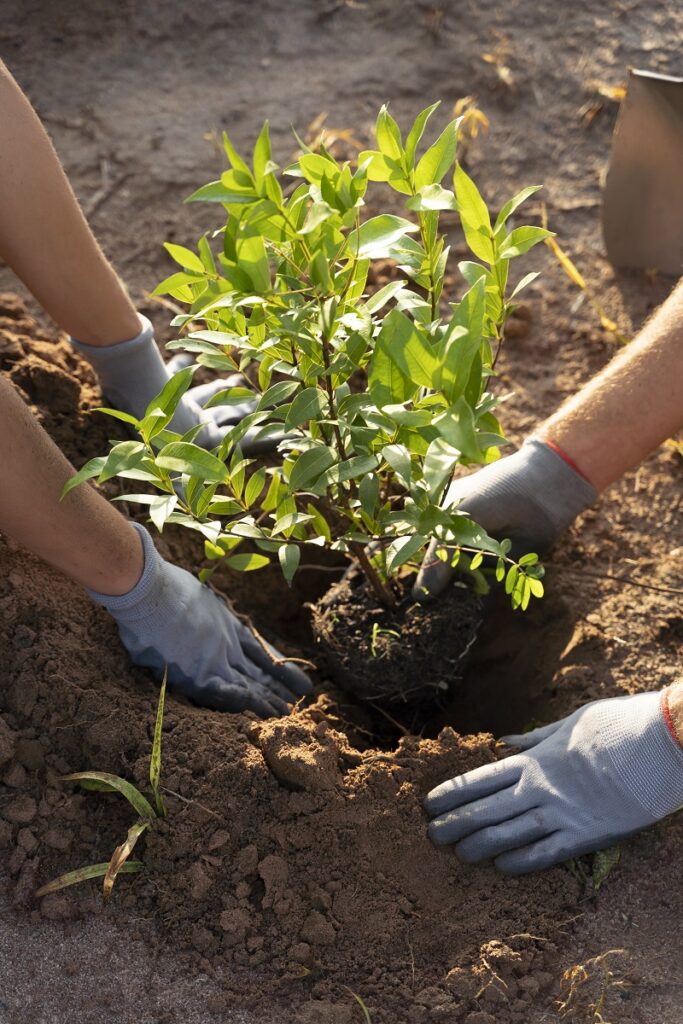
Imagine transforming a single healthy fruit tree into an entire orchard without spending hundreds of dollars at the nursery. Learning how to propagate fruit trees opens up a world of possibilities—from preserving heirloom varieties to establishing a productive homestead or even starting a small nursery business.
Propagating fruit trees might seem intimidating at first, but with the right techniques and proper guidance, anyone can successfully multiply their favorite varieties. Whether you’re a backyard gardener looking to expand your orchard or a small-scale farmer seeking cost-effective propagation methods, this comprehensive guide provides everything you need to know.
In this article, we’ll walk you through four proven propagation methods—cuttings, air layering, grafting, and seed starting—so you can choose the best technique for your specific fruit trees and growing conditions.


Why Learn Fruit Tree Propagation?
Propagating your own fruit trees offers numerous advantages for home growers and commercial producers alike.
Cost Savings: Quality fruit trees from nurseries typically cost $30-$75 each, with specialty varieties reaching $100+. By propagating your own trees, you can multiply your stock for just pennies per plant—the cost of basic supplies.
Genetic Preservation: When you propagate vegetatively (through cuttings, grafting, or air layering), you create genetic clones of the parent tree. This means you preserve the exact characteristics—flavor, disease resistance, productivity—of your best-performing trees.
Variety Control: Want to grow an heirloom apple variety that’s no longer commercially available? Propagation allows you to preserve rare cultivars and maintain genetic diversity that’s increasingly lost in modern agriculture.
Quality Assurance: By propagating from your own disease-free, vigorous parent trees, you maintain complete control over plant health from day one. You’ll avoid introducing pathogens that sometimes come with nursery stock.
Self-Sufficiency: Mastering propagation techniques gives you independence from nurseries and the ability to expand your orchard on your own timeline and budget.
Income Opportunity: Once proficient, many growers sell surplus trees at farmers markets or online, creating a supplementary income stream.
Understanding Propagation Methods: Choosing the Right Technique
Different fruit trees respond best to specific propagation methods. Understanding which technique works for which species ensures your success.
Propagation Method Overview
Hardwood Cuttings: Best for deciduous trees that root easily from dormant wood (figs, grapes, pomegranates, some plums)
Softwood Cuttings: Ideal for trees that root from actively growing tips (blueberries, currants, some cherries)
Air Layering: Perfect for trees difficult to root from cuttings (lychee, persimmon, avocado, some citrus)
Grafting: Essential for trees that don’t come true from seed or are difficult to root (most apples, pears, stone fruits, citrus)
Seed Propagation: Suitable for rootstock production and some true-breeding varieties (pawpaw, persimmon, some citrus, mulberry)
Let’s explore each method in detail.
Method 1: How to Propagate Fruit Trees from Cuttings
Cutting propagation is the simplest method for suitable species, requiring minimal equipment and producing results within weeks to months.
Best Fruit Trees for Cuttings
Excellent Success Rate:
- Figs (Ficus carica)
- Grapes (Vitis spp.)
- Pomegranates (Punica granatum)
- Currants and gooseberries (Ribes spp.)
- Elderberries (Sambucus spp.)
Moderate Success Rate:
- Mulberries (Morus spp.)
- Quince (Cydonia oblonga)
- Some plum varieties
Step-by-Step Hardwood Cutting Process
Timing: Take cuttings during dormancy (late fall through late winter) when trees are leafless.
Materials Needed:
- Sharp, sterilized pruning shears or knife
- Rooting hormone powder (IBA or NAA)
- Well-draining rooting medium (50% perlite, 50% peat moss)
- 4-6 inch pots with drainage holes
- Clear plastic bags or propagation dome
- Labels and permanent marker
Procedure:
- Select healthy wood: Choose pencil-thick shoots from the previous season’s growth (current-year wood that has hardened)
- Make proper cuts: Cut 8-12 inch sections, making the bottom cut at a 45-degree angle just below a bud node, and the top cut straight across above a bud
- Prepare cuttings: Remove all leaves except 2-3 at the top. Make sure each cutting has at least 3-4 nodes
- Apply rooting hormone: Dip the bottom 2 inches in rooting hormone powder, tapping off excess. This significantly increases rooting success
- Plant in medium: Insert cuttings 3-4 inches deep in pre-moistened rooting medium, spacing 3-4 inches apart
- Create humidity: Cover with clear plastic bag or dome to maintain 80-90% humidity. Ensure plastic doesn’t touch leaves
- Provide proper conditions:
- Temperature: 65-75°F is ideal
- Light: Bright indirect light; avoid direct sun
- Moisture: Keep medium consistently moist but not waterlogged
- Air circulation: Open covering briefly every few days to prevent fungal issues
- Monitor progress: Check for root development after 3-4 weeks by gently tugging. Resistance indicates rooting
- Harden off: Once well-rooted (6-8 weeks), gradually acclimate to outdoor conditions over 10-14 days
- Transplant: Move to larger containers or permanent location when roots fill the pot
Pro Tip: Take 3-4 times more cuttings than needed, as success rates vary. Even experienced propagators expect 50-80% success with most species.

Method 2: Air Layering for Difficult-to-Root Trees
Air layering (also called marcottage) is an ancient technique that produces rooted plants while still attached to the parent tree—a huge advantage for challenging species.
Best Fruit Trees for Air Layering
- Lychee (Litchi chinensis)
- Avocado (Persea americana)
- Persimmon (Diospyros spp.)
- Fig (Ficus carica)—though cuttings are easier
- Citrus (Citrus spp.)—especially lemons and limes
- Guava (Psidium guajava)
Step-by-Step Air Layering Process
Timing: Spring through early summer when trees are actively growing.
Materials Needed:
- Sharp, sterilized knife
- Rooting hormone powder or gel
- Sphagnum peat moss
- Clear plastic wrap or aluminum foil
- Twist ties or electrical tape
- Zip-lock bags (gallon size)
Procedure:
- Select a branch: Choose healthy, pencil-to-thumb-thick branch from previous year’s growth, ideally 12-24 inches from the tip
- Remove bark ring: Using a sharp knife, make two parallel cuts around the branch 1-1.5 inches apart. Remove the bark and cambium layer completely, creating a “wound” that will produce roots
- Treat wound: Dust the exposed wood with rooting hormone, covering completely
- Prepare moss: Soak sphagnum peat moss in water for 30 minutes, then squeeze out excess until just moist
- Apply moss: Pack a baseball-sized amount of moist moss around the wounded area, creating a 2-3 inch thick collar
- Wrap securely: Tightly wrap clear plastic around the moss ball, sealing both ends with twist ties or tape. The moss should be visible through the plastic so you can monitor moisture and root development
- Maintain moisture: Check every 2-3 weeks. If moss dries out, carefully inject water with a syringe through the top of the plastic wrap
- Monitor root development: Roots typically appear in 6-12 weeks as white growth visible through the plastic
- Separate when ready: Once roots densely fill the moss ball, cut the branch just below the rooted section
- Pot up: Immediately plant in a container with well-draining potting mix. Keep shaded and well-watered for 2-3 weeks
- Gradually acclimate: Slowly introduce to full sun conditions over 3-4 weeks
Success Rate: 70-90% with proper technique and suitable species.
Method 3: Grafting Fruit Trees for Superior Results
Grafting combines the rootstock of one tree with the scion (fruiting wood) of another, creating a superior tree that combines the best traits of both parents.
Why Graft Fruit Trees?
Advantages:
- Preserves exact genetic characteristics of parent tree
- Allows use of disease-resistant or climate-adapted rootstocks
- Controls tree size through dwarfing rootstocks
- Produces fruit years earlier than seed-grown trees
- Enables multiple varieties on one tree
Best Fruit Trees for Grafting
Excellent candidates:
- All apple varieties (Malus domestica)
- Pears (Pyrus spp.)
- Stone fruits: peach, plum, cherry, apricot (Prunus spp.)
- Citrus (Citrus spp.)
- Persimmons (Diospyros spp.)
Basic Grafting Method: Cleft Graft
The cleft graft works well for beginners and is effective for grafting scions to larger rootstock branches.
Timing: Late winter to early spring, just before buds break (February-April depending on region)
Materials Needed:
- Extremely sharp grafting knife or box cutter
- Grafting tape or parafilm
- Grafting wax or compound
- Sharp pruning shears
- 70% rubbing alcohol for sterilization
Procedure:
- Prepare rootstock: Select healthy rootstock (seedling or established tree) with 1-2 inch diameter trunk. Cut horizontally 12-18 inches above ground
- Make cleft: Using a sharp knife or small hatchet, split the rootstock vertically down the center 2-3 inches deep
- Prepare scion wood: Collect 6-8 inch dormant scion wood (taken in late winter) with 3-4 buds. Store in refrigerator wrapped in moist paper towels until grafting time
- Cut scion wedge: Make a 1.5-2 inch long tapering cut on both sides of the scion base, creating a wedge shape
- Insert scion: Carefully insert the scion into one side of the cleft, ensuring the cambium layers (green layer just under bark) align on at least one side. The cambium alignment is CRITICAL for success
- Secure graft: Wrap tightly with grafting tape, covering the entire union but leaving buds exposed
- Seal with wax: Coat all exposed surfaces (top of rootstock, tape edges) with grafting wax to prevent drying
- Monitor and maintain:
- Check weekly for new growth (appears in 2-4 weeks)
- Remove any shoots growing from rootstock below graft
- Gradually remove tape after 6-8 weeks once union is solid
- Stake if necessary to prevent wind damage
Success Indicators:
- Buds begin swelling within 2-3 weeks
- New shoots emerge from scion
- No browning or drying of scion wood
Success Rate: 60-85% for beginners; 90%+ with experience
Method 4: Growing Fruit Trees from Seed
While many fruit trees don’t come “true to type” from seed (meaning seedlings may differ from parent), seed propagation has its place.
When to Use Seed Propagation
Appropriate Uses:
- Producing rootstock for grafting
- Growing trees that breed true: pawpaw, persimmon, mulberry
- Creating new varieties through breeding
- Educational purposes
- Some citrus varieties (nucellar seedlings)
Not Recommended:
- Most apples, pears (highly variable genetics)
- Stone fruits (extreme variability)
- Grafted varieties (won’t replicate parent)
Best Fruit Trees from Seed
Breed relatively true:
- Pawpaw (Asimina triloba)
- American persimmon (Diospyros virginiana)
- Mulberry (Morus spp.)
- Some citrus (produce near-clones via nucellar embryony)
- Passion fruit (Passiflora edulis)
Step-by-Step Seed Propagation
Timing: Fall for stratification, spring for direct planting
Seed Processing:
- Extract seeds: Remove from fully ripe fruit, cleaning thoroughly to remove all flesh (fermentation can aid cleaning for some species)
- Dry briefly: Air dry seeds in shade for 1-2 days (never in direct sun or heat)
- Stratification (if needed): Many temperate fruits require cold stratification
- Mix seeds with moist sand or peat moss
- Store in refrigerator (35-40°F) for 60-120 days depending on species
- Check monthly for moisture and mold
Planting Process:
- Prepare growing medium: Use quality seed-starting mix or 50/50 peat moss and perlite
- Plant at proper depth: Generally 2-3 times seed diameter (1/4 to 1 inch deep)
- Maintain moisture: Keep consistently moist but not waterlogged
- Provide warmth: 70-80°F soil temperature speeds germination
- Ensure light: Once sprouted, provide bright light (6-8 hours daily)
- Transplant timing: Move to 4-inch pots when seedlings have 2-4 true leaves
- Grow out: Raise in containers for first year, then plant in permanent location or use as rootstock
Germination Times:
- Citrus: 2-4 weeks
- Pawpaw: 30-60 days (after stratification)
- Persimmon: 60-90 days (after stratification)
- Passion fruit: 2-4 weeks

Essential Tips for Successful Fruit Tree Propagation
Creating the Ideal Environment
Temperature Control:
- Most propagation succeeds best at 65-75°F
- Bottom heat (heating mats) significantly improves rooting
- Avoid temperature fluctuations
Humidity Management:
- Maintain 70-90% humidity for cuttings and air layers
- Use humidity domes, plastic tents, or misting systems
- Balance humidity with air circulation to prevent disease
Light Requirements:
- Bright indirect light for most methods
- Avoid direct sun which causes excessive heat and drying
- 12-16 hours daily for optimal growth
Rooting Medium Best Practices
Characteristics of Good Medium:
- Excellent drainage while retaining some moisture
- Sterile (free from pathogens)
- Low nutrient content initially
- Good aeration for root development
Recommended Mixes:
- 50% perlite + 50% peat moss (general purpose)
- 50% perlite + 25% peat + 25% vermiculite (moisture-retentive)
- 70% perlite + 30% peat (free-draining for rot-prone species)
Sanitation and Disease Prevention
Critical Practices:
- Sterilize all cutting tools with 70% alcohol between cuts
- Use new or sterilized containers and media
- Remove any diseased or dead material immediately
- Ensure adequate air circulation
- Avoid overwatering which promotes fungal issues
Common Propagation Problems and Solutions
Issue: Cuttings Rot Before Rooting
Causes:
- Excessive moisture
- Poor drainage
- Lack of air circulation
- Contaminated medium
Solutions:
- Reduce watering frequency
- Improve medium drainage (add more perlite)
- Ensure container has adequate drainage holes
- Use fresh, sterile growing medium
- Improve air circulation
Issue: Cuttings Dry Out and Die
Causes:
- Insufficient humidity
- Too much direct sun/heat
- Infrequent watering
- Poor seal on humidity cover
Solutions:
- Increase humidity with better covering
- Move to shadier location
- Check moisture daily
- Ensure proper seal on propagation setup
Issue: Grafts Fail to Take
Causes:
- Poor cambium alignment
- Incompatible rootstock/scion combination
- Wrong timing
- Insufficient securing
Solutions:
- Practice cambium alignment technique
- Verify compatibility of varieties
- Graft during proper dormant period
- Use adequate grafting tape pressure
- Ensure complete wax seal
Issue: Air Layers Don’t Root
Causes:
- Moss dried out
- Insufficient wound size
- Wrong season
- Poor branch selection
Solutions:
- Check and maintain moss moisture weekly
- Make wider wound (1-1.5 inches)
- Air layer during active growth only
- Choose younger, more vigorous branches


Building Your Propagation Schedule
Spring (March-May)
- Begin grafting as buds swell
- Start softwood cuttings mid to late spring
- Initiate air layering when growth begins
- Plant stratified seeds outdoors
Summer (June-August)
- Monitor and maintain air layers
- Continue softwood cuttings early summer
- Water and care for spring grafts
- Pot up rooted cuttings
Fall (September-November)
- Collect and stratify seeds
- Take hardwood cuttings late fall
- Harvest successful air layers
- Prepare rootstock for winter grafting
Winter (December-February)
- Store dormant scion wood in refrigerator
- Plan grafting projects
- Take dormant hardwood cuttings
- Prepare supplies for spring propagation
Recommended Resources for Fruit Tree Propagation
Books:
- “The Grafter’s Handbook” by R.J. Garner
- “Plant Propagation” by American Horticultural Society
- “The Holistic Orchard” by Michael Phillips
Online Resources:
- University Extension propagation guides
- North American Fruit Explorers (NAFEX)
- Local fruit tree organizations
- Grafting workshops through botanical gardens
Supplies:
- Fedco Trees (propagation supplies)
- A.M. Leonard (professional horticultural tools)
- Local agricultural supply stores
Conclusion: Start Propagating Your Fruit Tree Collection
Mastering fruit tree propagation opens endless possibilities for expanding your orchard, preserving heirloom varieties, and even generating income. While each method requires practice and patience, the rewards far exceed the modest investment of time and materials.
Start with easier species like figs or grapes using simple cutting techniques. As you gain confidence, progress to air layering and eventually grafting. Before long, you’ll possess the skills to propagate virtually any fruit tree you desire.
The journey from cutting to fruiting tree is deeply satisfying—combining practical knowledge, botanical science, and hands-on skill. Every successfully rooted cutting or thriving graft represents your growing expertise and self-sufficiency.
Ready to begin? Choose one method, gather your supplies, and start propagating this week. Your future orchard awaits!
You may also like: How to Grow Mandarin Oranges: Complete Guide to Planting and Harvesting Sweet Citrus