Plant and Harvest

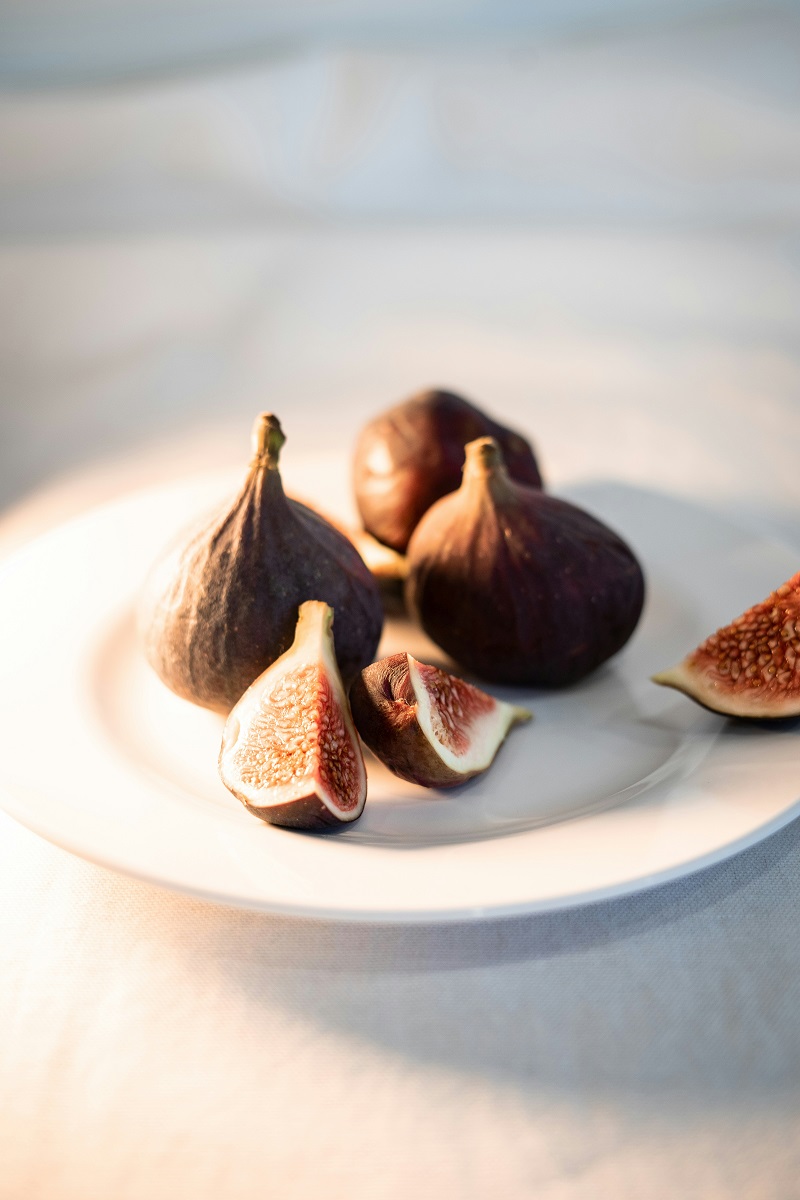
How to Grow Figs: Complete Beginner’s Guide to Profitable Fig Cultivation

Introduction Did you know that growing figs can transform your backyard into a productive orchard while generating significant income? Whether you’re a homesteader looking to expand your fruit garden or a small-scale farmer seeking crop diversification, fig cultivation offers an accessible entry point into fruit production. Figs (Ficus carica) are remarkably forgiving trees that thrive across many USDA hardiness zones, require minimal maintenance, and produce abundant harvests. Better yet, the growing demand for fresh and dried figs in American markets—coupled with limited domestic production—creates lucrative opportunities for new growers. In this comprehensive guide, you’ll discover everything you need to know about how to plant figs, nurture healthy trees, and harvest premium-quality fruit—even if you’ve never grown fruit trees before. Why Growing Figs Makes Economic and Agricultural Sense Nutritional Powerhouse with Market Appeal Figs are nutritional gems packed with dietary fiber, antioxidants, and essential minerals including calcium, potassium, and magnesium. Their versatility extends beyond fresh consumption—figs excel in value-added products like preserves, jams, dried fruit, and even artisanal fig bars that command premium prices at farmers’ markets. Low-Maintenance, High-Yield Cultivation Fig trees are exceptionally resilient compared to other fruit crops. They naturally resist many common pests and diseases, tolerate drought conditions once established, and can produce 50-100 pounds of fruit per mature tree annually. This combination of hardiness and productivity makes figs ideal for both hobby growers and commercial operations. Growing Market Demand The U.S. imports over 90% of its figs, primarily from Turkey and other Mediterranean countries. This dependency creates opportunities for domestic growers to supply local markets with fresh figs—a premium product that doesn’t ship well and fetches higher prices when locally grown. How to Plant Fig Trees: Step-by-Step Guide Step 1: Select the Right Fig Variety for Your Region Choosing climate-appropriate varieties is crucial for success. Here are top varieties for American growers: For Warmer Climates (USDA Zones 8-10): For Cooler Climates (USDA Zones 6-7): For Container Growing: Pro Tip: Contact your local Extension office or reputable nurseries for region-specific recommendations and disease-resistant stock. Step 2: Understanding Climate and Soil Requirements Climate Considerations Fig trees thrive in warm, dry climates with hot summers and mild winters. Optimal growing conditions include: Regional Adaptations: Soil Requirements Figs are adaptable but perform best in: Testing and Amendment: Before planting, conduct a soil test through your local Extension service ($10-30). Amend based on results: Step 3: Site Preparation and Soil Preparation Proper site preparation sets the foundation for decades of production: Step 4: Planting Your Fig Tree Timing: Plant bare-root figs in late winter/early spring (March-April) or container-grown trees spring through early fall. Planting Process: Step 5: Essential Post-Planting Care Watering Strategy Establishment phase (First year): Mature trees: Pro Tip: Drip irrigation systems deliver consistent moisture while preventing foliar diseases common with overhead watering. Weed Management Maintain a 3-4 foot weed-free circle around young trees: Pruning Fundamentals First-year pruning (formative): Maintenance pruning (mature trees): Important: Figs fruit on new growth, so strategic pruning increases yield. Fertilization Program Young trees (Years 1-3): Mature trees: Organic alternatives: Advanced Tips to Maximize Fig Production Implement Efficient Irrigation Drip irrigation offers multiple advantages: Install emitters 18-24 inches from trunk, expanding the irrigation zone as trees mature. Mulching for Moisture and Weed Control Organic mulches provide year-round benefits: Best mulch materials: Straw, wood chips, shredded leaves, or pine needles. Avoid fresh wood chips near trunk. Natural Pest Management Figs have few serious pests, but monitor for: Fig beetles (Cotinis mutabilis): Root-knot nematodes: Scale insects: Birds: Harvest Timing and Techniques Identifying ripe figs: Harvesting best practices: Fascinating Fig Facts Winterizing Fig Trees in Cold Climates For growers in USDA Zones 5-7, winter protection extends fig cultivation northward: Outdoor Winter Protection Container Growing for Cold Climates Troubleshooting Common Fig Growing Problems Problem: Fruit drops before ripening Problem: Poor fruit production Problem: Yellowing leaves Problem: Leaf spots or rust Marketing Your Fig Harvest Once you’ve mastered fig cultivation, consider these revenue streams: Direct sales: Value-added products: U-Pick operations: Conclusion: Start Your Fig Growing Journey Today Growing figs combines agricultural simplicity with economic opportunity. Whether you’re planting a single backyard tree or establishing a commercial orchard, figs deliver reliable harvests with minimal inputs once established. The keys to success are straightforward: choose climate-appropriate varieties, provide well-drained soil, maintain consistent moisture during establishment, and prune annually. Within 2-3 years, you’ll enjoy abundant harvests of this ancient fruit that’s experiencing a modern revival. Beyond their delicious flavor and nutritional benefits, fig trees add Mediterranean elegance to any landscape while providing decades of productive harvests. Their low-maintenance nature makes them ideal for beginning fruit growers, while their market value attracts experienced farmers seeking diversification. Ready to start growing figs? Source quality plants from reputable nurseries, prepare your site properly, and follow the practices outlined in this guide. Your future self—and your taste buds—will thank you for planting that first fig tree today. Frequently Asked Questions How long does it take for a fig tree to produce fruit? Most varieties begin producing within 2-3 years. Some may fruit the first year if planted from mature nursery stock. Can I grow figs in containers? Absolutely. Dwarf varieties thrive in 15-20 gallon containers, making them perfect for patios and small spaces. Do fig trees need cross-pollination? Most common cultivars are self-fertile and don’t require another tree for pollination. How much water do fig trees need? Established trees are drought-tolerant but produce better with consistent moisture—approximately 1-2 inches per week during growing season. When is the best time to plant fig trees? Late winter to early spring for bare-root stock; container-grown trees can be planted spring through early fall.

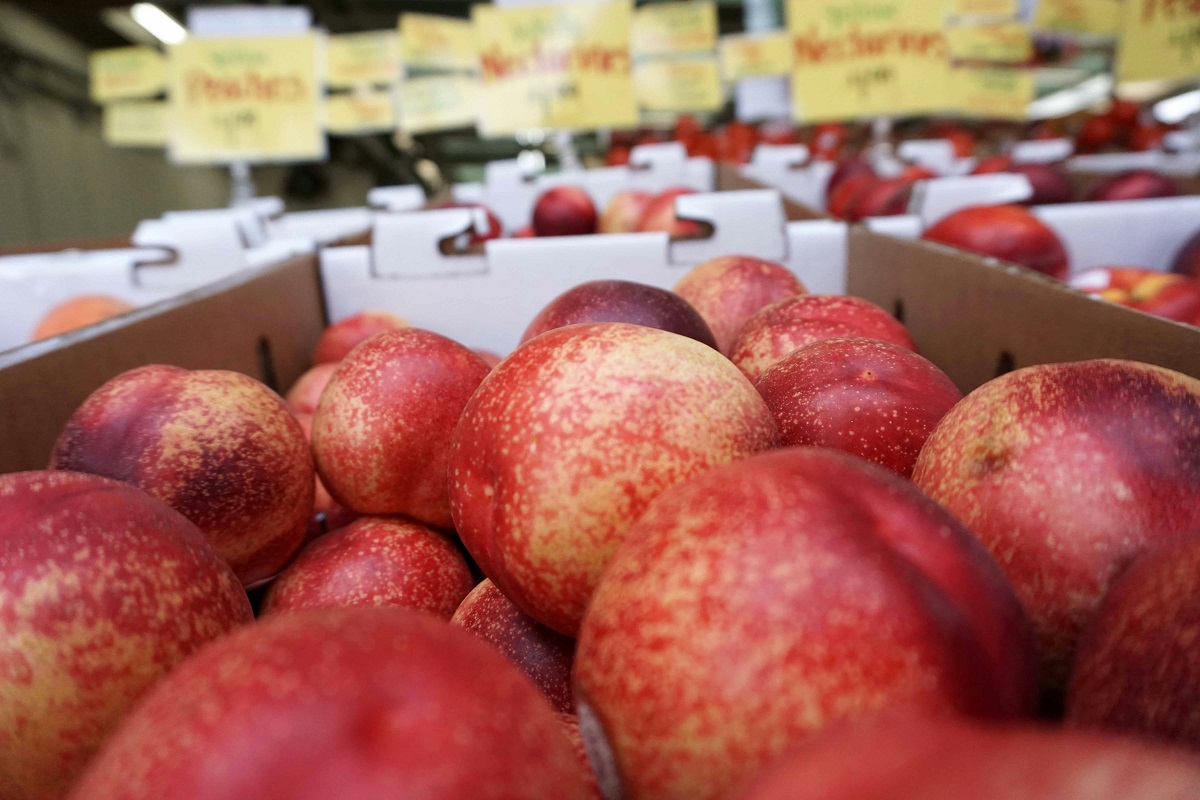
How to Plant Nectarines: Complete Guide to Growing Nectarine Trees at Home

Introduction Nectarines offer home and commercial growers an exceptional opportunity to produce premium stone fruit with remarkable eating quality, excellent nutritional density, and strong market appeal. These smooth-skinned relatives of peaches deliver exceptional sweetness, delicate texture, and distinctive flavor that justify premium pricing at farmers markets and specialty retailers. Beyond culinary excellence, nectarines establish relatively quickly and produce substantial harvests within 2-3 years of planting, making them economically attractive for diversifying fruit production. Growing nectarines successfully requires understanding your region’s specific climate requirements, selecting varieties matched to your zone’s chilling hours, preparing soil properly, and implementing sound management practices throughout the season. Unlike some specialty fruits demanding extensive horticultural expertise, nectarine cultivation remains accessible to beginning growers willing to follow basic guidelines and adapt to regional conditions. This comprehensive guide walks you through every stage—from variety selection through harvest timing—ensuring your nectarine trees produce abundant, delicious fruit season after season. Understanding Nectarines: Botanical Characteristics and Commercial Appeal What Nectarines Are Nectarines (Prunus persica var. nectarina) are genetic variants of peaches, differing only in skin smoothness. While peach skin is fuzzy, nectarines possess smooth, glossy skin. The botanical genetics remain identical—nectarines are simply smooth-skinned peaches. This minor genetic difference creates significant sensory and commercial distinctions. Sensory and Nutritional Qualities Nectarines combine exceptional sweetness (higher sugar content than most peaches), delicate juiciness, firm-crisp texture (when properly ripened), and distinctive aromatic compounds creating distinctive flavor profile. This sensory combination appeals strongly to fresh-market consumers willing to pay premium prices. Nutritionally, nectarines excel. Rich in vitamin C, vitamin A, fiber, and beneficial polyphenol antioxidants, they support human health while delivering exceptional culinary experience. This combination of nutrition and flavor drives consistent consumer demand. Market Advantages Premium Pricing: Fresh nectarines command higher prices than peaches—often $2-4 per pound at retail compared to $1-3 for peaches. Smooth skin appearance appeals to consumers viewing fruit before purchase. Fresh Market Dominance: Unlike many stone fruits suitable primarily for processing, nectarines thrive as fresh-market commodities. Farmers market and direct-to-consumer sales capture premium margins unavailable through wholesale channels. Diverse Applications: Fresh eating dominates, but nectarines also suit preserves, canned products, and processed applications, creating market flexibility. Organic Market Appeal: High consumer interest in organic stone fruits creates pricing premiums justifying organic production investments. Selecting Nectarine Varieties: Matching Your Region Understanding Nectarine Types Freestone Varieties: Pit separates cleanly from flesh—ideal for fresh eating and home consumption. Most commercial fresh-market varieties are freestone. Clingstone Varieties: Flesh clings to pit, requiring cutting to separate—generally unsuitable for fresh market, better for processing. White-Flesh Varieties: Lighter, sweeter flesh with delicate flavor. Premium fresh-market appeal. Examples: Fantasia, Arctic Rose, Arctic Snow. Yellow-Flesh Varieties: More traditional flavor, firmer texture. Examples: Sunmist, Sunred, Rubysweet. Key Nectarine Varieties and Regional Adaptation Sunmist: Sunred: Rubysweet: Fantasia: Arctic Rose: Arctic Snow: Regional Suitability Cold Climate Regions (USDA Zones 3-4): Arctic Snow and other extremely cold-hardy selections only. Most nectarines suffer winter injury. Site protection (southern exposure, windbreak) essential. Temperate Regions (USDA Zones 5-6): Excellent variety selection. High-chill varieties (Rubysweet, Arctic Snow) thrive. Early-season types (Sunmist) produce reliably. Subtropical Regions (USDA Zones 7-8): Lower-chill varieties (Fantasia, Sunred) perform well. High-chill varieties may produce insufficient flowers in warm zones. Warm Regions (USDA Zones 9-10): Very-low-chill nectarines only. Standard varieties fail to develop adequate fruit set. Species selections and special cultivars necessary. Chilling Hour Requirement Matching Most nectarines require 200-600 chilling hours (hours below 45°F during dormancy). Verify variety requirements match your region’s actual average winter temperatures. Insufficient chilling produces poor flowering and minimal fruit set. Regional Chilling Guidelines: Climate and Soil Requirements: Creating Optimal Growing Conditions Climate Preferences Temperature Ranges: Nectarines evolved in temperate regions with moderate winters and warm summers. Ideal conditions include: Winter Hardiness: Varies by variety. Most survive zone 5; some struggle zone 4. Hardiest selections (Arctic Snow) survive zone 4. Few varieties succeed zone 9+. Spring Freeze Vulnerability: Nectarine flowers emerge early (February-March in temperate regions), making them susceptible to late-spring freezes. Sites with good air drainage (higher elevation, gentle slopes) reduce frost damage risk. Summer Heat: Nectarines require warm summers (75-85°F average) for adequate fruit development and sugar concentration. Excessive heat (above 95°F) can cause sunscald and quality reduction. Humidity and Disease: High humidity, especially during flowering and early fruit development, increases fungal disease risk. Good air circulation and adequate spacing minimize disease pressure. Soil Requirements Texture: Well-draining loamy soil provides ideal growing medium. Clay soils require amendment with sand and organic matter improving drainage. Waterlogging causes root rot and poor growth. Drainage: Critical characteristic. Standing water 24 hours after heavy rain indicates inadequate drainage requiring remediation (raised beds, amended soil, drainage tiles). pH Range: Optimal pH is 6.0-7.0 (neutral to slightly acidic). Below pH 5.5, aluminum toxicity and nutrient imbalances develop. Above pH 7.5, micronutrient availability decreases significantly. Soil Depth: Nectarines require deep soils (minimum 30 inches) enabling substantial root penetration. Shallow soils over bedrock restrict growth and productivity. Organic Matter: 2-5% organic matter content improves water-holding capacity, nutrient availability, and biological activity. Most soils benefit from compost incorporation before planting. Soil Preparation: Establishing Success from the Start Pre-Planting Assessment Soil Testing: Submit samples to your local university extension office 3-6 months before planting. Testing identifies pH, nutrient status, organic matter content, and texture—essential information guiding amendments. Drainage Evaluation: Observe soil behavior following heavy rain. After 24 hours, soil should drain completely. Poor drainage requires remediation before planting. Root Zone Analysis: Dig test holes to identify depth of suitable soil and depth of restrictive layers (hardpan, bedrock, dense clay). Depth of 30+ inches is ideal. Amendment and Preparation Step 1: pH Correction (if needed): If soil pH exceeds 7.5, incorporate elemental sulfur at rates recommended by soil test (typically 0.5-2 pounds per 100 square feet) 3-6 months pre-planting. If pH is below 5.5, apply agricultural limestone similarly. Allow time for modifications to stabilize. Step 2: Organic Matter Incorporation: Six months to one year before planting, incorporate 2-4 inches aged compost or well-rotted manure into expanded planting area (minimum 4-5 feet diameter around each location). Working amendments

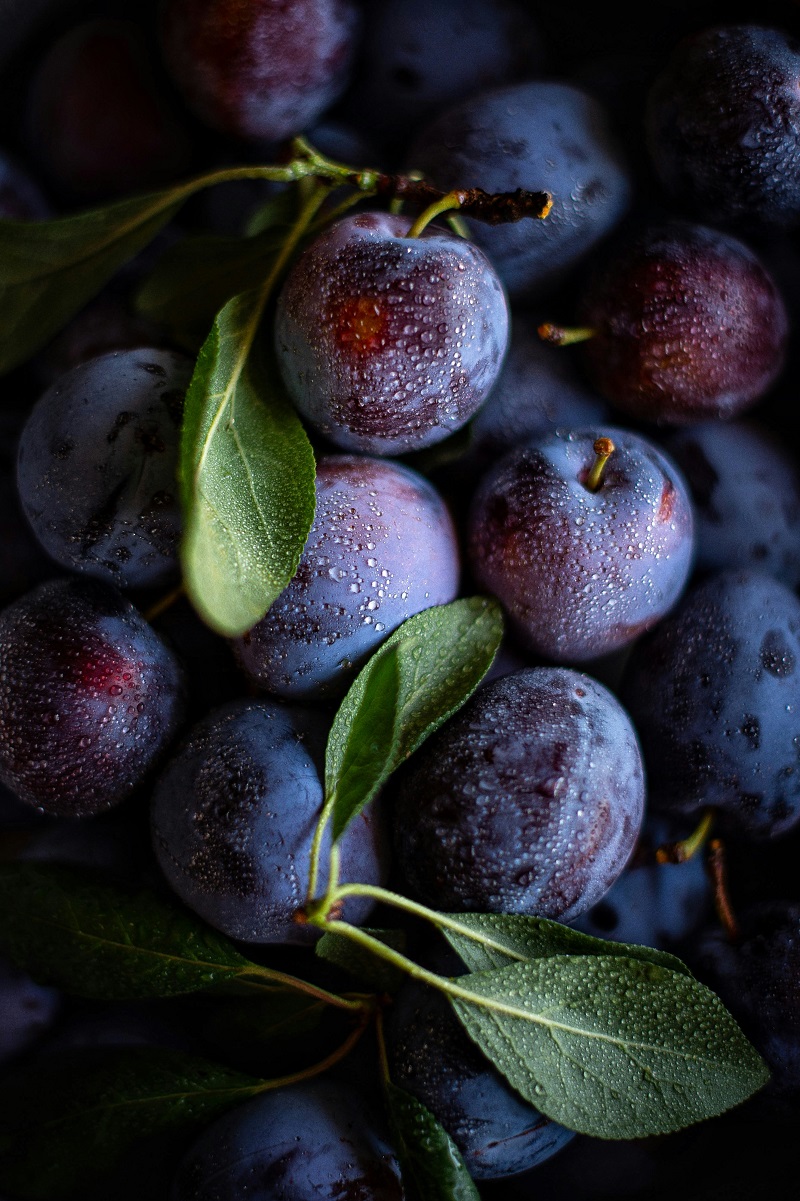
How to Plant Plums: Complete Guide to Growing Plum Trees Successfully

Introduction Plum cultivation offers fruit growers a rewarding opportunity to diversify production while tapping into strong consumer demand and excellent market pricing. Plums—with their delicate sweetness, exceptional nutritional density, and versatility spanning fresh fruit, preserves, dried varieties, and culinary applications—command premium prices at farmers markets and wholesale outlets. Beyond market appeal, plum trees establish relatively quickly and produce substantial harvests within a few years of planting, making them economically attractive for small and medium-scale operations seeking rapid return on investment. Growing plums successfully requires understanding your region’s climate requirements, selecting appropriate varieties for your zone, preparing soil properly, and implementing sound management practices throughout the season. Unlike some specialty crops demanding extensive horticultural expertise, plum cultivation remains accessible to beginning growers willing to follow basic guidelines. This comprehensive guide walks you through every stage—from variety selection through establishing productive, healthy trees generating premium-quality fruit season after season. Understanding Plums: Characteristics and Market Advantages What Are Plums and Why They Matter Plums (genus Prunus) represent one of the world’s most important stone fruits. The fresh fruit exhibits delicate sweetness, firm-crisp texture (when properly ripened), and exceptional nutritional profiles including substantial fiber, vitamins A and C, and beneficial phytonutrients supporting human health. This nutritional density, combined with delicious flavor and attractive appearance, creates consistent consumer demand. Commercial and Culinary Appeal Fresh Market: Fresh plums command premium pricing, especially locally-grown varieties appearing in farmers markets during peak season. Consumer preference for tree-ripened fruit—impossible with commercial distribution—creates market niche advantages for local growers. Processing Markets: Canning facilities, jam manufacturers, and dried plum (prune) producers create substantial outlet opportunities absorbing both premium fruit and second-quality product unsuitable for fresh markets. Culinary Versatility: European cuisines showcase plum tarts and compotes. Asian cuisines employ plums in sauces and pickles. This global versatility supports diverse marketing channels. Nutritional Appeal: Health-conscious consumers recognize plum nutritional benefits, supporting premium pricing and consistent demand. Economic Advantages Plum trees establish rapidly compared to many tree fruits. Quality fruit appears within 3-4 years of planting, enabling faster return on investment. Once established, productive trees yield 50-100+ pounds annually from mature specimens—substantial yields from limited space. Favorable wholesale pricing (often $1-3/pound depending on variety and market conditions) and strong retail potential create meaningful farm income from modest acreage. Selecting Plum Varieties: Matching Crops to Your Region Understanding Plum Types European Plums (Prunus domestica): Small to medium fruits with dense, sweet flesh. Excellent for fresh eating and processing. Varieties include Stanley, Agen, Prune, and Italian plums. Japanese Plums (Prunus salicina): Larger fruits with juicy, moderately firm flesh. Excellent fresh-market appeal. Includes varieties like Santa Rosa, Methley, and Black Amber. Damson Plums (Prunus insititia): Small, intensely flavored fruits ideal for preserving and liqueurs. Hardy in colder regions. American Plums (Prunus americana and hybrids): Native species and hybrids, extremely cold-hardy, suited to Upper Midwest and northern regions. Often used as rootstocks. Major Varieties and Regional Suitability Stanley (European Type): Santa Rosa (Japanese Type): Methley (Japanese Type): Shiro (Japanese Type): Damson: American Hybrid Plums (various cultivars): Selecting for Your Region Cold Climate Regions (USDA Zones 3-5): American hybrids and Damson varieties tolerate extreme cold. Japanese plums suffer winter injury. European types survive in zone 5 with site protection. Temperate Regions (USDA Zones 6-7): Stanley, other European types, and Japanese varieties with appropriate chilling requirements thrive. Excellent variety selection. Warm Subtropical Regions (USDA Zones 8-10): Japanese varieties dominate. Select low-chill varieties (150-300 hours below 45°F) in southern zones. European types may develop reduced productivity. Very Warm/Tropical Regions (USDA Zones 10-11): Very-low-chill Japanese varieties only. Many standard varieties fail to develop adequately. Chilling Hour Requirements Most plum varieties require specific “chilling hours”—hours below 45°F during winter dormancy—to break dormancy and produce normal flowering. Varieties specify these requirements: Ensure variety chilling requirements match your region’s actual winter temperatures. Insufficient chilling produces poor flowering and minimal fruit set. Pollination Considerations Most plum varieties are self-fertile, setting adequate crops from their own pollen. However, cross-pollination often increases fruit set. Planting compatible varieties (different cultivar from same type flowering during similar window) can increase productivity 20-30%. Example compatible pairings: Climate and Soil Requirements: Establishing Optimal Growing Conditions Climate Preferences Temperature Ranges: Plums evolved in temperate to subtropical regions. Most varieties thrive with: Winter Hardiness: Varies dramatically by type. European plums tolerate zone 5 reliably; Japanese types survive zone 6 safely; American hybrids thrive zone 3. Spring Freeze Sensitivity: Late-spring freezes kill flowers that have emerged during warm spells. Frost protection (frost cloth, overhead irrigation, air movement) becomes critical in marginal-frost regions. Summer Heat and Drought: Plums tolerate heat reasonably well but require consistent moisture during fruit development. Extended drought reduces fruit size and quality. Humidity and Disease Pressure: High humidity during flowering and fruit development increases fungal disease risk. Good air circulation reduces disease problems substantially. Soil Requirements Texture and Drainage: Plums thrive in loamy, well-draining soils. Clay soils require amendment with sand and organic matter improving drainage. Waterlogging causes root rot and poor growth. pH Range: Optimal pH is 6.0-7.0 (slightly acidic to neutral). Below pH 5.5, nutrient uptake becomes limited and aluminum toxicity risk increases. Above pH 7.5, iron and manganese become unavailable. Depth: Plums require deep soils (minimum 24-30 inches) enabling substantial root penetration. Shallow soils over bedrock or hardpan restrict growth. Nutrient Content: Moderately fertile soil provides baseline nutrition. Extremely poor soils require amendment before planting; excessively fertile soils (particularly high nitrogen) promote excessive foliage at expense of fruit. Organic Matter: 2-5% organic matter content by volume improves water-holding capacity and nutrient availability. Most soils benefit from compost incorporation before planting. Soil Preparation: The Foundation of Plum Success Pre-Planting Assessment Soil Testing: Submit samples to your local university extension office at least 3-6 months before planting. Testing identifies pH, nutrient status, texture, and organic matter—critical information guiding amendments. Drainage Evaluation: Observe soil behavior following heavy rain. Poor drainage requires remediation before planting. In poorly-draining sites, create raised beds (12-18 inches height) improving drainage. Root Zone Depth: Dig test holes to identify depth of good soil and depth of restrictive

Complete Guide to Crop Fertilizers: Types, Selection, and Application Strategies

Introduction The difference between thriving, profitable agricultural operations and struggling farms often comes down to one critical factor: soil fertility management. Crops cannot perform beyond the nutrient availability their soil provides. Without adequate nitrogen, phosphorus, potassium, and micronutrients, plants cannot develop vigorous root systems, produce abundant foliage, generate robust flowering, or set premium-quality grain, fruit, or vegetables. The result is disappointing yields, increased disease pressure, pest vulnerability, and ultimately reduced profitability. Understanding fertilizer types, nutrient functions, and application strategies isn’t optional for serious growers—it’s foundational business management. Strategic fertilization transforms marginal productivity into exceptional yields. Proper nutrient management improves crop quality, enhances disease resistance, and strengthens your competitive market position. Conversely, fertilization errors—whether excessive application, inappropriate timing, or wrong product selection—waste investment capital while degrading soil health and environmental quality. This comprehensive guide demystifies agricultural fertilization. You’ll discover how different fertilizer types work, which nutrients your crops require at specific growth stages, how to interpret soil test results guiding fertilizer selection, and proven application strategies maximizing nutrient efficiency. Armed with this knowledge, you’ll optimize fertilization decisions, improve yields, protect environmental resources, and strengthen your operation’s profitability. Understanding Fertilizers: Definitions and Agricultural Importance What Fertilizers Are Fertilizers are products—either naturally occurring or manufactured—applied to soil or plant foliage that supply essential nutrients promoting plant growth and development. These nutrients work through various mechanisms: some provide immediately available nutrients solving acute deficiencies, others establish long-term nutrient availability, and still others improve soil structure and microbial activity supporting sustained plant nutrition. The Nutrient Foundation: NPK and Beyond While numerous elements support plant growth, three nutrients dominate agricultural fertilization discussions: Nitrogen (N): The element most limiting plant productivity. Nitrogen drives vegetative growth—stem elongation, leaf expansion, and foliage density. Crops require substantial nitrogen quantities, yet nitrogen depletes rapidly through leaching, denitrification, and crop removal. Without adequate nitrogen, plants remain stunted with pale, yellowed foliage. Excessive nitrogen produces excessive foliage at the expense of flowering and fruiting. Phosphorus (P): The nutrient most limiting in acidic soils and deficient soils. Phosphorus drives root development, flowering initiation, seed production, and fruit maturation. Phosphorus availability decreases dramatically as soil pH becomes acidic or alkaline, creating deficiency despite soil presence. Phosphorus immobility means plants cannot redistribute this nutrient to correct deficiencies mid-season. Potassium (K): Essential for water regulation, nutrient transport, disease resistance, and fruit quality. Potassium enhances crop hardiness, improves disease and pest resistance, and strengthens grain or fruit quality. Potassium depletion appears as marginal leaf burning (edges turning brown), reduced yield, and lower quality grain or fruit. Secondary Macronutrients: Calcium, magnesium, and sulfur support critical physiological processes. Calcium stabilizes cell membranes and prevents diseases like blossom-end rot. Magnesium forms the photosynthesis center, directly limiting productivity. Sulfur participates in protein synthesis and contributes to crop flavor and nutritional quality. Micronutrients: Iron, zinc, manganese, boron, copper, and molybdenum enable enzyme function and metabolic processes. Though required in tiny quantities compared to macronutrients, micronutrient deficiencies severely limit productivity. Why Fertilizers Are Essential Without adequate fertilization, agricultural soils become progressively depleted. Crops remove substantial nutrients during harvest—bushels of grain export nitrogen and phosphorus from farms. Without replacement through fertilization or natural sources (nitrogen fixation, mineral weathering), soil fertility declines year after year. This depletion manifests as: Declining Productivity: Year-over-year yield reductions despite similar management practices indicate soil nutrient depletion. Increased Disease Pressure: Nutrient-deficient plants develop weak immune systems. Foliar diseases, root diseases, and insect vulnerability escalate with declining nutrition. Poor Crop Quality: Grain protein content, fruit flavor, vegetable nutritional density—all depend on adequate nutrient availability. Deficient nutrition produces inferior products commanding lower market prices. Economic Losses: Reduced yields and poor quality directly reduce farm revenue. Without fertilization investment, crop value frequently declines more than fertilizer costs, yielding negative returns. Strategic fertilization inverts this equation. Adequate nutrition maintains soil fertility, supports vigorous plant growth resisting disease and pest pressure, produces premium-quality crops, and ultimately generates superior economic returns justifying fertilizer investment. Fertilizer Types: Characteristics, Advantages, and Disadvantages Synthetic (Chemical) Fertilizers Synthetic fertilizers contain nutrients in concentrated, readily available forms. They’re manufactured through industrial processes converting natural mineral deposits into usable products. Nitrogenous Fertilizers: Urea (46-0-0) represents the most common nitrogen source globally. Its high nitrogen concentration and relatively low cost make it economical. Urea requires soil microbial conversion to ammonium before plant uptake—a delay of 7-14 days depending on soil temperature. Anhydrous ammonia (82-0-0) provides maximum nitrogen concentration but requires specialized equipment, handling expertise, and safety protocols. Its high cost and application complexity limit use to large-scale operations. Ammonium sulfate (21-0-0) and ammonium nitrate (34-0-0) provide nitrogen in immediately available forms, delivering rapid plant response. Ammonium forms acidify soil; long-term use requires lime application correcting pH. Advantages of Synthetic Nitrogenous Fertilizers: Disadvantages: Phosphatic Fertilizers: Superphosphate products (0-18-0 to 0-46-0 depending on type) result from treating phosphate rock with acid, creating soluble phosphorus available for plant uptake. Single superphosphate provides phosphorus plus calcium and sulfur. Triple superphosphate concentrates phosphorus, eliminating sulfur but increasing cost. Diammonium phosphate (18-46-0) combines nitrogen and phosphorus in single product, suiting band application with corn and other row crops. Monoammonium phosphate (11-52-0) provides exceptionally high phosphorus concentration, useful for severe phosphorus deficiency correction. Advantages of Synthetic Phosphatic Fertilizers: Disadvantages: Potassic Fertilizers: Potassium chloride (0-0-60) dominates potassium fertilizer use. Its high potassium concentration, low cost, and ready availability make it economical despite chloride concerns in sensitive crops. Potassium sulfate (0-0-50) costs more than chloride but suits salt-sensitive crops (tobacco, certain vegetables, tree nuts) and provides supplemental sulfur. Advantages of Synthetic Potassic Fertilizers: Disadvantages: Complete Fertilizers (NPK Blends): Fertilizers blending nitrogen, phosphorus, and potassium (such as 10-10-10, 15-15-15, or crop-specific formulations) simplify application, ensuring balanced nutrition. Blends incorporate multiple nutrient sources into single products enabling one-pass application. Organic Fertilizers Organic fertilizers derive from plant or animal materials. They supply nutrients through organic matter decomposition rather than immediately available mineral forms. Animal-Based Materials: Manure from cattle, poultry, swine, and horses contains nitrogen, phosphorus, potassium, and organic matter. Fresh manure requires composting (6-12 months) to stabilize, eliminate pathogens, and enable nutrient availability. Aged, composted

How to Grow Leeks: Complete Guide to Planting and Harvesting Leeks

Introduction If you’re seeking a versatile, nutritious vegetable that thrives with minimal effort, leeks deserve prominent space in your garden. This elegant allium relative offers subtle, delicate flavor that elevates soups, risottos, braised dishes, and countless culinary applications. Beyond culinary appeal, leeks are remarkably forgiving plants that adapt to various growing conditions while requiring less intensive pest management compared to related onions and garlic. Leeks represent an exceptional value proposition for home gardeners. A single row produces abundant harvests with modest inputs. Unlike high-maintenance vegetables demanding constant monitoring, leeks grow steadily with basic care. The payoff arrives in fall and early winter—precisely when fresh garden vegetables become scarce and supermarket prices spike—making leeks perfect for season-extending harvests. This comprehensive guide demystifies leek cultivation from seed to harvest. Whether you’re a novice gardener with minimal experience or an established grower seeking to expand crop diversity, these proven techniques ensure consistent success. You’ll discover ideal planting windows, soil preparation strategies, spacing optimization, blanching techniques that produce premium white shanks, and harvest timing that maximizes yield and storage quality. What Are Leeks and Why Grow Them at Home? Understanding the Leek Plant Leeks (Allium porrum) belong to the same botanical family as onions, garlic, and chives. However, leeks develop dramatically differently. Rather than forming bulbs underground, leeks develop long, cylindrical white shanks gradually transitioning to green leaves above soil. This unique growth pattern delivers a mild, slightly sweet flavor distinctly different from pungent onions or garlicky intensity. The edible portion includes both the white shank (blanched portion) and tender green leaves. Professional chefs prize the tender white section, but resourceful home gardeners utilize the entire plant. Tougher green leaves serve soup bases and vegetable stocks excellently. Advantages of Home Leek Cultivation Versatile Culinary Uses: Leeks shine in French potato-leek soup, creamy risotto, elegant braised dishes, and vibrant stir-fries. Fresh leeks elevate simple preparations into restaurant-quality meals. Dried leeks season soups and stews throughout winter. Mild, Approachable Flavor: Unlike strong onions or garlic, leeks provide subtle allium character without overwhelming palates. This makes leeks ideal for dishes requiring onion flavor without intensity. Extended Growing Season: Most leek varieties mature in 4-6 months, making them perfect for fall and early winter harvests when fresh garden vegetables become scarce. Many varieties withstand light freezes, extending harvest windows further. Space-Efficient Production: Leeks grow vertically with minimal lateral spread. Dense plantings in small spaces produce substantial quantities from limited garden real estate. This efficiency makes leeks perfect for urban gardens and container cultivation. Pest and Disease Resistance: Leeks experience significantly fewer pest problems compared to onions and garlic. Natural pest resistance eliminates many chemical applications, supporting organic growing practices. Nutritional Density: Leeks provide vitamin K, vitamin C, fiber, and beneficial plant compounds. Culinary portions contain remarkable nutritional value relative to calories consumed. Extended Storage: Properly stored leeks remain viable for 2-3 months, extending winter supply beyond fresh harvests. Economic Value: Seeds are inexpensive, plants proliferate from minimal investment, and harvest quantities exceed input costs substantially—making leeks excellent value for budget-conscious gardeners. Getting Started: Timing and Site Selection Optimal Planting Windows by Region Leeks exhibit flexibility regarding planting timing, but fall and winter maturity is ideal for maximizing production and flavor. Northern Regions (USDA Zones 3-5): Temperate Regions (USDA Zones 6-7): Warm Regions (USDA Zones 8-9): Very Warm Regions (USDA Zones 10-11): Sunlight Requirements Leeks thrive with minimum 6 hours direct daily sunlight. Eight or more hours produces faster growth and larger, premium shanks. South-facing locations ideal for northern regions; east or west-facing suitable for warmer areas. Afternoon shade benefits very warm climate growers. Soil Preparation and Site Selection Leeks demand rich, well-draining soil. Heavy clay soils lead to rot and stunted development. Sandy soils drain excessively, reducing leek size. Ideal Soil Composition: Soil Preparation Steps: Leek Propagation: Seeds vs. Transplants Starting from Seed Starting leeks from seed provides economical advantages and variety options unavailable as transplants. Indoor Seed Starting (Northern/Temperate Regions): Advantages: Broader variety selection, lower cost, educational value Disadvantages: Requires space, attention, and controlled environment Purchasing Transplants Garden centers and specialty seed suppliers offer pre-grown leek transplants, eliminating indoor starting requirements. Advantages: Minimal space requirements, immediate planting, no seed-starting skill required Disadvantages: Higher cost per plant, limited variety selection, transportation challenges Direct Seeding Outdoors In warm regions with extended growing seasons, direct seeding outdoors is possible. Procedure: Planting Leeks: Step-by-Step Procedure Step 1: Prepare Planting Area Clear existing vegetation from planting area. If planting in rows, create furrows 4 inches deep, 30 centimeters (12 inches) apart. If planting in blocks, establish square-foot grids allowing intensive planting. Step 2: Position Seedlings Space transplants 15 centimeters (6 inches) apart for standard cultivation. Closer spacing (10 centimeters) produces smaller leeks suitable for whole-leek presentations. Wider spacing (20 centimeters) produces larger individual shanks. Critical Positioning Technique: This step determines blanching success. Insert transplants deep within prepared furrows rather than planting at original soil level. Position so only 2-3 inches of leaf material protrudes above soil. This deep planting naturally blanches developing white shank by eliminating light exposure. Step 3: Backfill Carefully Return soil gradually, pressing gently to eliminate air pockets. Soil should contact roots completely without compaction restricting root expansion. Step 4: Initial Watering Water thoroughly immediately after planting. Soil should be moist 8-10 inches deep—this ensures root-to-soil contact and initiates establishment. Step 5: Mulch Application Apply 2-3 inches mulch (straw, shredded leaves, compost) around transplants. Mulch conserves moisture, moderates soil temperature, and suppresses weeds. Cultivation and Maintenance Irrigation Management Leeks require consistent moisture but not waterlogging. This balance is critical. Watering Strategy: Moisture Monitoring: Insert finger into soil 4 inches deep. Soil should feel moist but not dripping wet. If dry, water. If wet, wait 2-3 days before checking again. Watering Technique: Apply water directly to soil level, not overhead. This prevents fungal disease and water waste. Progressive Blanching (Hilling) Premium white shanks result from blocking light exposure during growth. Progressive hilling—gradually mounding soil around developing plants—creates this blanching effect. Hilling Schedule: Each hilling application should completely bury all

The Complete Guide to Vegetable Planting Seasons: When to Plant Each Crop for Maximum Harvests

Introduction Have you ever invested time, money, and effort into planting vegetables only to watch them underperform, produce minimal yields, or succumb to disease? The culprit is often simpler than you might think: planting at the wrong time. Every vegetable crop has an optimal growing window—a specific season when conditions align perfectly for germination, vigorous growth, abundant flowering, and exceptional harvests. Understanding your region’s vegetable planting seasons transforms gardening from frustrating guesswork into predictable success. When you plant tomatoes at the right moment, they produce abundant fruit instead of sparse, slow-ripening harvests. Plant cool-season lettuce in autumn rather than summer, and you’ll harvest crisp, tender leaves instead of bitter bolted plants. Timing isn’t everything in vegetable gardening, but it’s certainly the most impactful factor determining whether your efforts yield abundant bounty or disappointing results. This comprehensive guide maps out ideal planting windows for the most productive vegetable crops across North American growing zones. You’ll discover which vegetables thrive in cool spring conditions, which demand summer heat, and which tolerate multiple seasonal windows. Armed with this knowledge, you’ll plan strategically throughout the year, maintaining continuous harvests and maximizing productivity from every square foot of garden space. Why Planting Season Matters More Than You Think The Consequences of Poor Timing Novice gardeners commonly assume vegetables simply need soil, sun, and water—season irrelevant. This misconception leads to repeated failures. Plant tomatoes in autumn and watch them struggle through cold nights without setting fruit. Plant lettuce in summer heat and witness it immediately bolt to seed, becoming too bitter to enjoy. These aren’t failures of technique or care—they’re botanical impossibilities resulting from environmental mismatch. Each vegetable evolved in specific climates with particular temperature, moisture, and daylight patterns. When you honor these evolutionary preferences, plants thrive effortlessly. When you ignore them, you battle constant problems regardless of fertilizer applications or pest management. The Advantages of Strategic Seasonal Planting Accelerated Growth Cycles: Vegetables planted during ideal seasons complete growth 30-50% faster than off-season attempts. This acceleration means more efficient land use and extended harvesting periods. Superior Plant Health: Crops planted in favorable conditions develop stronger root systems, more robust stems, and denser foliage naturally. Plants are naturally more disease-resistant when growing conditions match their preferences. Reduced Pest Pressure: Different insect and disease problems peak during specific seasons. Strategic planting timing avoids peak pest and disease pressure windows. For example, planting beans after peak Japanese beetle season eliminates their primary pest pressure. Optimized Nutrient Availability: Soil microorganisms that break down organic matter and release nutrients work most efficiently within specific temperature ranges. Planting during these windows means better nutrient availability for plant uptake. Superior Flavor, Texture, and Color: Vegetables grown under optimal conditions develop superior nutritional profiles and culinary qualities. Summer tomatoes taste more vibrant than forced greenhouse alternatives. Spring lettuce is crisper than heat-stressed summer variations. Water Efficiency: Rainfall naturally aligns with many planting seasons. Planting warm-season crops as spring rain transitions to summer requires less supplemental irrigation. Planting cool-season crops as fall rains arrive reduces irrigation demands. Understanding Your Regional Climate Zone Identifying Your Growing Climate North America encompasses diverse growing conditions—everything from Pacific Northwest temperate climates to Southwest deserts, Upper Midwest deep winters, and Deep South humid subtropical summers. Your specific location determines planting timelines. USDA Hardiness Zones (1-13) provide starting reference points based on average minimum winter temperatures. However, vegetable gardening requires more nuanced information than hardiness zones alone provide. Growing Season Length is critical. This measurement—average days between last spring frost and first fall frost—determines which crops you can realistically grow. Regions with 180+ frost-free days accommodate long-season crops like winter squash. Areas with 90-120 frost-free days must focus on quick-maturing crops. Precipitation Patterns significantly influence planting timing. Pacific Northwest gardeners experience spring rains but dry summers (requiring irrigation). Southern states experience humid, rainy summers. Arid Southwest regions must plan irrigation strategies from the start. Temperature Extremes beyond winter cold matter enormously. Summer heat exceeding 95°F causes stress for cool-season crops. Late spring freezes damage tender seedlings. Early fall freezes shorten harvest windows. Assessing Your Specific Site Before planning crops, research your local climate data. Contact your county cooperative extension office—they maintain detailed records and provide region-specific vegetable planting guides. Most states publish free planting calendars identifying optimal windows for local conditions. Key information to gather: Warm-Season Vegetables: Spring Planting for Summer and Fall Harvests Warm-season vegetables demand sustained heat, long days, and consistent moisture. These are the summer garden centerpieces—tomatoes, peppers, squash, and beans that define summer eating. Optimal Planting Timeline Soil Temperature: Never plant warm-season vegetables until soil temperatures reach 60°F minimum; 70°F is far better. Use soil thermometers (available inexpensively online) to verify. Soil warmer than 75°F is ideal for most warm-season crops. Air Temperature: Wait until nighttime temperatures remain consistently above 50°F. Late spring freezes devastate tender seedlings. Regional Timing: Primary Warm-Season Crops Tomatoes: The quintessential summer crop. Indeterminate varieties produce continuously until frost; determinate types produce concentrated early harvests. Start seeds indoors 6-8 weeks before transplanting outdoors. Provide sturdy support structures. Harvest determinate types all at once; pick indeterminate types progressively as they ripen. Peppers and Chilies: Remarkably productive once established. Start seeds indoors 8-10 weeks before last spring frost. Peppers produce continuously, rewarding patient gardeners. Harvest green or allow to mature to red/yellow/orange. More heat-tolerant than tomatoes. Summer Squash and Zucchini: Grow explosively in summer heat. Direct-seed after all frost danger passes. Space plants widely—they sprawl aggressively. Production starts within 40-50 days and continues weekly through frost. Beans: Quick-maturing, nitrogen-fixing, and prolific. Direct-seed after soil reaches 60°F. Bush types produce concentrated early yields; pole beans produce continuously. Succession-plant every two weeks for extended harvests. Cucumbers: Thrive in summer heat. Direct-seed or transplant after frost danger passes. Require support structures for vertical growing. Production begins 50-70 days after planting. Eggplant: Heat-loving nightshade requiring 60-85 frost-free days. Start seeds indoors 8-10 weeks before transplanting. Produces continuously once established. Okra: Heat and drought-tolerant crop producing tall plants with edible seed pods. Direct-seed after soil reaches 70°F. Sweet Corn:

Growing Herbs in Containers: 7 Easy Culinary Herbs to Grow at Home

Introduction Imagine stepping onto your patio or reaching toward your kitchen windowsill to harvest fresh basil, cilantro, or rosemary exactly when you need it. Container gardening makes this everyday convenience absolutely achievable, regardless of your outdoor space size. Whether you’re managing a sprawling suburban yard, a modest urban balcony, or even a compact apartment kitchen, growing herbs in containers delivers restaurant-quality flavors at your fingertips while saving money and eliminating pesticide concerns. The beauty of container herb gardening lies in its accessibility. You don’t need extensive land, specialized equipment, or horticultural expertise. A few pots, quality soil, consistent sunlight, and regular attention yield abundant harvests that transform everyday cooking. Fresh herbs elevate simple dishes into memorable meals while providing superior nutrition compared to dried supermarket alternatives. This guide walks you through seven resilient, productive herbs perfectly suited to container cultivation. You’ll discover which varieties thrive in limited light, how to optimize growth in different seasons, harvesting techniques that encourage continued production, and companion planting strategies that maximize your container garden’s productivity. Whether you’re a seasoned gardener or absolute beginner, these proven methods ensure success. The Benefits of Growing an Herb Garden at Home Health and Nutrition Advantages Superior Freshness and Potency: Homegrown herbs contain significantly higher concentrations of essential oils and active compounds compared to supermarket herbs shipped thousands of miles and stored for weeks. The flavor difference between fresh-picked basil and packaged alternatives is unmistakable—your palate will immediately recognize the superior taste and aroma. Complete Chemical Control: You determine exactly what touches your plants. No synthetic pesticides, no mysterious chemical residues, no concerns about food safety. Organic cultivation methods ensure herbs safe for children, pets, and health-conscious households. Nutrient Density: Herbs harvested and consumed immediately retain maximum vitamin content, antioxidants, and medicinal compounds. Medical research demonstrates that fresh herb consumption supports immune function, digestive health, and cardiovascular wellness far more effectively than dried alternatives. Economic Benefits Significant Grocery Savings: Fresh herb bundles sold retail cost $3-6 each and deteriorate within days. A single container investment ($10-15) produces equivalent quantities continuously throughout growing seasons, eliminating repeated purchases and waste. Reduced Food Waste: Growing exactly what you need prevents the frustration of purchasing full packages when recipes require minimal quantities. No more discarding wilted herbs from refrigerator drawers. Year-Round Availability: Indoor container cultivation extends herb availability beyond normal seasons. Winter herb gardening keeps your kitchen stocked when fresh market options become scarce and expensive. Environmental and Wellness Impact Reduced Carbon Footprint: Homegrown herbs eliminate transportation emissions from distant commercial farms. No packaging waste, no refrigerated shipping, no environmental impact—just direct soil-to-plate simplicity. Mental Health Benefits: Gardening reduces stress and anxiety while connecting you with natural cycles. The sensory experience of harvesting fragrant herbs and tending living plants provides measurable psychological wellness benefits documented in horticultural therapy research. Biodiversity Support: Container gardens attract beneficial pollinators and insects that support broader ecosystem health. Even small balcony gardens contribute meaningfully to urban biodiversity. Quick-Start Essentials Before You Begin Sunlight Assessment Herbs have varying light requirements, but most thrive with 4-6 hours of direct daily sunlight. Assess potential locations—south-facing windows and patios typically provide optimal exposure. North-facing areas receive insufficient light for most culinary herbs. East or west-facing locations work adequately if supplemented with afternoon shade during extreme heat. Track sun patterns throughout the day to identify your garden’s best position. Container Selection Size Specifications: Choose containers at minimum 6-8 inches deep for shallow-rooted herbs and 10-12 inches for deeper-rooting varieties. Diameter should accommodate mature plant spread—generally 8-10 inches minimum for single herbs or 12-14 inches for multiple plantings. Drainage Requirement: Drainage holes are non-negotiable. Waterlogged roots cause rot and fungal diseases. If using decorative containers lacking drainage, nest a draining pot inside or drill holes carefully in container bases. Material Options: Terracotta breathes well but dries quickly, requiring frequent watering. Ceramic provides aesthetic appeal with moderate drainage. Plastic retains moisture longer, reducing watering frequency—ideal for busy gardeners or arid climates. Fabric pots offer excellent drainage and temperature regulation but require aesthetic outer containers. Soil Composition Standard potting soil combined with organic amendments creates optimal herb growing media. Mix: This blend provides nutrient density, moisture retention, and airflow balance necessary for productive container gardening. Watering Guidelines Successful herb cultivation balances moisture availability with preventing waterlogging. Water when the top inch of soil feels dry to your touch. Morning watering allows foliage to dry before evening, reducing fungal disease risk. During hot weather, daily watering may be necessary. In cooler seasons, reduce frequency to 2-3 times weekly. Never allow containers to sit in standing water—empty saucers 30 minutes after watering. Seven Easy Herbs to Grow in Containers 1. Basil: The Culinary Workhorse Light Requirements: Basil demands abundant sunlight—minimum 6-8 hours daily. More sun equals bushier growth and superior flavor intensity. South-facing windowsills and sun-exposed patios provide ideal positioning. Care Protocol: Water consistently to maintain evenly moist (not waterlogged) soil. Pinch off flower buds as they emerge to redirect energy into leaf production. Harvest upper leaves frequently using clean scissors or fingers, removing entire leaf sets rather than individual leaves. This pruning technique encourages dense, branching growth rather than tall, spindly stems. Culinary Applications: Basil’s versatility is unmatched. Fresh leaves elevate Caprese salads, pasta sauces, pizzas, and Mediterranean dishes. Preserve excess by making pesto, infusing oils, or drying leaves for winter use. A single productive basil plant supplies sufficient leaves for multiple family meals weekly. Variety Options: Sweet basil offers classic flavor for Italian cuisine. Thai basil provides spicy, licorice-tinged notes. Purple basil adds visual appeal and subtle peppery complexity. African blue basil combines ornamental qualities with culinary utility. Companion Planting: Basil grows well with parsley, oregano, and chives. Avoid planting with mint, which spreads aggressively and outcompetes neighbors. 2. Chives: The Resilient Performer Light Requirements: Chives display remarkable flexibility, thriving in direct sun or partial shade (3-4 hours sunlight). This adaptability makes chives ideal for challenging locations with limited light. Care Protocol: Chives are extraordinarily forgiving plants tolerating various growing conditions. They survive in recycled

The Complete Guide to Growing Garlic at Home: Planting to Harvest

Introduction Growing garlic at home is one of the smartest decisions for anyone seeking a versatile, essential culinary ingredient that requires minimal care yet delivers abundant harvests. Whether you’re tending a small urban balcony garden, a traditional backyard plot, or dedicated raised beds, garlic thrives with basic maintenance and rewards you with months of aromatic, nutrient-dense bulbs. Contrary to popular belief, cultivating garlic isn’t complicated—it demands patience, yes, but the payoff is substantial. You’ll harvest healthy bulbs that store for months, supply your kitchen with fresh garlic year-round, and potentially generate supplemental income by selling excess to local markets or neighbors. This comprehensive guide walks you through every stage of garlic cultivation, from selecting quality seed cloves to storing your harvest. You’ll learn the optimal planting windows for your region, master soil preparation techniques, recognize maturity signals, and implement pest and disease management strategies that protect your investment. Why Growing Garlic Makes Perfect Sense Nutritional and Health Benefits Garlic is far more than a seasoning—it’s a nutritional powerhouse backed by scientific research. Understanding these benefits motivates consistent cultivation: Powerful Active Compounds: Allicin, the compound formed when garlic is crushed or cut, delivers proven antibacterial, antiviral, and anti-inflammatory properties that support overall wellness. Immune System Support: Regular garlic consumption strengthens your body’s natural defenses, increasing resistance to common infections and seasonal illnesses. Cardiovascular Health: Garlic helps maintain healthy blood pressure levels and supports cholesterol management, contributing to long-term heart health. Antioxidant Protection: Rich in compounds that combat free radicals, garlic helps slow cellular aging and supports longevity. Digestive Wellness: Garlic promotes healthy gut flora and improves digestive efficiency, enhancing nutrient absorption from your entire diet. Economic and Practical Advantages Significant Cost Savings: One productive garlic plant yields multiple cloves sufficient for numerous meals. By growing your own, you eliminate recurring supermarket purchases and gain independence from retail pricing. Extended Storage: Properly stored homegrown garlic maintains quality for six months or longer, providing consistent supply without waste. Food Security: Develop genuine self-sufficiency by producing food in your own space, reducing dependence on supply chain disruptions. Flexible Growing Options: Garlic adapts to various environments—small containers, raised beds, traditional in-ground gardens, or commercial-scale fields. Minimal Startup Investment: Seed clove costs are remarkably low compared to the harvest value, delivering exceptional return on investment. Supplementary Income Potential: Sell surplus bulbs at farmers markets, community gardens, or directly to neighbors seeking locally-grown produce. Environmental Impact Growing your own garlic dramatically reduces your carbon footprint by eliminating transportation from distant farms. Garlic cultivation doesn’t require aggressive synthetic chemicals, supporting soil health and local ecosystem biodiversity. Each plant you grow strengthens your garden’s environmental resilience. Essential Materials and Setup Quality Seed Cloves: Your Foundation Selecting Suitable Cloves: What to Avoid: Small cloves (under 3 grams) produce proportionally small bulbs. Damaged, diseased, or excessively sprouted cloves risk rot. Pre-sprouted garlic indicates age and reduced viability. Obtaining Quality Seeds: Professional Sources: Purchase certified seed garlic from reputable suppliers specializing in garlic production. Contact your local extension office for certified supplier recommendations in your region. Grocery Store Option: Supermarket garlic works but offers less guarantee of purity and disease-free status. Choose bulbs from trusted sources without chemical residues. Homegrown Selection: After your first successful harvest, reserve your largest, healthiest bulbs for next season’s planting. This approach builds climate adaptation and ensures genetic consistency with your specific growing conditions. Soil Preparation Materials Essential Tools and Supplies Container Requirements (For Pot Growing) Use containers at least 20 centimeters (8 inches) deep with drainage holes. Minimum soil volume per plant: 5 liters. A 5-liter pot accommodates one large clove or up to four medium cloves spaced appropriately. Space Calculations Container Gardens: Two square meters (roughly 20 square feet) holds 10-15 plants in individual pots. Garden Beds: Five to ten square meters provides ideal production for household needs plus surplus. Spacing Standards: Space cloves 10-15 centimeters apart within rows and 30 centimeters between rows. Understanding Your Climate: Timing Your Planting The Garlic Growth Cycle Garlic is a long-season crop requiring a mandatory cold period (vernalization) to develop properly segmented bulbs. This chilling phase triggers the physiological changes that divide seed cloves into multiple individual cloves within new bulbs, intensifies flavor, and improves storage longevity. Optimal Planting Timeline by U.S. Region Cold Climate Zones (Northern states: Montana, Minnesota, Wisconsin, upstate New York): Temperate Zones (Mid-Atlantic, parts of Midwest: Pennsylvania, Ohio, Indiana, Illinois): Moderate Climate Regions (Southern states: Virginia, Tennessee, North Carolina, northern Georgia): Warm Climate Zones (Texas, Oklahoma, southern California, Arizona): Very Warm Climates (southern Florida, Hawaii, southern coastal California): Why the Cold Period is Non-Negotiable Minimum 4-8 weeks of temperatures between 50-59°F (10-15°C) trigger clove segmentation and bulb formation. Without adequate chill hours, seed cloves produce single undivided bulbs rather than multi-clove heads. Planting in wrong seasons or warmer regions results in tiny, unmarketable bulbs or failure to segment. Soil Preparation: Building Your Success Foundation Soil Analysis and Assessment Before planting, evaluate your soil’s fundamental properties: Optimal pH Range: 6.0-7.0 (slightly acidic to neutral) Ideal Texture: Loose, crumbly, well-structured soil that crumbles easily in your hand Drainage: Excellent drainage is non-negotiable; garlic rots in waterlogged conditions Organic Matter Content: Minimum 3-5% by volume, evidenced by dark color and rich, earthy aroma Nitrogen Levels: Moderate content; excessive nitrogen promotes leaf growth at the expense of bulb development Step-by-Step Soil Preparation Phase 1: Analysis and Correction (Timing: 4-6 weeks before planting) Conduct professional soil testing through your local extension office. If pH is too acidic (below 5.5), apply agricultural lime 30 days before planting. If excessively alkaline (above 7.5), incorporate elemental sulfur to gradually lower pH. Phase 2: Site Clearance Remove all perennial weeds, old root systems, rocks, and debris. Avoid planting garlic in locations where garlic grew within the previous three years to prevent pest and disease accumulation. If reusing space, thoroughly clear debris and add fresh organic matter. Phase 3: Texture Development Incorporate 2-4 inches of well-aged compost into existing soil. Loosen compacted soil with a garden fork or tiller to 10-12 inches depth.

How to Grow Cherry Tomatoes at Home: Complete Guide for Container and Garden Success

Introduction: Why Cherry Tomatoes Are the Perfect Gateway to Home Food Production Cherry tomatoes represent the ideal entry point into home vegetable gardening. They’re forgiving of beginner mistakes, produce abundantly in confined spaces, thrive in containers on apartment balconies, and deliver harvests within weeks of planting. Unlike many vegetables requiring extensive space, sophisticated equipment, or lengthy growing seasons, cherry tomatoes flourish in conditions most homeowners possess—a sunny window, modest planter, and basic care. Beyond practicality, cherry tomatoes satisfy something deeper: the human desire for fresh, flavorful food grown by your own hands. Store-bought cherry tomatoes, picked unripe for shipping durability, cannot match the concentrated sweetness of sun-ripened tomatoes harvested at peak flavor. A handful of homegrown cherry tomatoes offers more satisfaction than pounds of commercial equivalents. The economics appeal equally. A single cherry tomato plant costing $3-5 produces 50-150+ individual tomatoes across the season—easily $15-30 worth of store-quality produce. Beyond raw economics, homegrown tomatoes eliminate pesticide residues, food-miles carbon impact, and packaging waste. They provide psychological benefits (pride in production, stress reduction from gardening), nutritional superiority (picked-ripe nutrition concentration), and culinary versatility (salads, sauces, snacking, preservation). This guide walks you through everything needed to successfully grow cherry tomatoes at home, whether you possess a sprawling backyard garden or only a sunny apartment balcony. We’ll cover variety selection, starting from seeds or transplants, optimizing growing conditions, managing common pests, and maximizing harvests. Why Cherry Tomatoes Outshine Traditional Varieties for Home Gardeners Space Efficiency and Container Suitability Standard slicing tomatoes (Beefsteak, Big Boy, Brandywine) require substantial space: 3-4 feet between plants, tall stakes or cages, and generous soil volumes. Cherry tomato varieties reach manageable heights (2-4 feet typically) and thrive in containers as small as 5-gallon pails. A single 12-by-36-inch windowsill could support 4-6 productive cherry tomato plants; equivalent slicing tomato production requires 20+ square feet of dedicated garden space. Prolific Production and Extended Harvests Cherry tomato productivity astounds beginners. A single healthy plant produces 100-150+ individual fruits across 2-3 months of active production. Continuous harvesting triggers the plant’s biological imperative to produce more fruit—unlike vegetables with single harvest windows (lettuce, carrots, peas), cherry tomatoes reward frequent picking with perpetual flowering and fruiting. This abundance allows diverse uses: fresh eating (highest satisfaction), sharing with neighbors (building community), preservation (sauces, drying, canning), and experimentation (cooking techniques you wouldn’t risk on expensive store-bought produce). Pest Resilience and Disease Management Cherry tomatoes’ smaller fruit size and branching architecture create conditions less favorable to certain pests (notably tomato hornworms, which prefer massive fruits). Their prolific leaf cover provides habitat for beneficial insects predating pests. Most importantly, losing a few cherry tomatoes to pest damage (versus losing half a premium Beefsteak) remains emotionally and practically acceptable. Flavor Concentration and Culinary Versatility Cherry tomatoes’ high sugar-to-acid ratio and concentrated flavor exceed standard slicing varieties for many purposes. Their size makes them perfect for whole tomatoes in salads, pasta dishes, roasting, or simply eating fresh warm from the garden. Rapid Gratification and Success Psychology Cherry tomatoes flower and fruit within 50-70 days of transplanting—providing measurable success quickly. This early gratification keeps beginning gardeners motivated and confident. Contrast this with peppers (90+ days to first fruit) or standard tomatoes potentially requiring staking, pruning, and intensive management before production. Cherry tomatoes deliver rewards quickly, building enthusiasm for expanded gardening. Understanding Cherry Tomato Varieties: Selecting Your Champions Hundreds of cherry tomato varieties exist, ranging from classic red round types to yellow, orange, pink, striped, and even purple varieties. Selection depends on your climate zone, available growing season, and flavor preferences. Popular Proven Varieties for Home Gardeners ‘Sweet 100’ – The reliable workhorse. Indeterminate (vining, continuous production), prolific production of small sweet fruits, adaptable to most climates. Seeds and transplants widely available. USDA zones 3-12. ‘Sungold’ – Premium flavor variety producing golden-orange fruits of exceptional sweetness. Slightly more demanding (appreciates consistent warmth and moderate nitrogen), but flavor rewards justify attention. Requires 2-3 years seed saving or annual seed purchase (often hybrid). USDA zones 3-11. ‘Tiny Tim’ – Ultra-compact determinate variety (12-18 inches), perfect for container growing and apartments. Produces abundant full-size cherry tomatoes on minuscule plants. Excellent for patio containers, window boxes, and space-constrained environments. USDA zones 3-12. ‘Yellow Pear’ – Heirloom indeterminate variety producing distinctive pear-shaped yellow fruits. Excellent flavor, prolific, somewhat sprawling (requires staking). Reproduces reliably from saved seed. USDA zones 3-11. ‘Black Cherry’ – Dark purple-black fruits with complex sweet-tart flavor. Indeterminate, moderate production, gourmet appeal. Best in warm climates; longer growing seasons required for consistent production. USDA zones 4-11. ‘Hundreds and Thousands’ – Extremely prolific small fruits on branching plants. Each plant produces literally hundreds of small cherry tomatoes. Excellent for sauce production or maximizing harvest volume. USDA zones 3-11. ‘Black Currant’ – Smallest variety (marble-sized fruits), dramatic dark color, concentrate tart-sweet flavor. Gourmet option for gardeners seeking novelty and unique flavor. Moderate production; excellent for fresh eating. USDA zones 3-11. Determinate vs. Indeterminate Considerations Determinate varieties (bush types) grow to fixed height (typically 18-36 inches), produce most fruit simultaneously, then largely finish production. Advantages: compact, no pruning needed, all-at-once harvest allowing preservation projects. Disadvantages: concentrated production window (2-3 weeks of peak harvest), shorter overall productivity period. Indeterminate varieties (vining types) grow continuously throughout season, produce flower clusters sequentially, and produce fruit until frost. Advantages: extended harvest (June through October in most climates), continuous fresh production. Disadvantages: require staking/support, larger plants, need occasional pruning for manageability. Recommendation: Beginners starting with containers should prioritize determinate ‘Tiny Tim’ or similar compact varieties. Gardeners with space and patience appreciate indeterminate varieties for extended harvests. Starting Your Cherry Tomato Garden: Complete Step-by-Step Guide Step 1: Choose Your Growing Location Sunlight Requirements – Non-Negotiable: Cherry tomatoes demand 6-8 hours minimum direct sunlight daily; 8+ hours optimal. Less than 6 hours produces sparse flowering, minimal fruit, and increased fungal disease susceptibility. Locations receiving afternoon shade in scorching-hot climates (SW deserts, southern zones 9-10) may benefit from afternoon protection; most North American climates benefit from maximum available sunlight. Assess your potential location throughout the day,

Regenerative Agriculture: How to Start Building Healthier Soils and Sustainable Farms

Introduction: Agriculture That Heals Rather Than Degrades Conventional agriculture has succeeded spectacularly at production—feeding billions of people through intensive cultivation, mechanical efficiency, and chemical inputs. Yet this success carries hidden costs: degraded soils losing organic matter, depleted aquifers, chemical residues contaminating water supplies, and loss of biological diversity that formerly supported ecosystem resilience. For decades, farmers accepted this trade-off as inevitable—maximize production or preserve ecology, but not both. Regenerative agriculture challenges this false choice. This emerging farming philosophy demonstrates that agriculture designed to build soil health, enhance biodiversity, and sequester atmospheric carbon actually produces better yields, lower input costs, and greater resilience than conventional systems. The paradigm shift is profound: rather than extracting maximum production from soil through purchased inputs and mechanical intervention, regenerative agriculture works with natural soil biology, enhances ecosystem function, and views farms as biological systems to be managed rather than chemical factories to be operated. This transition isn’t theoretical idealism. Thousands of North American farmers operating regenerative systems report improved profitability, reduced input costs, enhanced crop resilience during drought and flooding, and measurable soil health improvements within 3-5 years. Increasingly, agricultural investors, food companies, and commodity markets recognize and reward regenerative practices. This comprehensive guide explains regenerative agriculture’s core principles, demonstrates practical implementation pathways, and provides concrete steps any farmer—from small-scale gardeners to large-scale row crop operations—can adopt immediately. Understanding Regenerative Agriculture: Beyond Sustainable to Restorative Regenerative agriculture is frequently confused with “sustainable” farming, yet the distinction matters profoundly. Sustainable agriculture maintains current conditions. It reduces external inputs, minimizes environmental damage, and sustains productivity indefinitely without degradation. This represents substantial improvement over conventional agriculture but accepts existing soil conditions as baseline. Regenerative agriculture actively restores and improves. It rebuilds depleted soils, enhances biological communities, increases ecosystem function year-over-year, and moves from degradation toward health. Regenerative farms produce better each season than the previous—measurably improving soil organic matter, water retention, microbial diversity, and productivity simultaneously. The Foundational Principle: Working With Nature Rather Than Against It Conventional agriculture emphasizes control: controlling weeds through herbicides, controlling pests through insecticides, controlling soil conditions through synthetic fertilizers. Each control action requires ongoing intervention; stopping applications allows weeds, pests, and soil depletion to resume. Regenerative agriculture emphasizes ecosystem design: building soils so fertile that crop competitiveness suppresses weeds naturally, encouraging predatory insects and soil organisms that control pests biologically, and designing rotations and cover cropping systems that maintain fertility without external inputs. This fundamental difference—control through external inputs versus resilience through ecological design—explains why regenerative systems become progressively easier and more profitable over time. Initial transition requires active management; established regenerative systems self-regulate through healthy soil biology and ecosystem balance. Six Core Principles of Regenerative Agriculture Principle 1: Minimizing Soil Disturbance The Problem with Tillage: Conventional agriculture relies on plowing, disking, and cultivation to control weeds, incorporate amendments, and prepare seedbeds. These actions destroy soil structure, expose carbon-rich organic matter to oxidation, disrupt fungal networks, and pulverize aggregates that took decades to develop. Research shows that each plowing event reduces soil organic matter 1-3% annually—a death by thousand cuts where continuous tilling gradually degrades soils across years and decades. The Regenerative Solution: No-till and reduced-till systems minimize mechanical disturbance. Rather than plowing fields, farmers maintain living soil architecture by: These practices preserve soil structure, protect fungal networks critical for nutrient cycling, and maintain the billions of soil organisms performing ecological functions that expensive inputs previously attempted to replace. Principle 2: Permanent Soil Coverage Why Bare Soil is Agricultural Enemy #1: Exposed soil experiences erosion from raindrop impact and water runoff, oxidative loss of organic matter from sun and heat exposure, and surface crusting that prevents water infiltration. Summer fallows and winter bare fields represent profound soil degradation occurring invisibly. Regenerative Coverage Solutions: Regenerative farms maintain living or recently-dead plant material covering soil surface year-round through: Cover Crops – Planted specifically to provide soil protection and biological function: Crop Residue Management – Rather than removing straw, stalks, and leaves: Living Mulches – Interseeded permanent groundcover plants living among production crops, providing coverage and ongoing ecological function. Permanent soil coverage eliminates erosion, dramatically increases water infiltration during rain events, moderates soil temperature extremes, and provides habitat for beneficial soil organisms. Principle 3: Diverse Crop Rotations The Problem with Monoculture: Growing identical crops year-after-year selects for specialized pests and diseases targeting that specific plant, gradually building pest populations of extraordinary density. Agricultural pest epidemics are often iatrogenic—created by agricultural practices rather than natural ecosystem conditions. Monocultures also deplete specific soil nutrients while leaving others unused, creating nutrient imbalances. Soil microbiota specialized for one crop fail to diversify; soil biology becomes simplified and fragile. Regenerative Rotation Design: Diverse rotations disrupt pest cycles, balance nutrient utilization, and support soil microbial diversity. Optimal rotations typically include: Plant Family Rotation – Following plant families through sequential years: Different plant families have different root depths, nutrient demands, and pest/disease associations; rotating confuses pests while varying nutrient extraction patterns. Livestock Integration – Adding animals to crop rotations: Perennial Inclusions – Integrating perennial crops where climatically viable: Principle 4: Living Roots Year-Round Why Continuous Root Growth Matters: Living root systems feed soil microbes through root exudates (sugars and organic acids plants secrete). Soil microbes dependent on this nutrition thrive during growing season, then starve during fallow periods. Repeated boom-bust cycles create fragile soil microbial communities. Living Root Solutions: Continuous living roots maintain constant microbial food supply, creating stable, diverse soil communities. Strategies include: Principle 5: Eliminating or Minimizing Synthetic Inputs Transitioning Beyond Chemistry: Conventional agriculture depends on synthetic nitrogen fertilizers, herbicides, fungicides, and insecticides. Regenerative systems reduce this dependence through: Biological Nitrogen Fixation – Legume cover crops and rotational crops fix atmospheric nitrogen through rhizobia bacteria, replacing synthetic nitrogen fertilizers. Compost and Organic Amendments – On-farm composting of crop residues, manure, and other organic matter recycles nutrients that synthetic fertilizers provide externally. Biological Pest and Disease Management: Biofertilizers – Microorganism-based products enhancing nutrient availability and plant uptake efficiency This transition doesn’t require eliminating all external inputs immediately. Gradual reduction over 3-5