
Introduction
Cauliflower (Brassica oleracea var. botrytis) has evolved from a specialty vegetable to a mainstream superfood, driving unprecedented demand in American markets. This nutritious cruciferous crop commands premium prices at farmers’ markets and grocery stores, making it an attractive option for both home gardeners and commercial growers.
While cauliflower has a reputation for being temperamental, understanding its specific requirements—cool temperatures, consistent moisture, and proper nutrient management—transforms this challenging crop into a reliable, profitable venture. Modern varieties have expanded the growing season beyond traditional spring and fall windows, opening opportunities for extended production.
This comprehensive guide provides everything you need to successfully grow cauliflower, from variety selection and soil preparation through pest management and harvest timing. Whether you’re cultivating a few plants in your backyard or planning commercial acreage, mastering cauliflower production can deliver exceptional returns and premium-quality produce.
Why Grow Cauliflower? Market and Nutritional Benefits
Before diving into cultivation techniques, understanding cauliflower’s advantages helps justify the investment and attention this crop requires.
Exceptional Nutritional Profile
Cauliflower has earned its superfood status through impressive nutritional benefits:
- High in vitamin C: One cup provides 77% of daily requirements
- Rich in fiber: Supports digestive health (3g per cup)
- Contains sulforaphane: Powerful antioxidant compound
- Good source of vitamin K: Essential for bone health
- Low calorie: Only 25 calories per cup
- Provides choline: Important for brain health
These nutritional credentials resonate strongly with health-conscious consumers driving market demand.
Strong Market Demand and Premium Pricing
Cauliflower enjoys robust market positioning driven by multiple consumer trends:
Pricing Benchmarks:
- Farmers’ market retail: $4-7 per head
- Wholesale to restaurants: $2.50-4 per head
- Grocery store retail: $3-5 per head (growers receive 40-60%)
- Organic premium: Additional 30-50%
- Colored varieties (purple, orange): 20-30% premium over white
Market Drivers:
- Low-carb diet popularity (cauliflower rice, pizza crust)
- Plant-based eating trends
- Grain-free alternatives
- Instagram-worthy colored varieties
- Year-round demand for versatile vegetable
Culinary Versatility
Cauliflower’s adaptability in the kitchen expands its appeal:
- Roasted whole or in florets
- Riced as grain substitute
- Mashed as potato alternative
- Pizza crust base
- Buffalo “wings”
- Raw in crudité platters
- Pickled for preservation
This versatility maintains consistent demand across seasons and market segments.
Reasonable Production Timeline
Compared to other brassicas like cabbage or Brussels sprouts, cauliflower offers relatively quick returns:
- Transplant to harvest: 55-100 days (variety dependent)
- Multiple crops possible in moderate climates
- Quick turnover enables responsive market adaptation
Understanding Cauliflower: Growth Requirements and Challenges
Cauliflower’s reputation as a difficult crop stems from its specific environmental needs and sensitivity to stress. Understanding these requirements is key to success.
The Cauliflower Growth Cycle
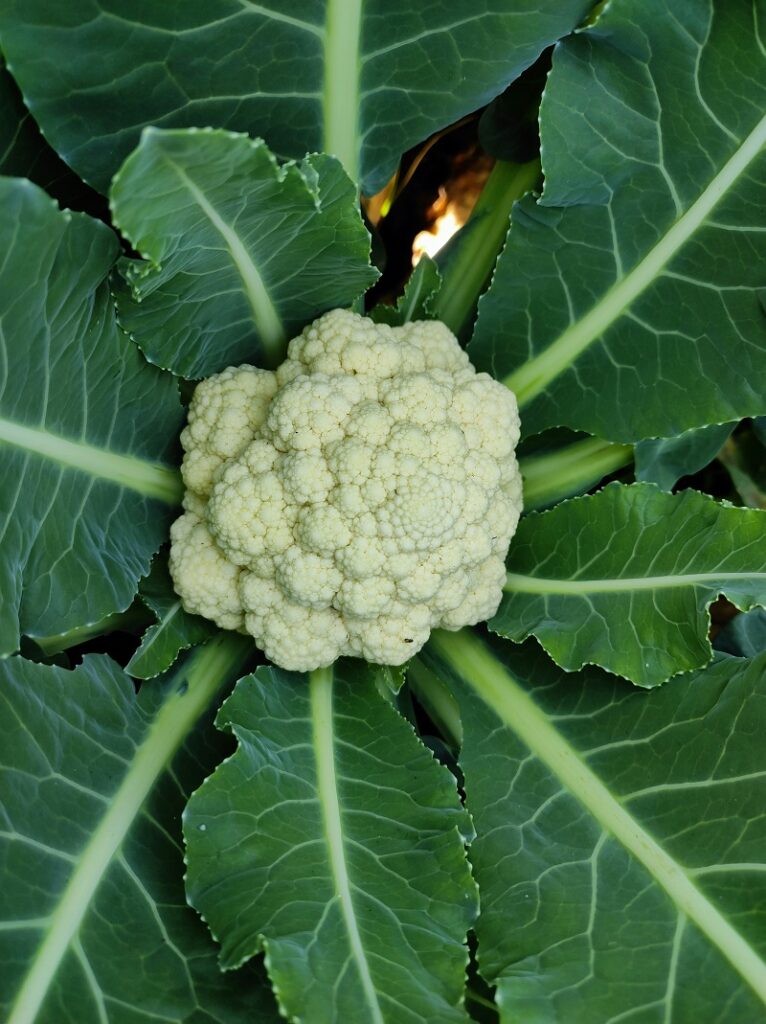
Cauliflower produces a “head” technically called a curd—a dense cluster of undeveloped flower buds. The plant progresses through distinct phases:
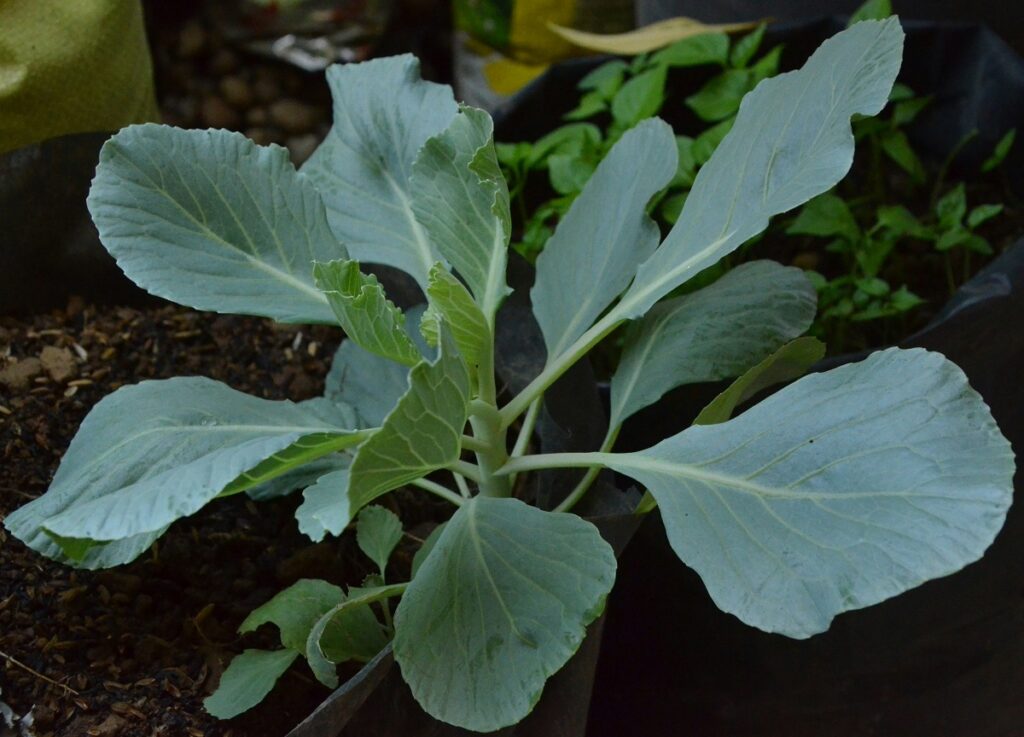
Vegetative Phase (3-5 weeks post-transplant): Plants focus on leaf development, building the plant structure that will support curd formation.
Curd Initiation (Week 5-7): Triggered by temperature and plant maturity, the growing point transitions from leaves to curd formation.
Curd Development (3-4 weeks): The head enlarges rapidly, requiring optimal conditions and heavy nutrient uptake.
Harvest Maturity: Timing is critical—wait too long and curds become loose, ricey, or discolored.
Temperature Sensitivity: The Critical Factor
Cauliflower is exceptionally temperature-sensitive during curd formation.
Optimal Range: 60-65°F (15-18°C) daytime temperatures
Problems from Temperature Extremes:
Too Hot (above 80°F/27°C):
- Buttoning (premature tiny heads)
- Ricey texture (loose, separated florets)
- Bitter flavor
- Yellowing or purple discoloration
- Bolting without proper head formation
Too Cold (below 50°F/10°C for extended periods):
- Delayed maturity
- Uneven head development
- Increased pest and disease pressure
- Potential freezing damage to curds
Temperature Stress Prevention:
- Select varieties suited to your growing season
- Time plantings for cool season windows
- Use row covers for temperature moderation
- Provide shade cloth in warmer climates
Moisture Requirements
Consistent soil moisture is non-negotiable for quality cauliflower production.
Water Needs:
- 1-1.5 inches per week throughout growing season
- Increased demand during curd development (up to 2 inches weekly)
- Evening soil moisture more critical than morning
Problems from Inconsistent Water:
- Irregular curd development
- Hollow stem disorder
- Bract growth (leaf emergence within curd)
- Cracking and uneven texture
- Bitter flavor
Ideal Growing Conditions for Cauliflower
Creating optimal conditions maximizes success rates and quality.
Climate and Seasonal Considerations
Best Growing Regions: Cauliflower thrives in coastal California, Pacific Northwest, upper Midwest, and mid-Atlantic states where cool temperatures prevail during growing seasons.
USDA Zone Adaptations:
- Zones 3-6: Spring and fall crops (avoid summer heat)
- Zones 7-8: Fall through spring production (mild winter areas)
- Zones 9-10: Winter production (November-March)
Growing Season Windows:
Spring Planting:
- Start seeds indoors: 6-8 weeks before last frost
- Transplant: 2-4 weeks before last frost (plants tolerate light frost)
- Harvest: Late spring before heat arrives
Fall Planting:
- Start seeds: Mid to late summer
- Transplant: Late summer (8-10 weeks before first frost)
- Harvest: Fall through early winter (sweetens after light frost)
Overwintering (Mild Climates):
- Plant: September-October
- Harvest: March-May
- Advantage: Extended harvest window, premium spring prices
Soil Requirements
Proper soil conditions are foundational for healthy cauliflower.
Ideal Soil Characteristics:
- Texture: Loamy or sandy loam with good structure
- Drainage: Essential—cauliflower won’t tolerate waterlogged conditions
- Organic matter: 3-5% for nutrient retention and structure
- pH: 6.0-7.0 (optimal: 6.5-6.8)
- Depth: Minimum 12 inches of workable soil
Soil Testing and Amendment:
Conduct comprehensive soil testing 2-3 months before planting, analyzing:
- pH and lime requirement
- Nitrogen, phosphorus, potassium levels
- Micronutrients (especially boron and molybdenum)
- Organic matter content
pH Adjustment:
- Below 6.0: Apply agricultural lime at recommended rates (typically 25-50 lbs per 1,000 sq ft)
- Above 7.0: Incorporate elemental sulfur or organic amendments
Organic Matter Enhancement: Incorporate 2-3 inches of:
- Well-composted manure
- Finished compost
- Aged leaf mold
- Mushroom compost
Work amendments into top 8-12 inches 4-6 weeks before planting.
Critical Micronutrients
Cauliflower has specific micronutrient requirements, particularly:
Boron: Essential for curd formation and quality. Deficiency causes:
- Hollow stem
- Brown discoloration in curd
- Bitter flavor
- Poor head development
Application: 1-2 lbs borax per acre or foliar sprays
Molybdenum: Required for nitrogen metabolism. Deficiency causes:
- “Whiptail” disorder (narrow, distorted leaves)
- Poor plant growth
- Reduced yields
Application: Often included in complete fertilizers or foliar applications
Selecting Cauliflower Varieties
Modern breeding has produced varieties adapted to different seasons, climates, and market preferences.
White Cauliflower Varieties
Early Season (55-65 days):
Snow Crown:
- Industry standard hybrid
- Reliable in various conditions
- 2-3 lb heads
- Good heat tolerance
- Self-blanching (leaves naturally cover heads)
Minuteman:
- Early maturing (58 days)
- Compact plants suitable for close spacing
- Uniform heads
- Good for spring production
Mid-Season (70-80 days):
Amazing:
- Extremely uniform heads
- Excellent dome shape
- 2-3 lb average
- Good holding ability
- Suitable for fall harvest
Skywalker:
- Vigorous plants
- Large heads (3-4 lbs)
- Extended harvest window
- Cold tolerant
Late Season (85-100 days):
Snowball Y Improved:
- Heritage variety, open-pollinated
- Very cold hardy
- Excellent for overwintering
- 2-3 lb heads
- Good for saving seeds
Colored Varieties
Colored cauliflower commands premium prices and attracts consumer attention.
Purple:
Graffiti:
- Deep purple throughout
- High in anthocyanins
- Color fades when cooked
- 75-85 days
- Premium market appeal
Violet Queen:
- Vibrant purple
- Slower to bolt than white types
- Good heat tolerance
- 75 days
Orange:
Cheddar:
- Bright orange from beta-carotene (25x more than white)
- Retains color when cooked
- Milder, sweeter flavor
- 80 days
- Novelty market advantage
Green (Romanesco):
Veronica:
- Lime green, fractal appearance
- Nutty, complex flavor
- 75-85 days
- High-end restaurant demand
Variety Selection Strategy
For Beginners: Start with ‘Snow Crown’—most forgiving and reliable
For Extended Harvest: Plant early, mid, and late varieties in succession
For Premium Markets: Include colored varieties for visual appeal and higher prices
For Commercial Production: Focus on uniform hybrids with good shelf life
“
Step-by-Step Guide to Growing Cauliflower
Step 1: Starting Seeds and Transplant Production
Most commercial and serious home growers start cauliflower from transplants rather than direct seeding.
Seed Starting Timeline:
- Spring crop: Start indoors 6-8 weeks before last frost
- Fall crop: Start indoors mid-summer (July-August for most regions)
Seed Starting Procedure:
Materials:
- 72-cell or 50-cell plug trays
- Quality seed starting mix (sterile, well-draining)
- Heat mat (optional but beneficial)
- Grow lights or bright windowsill
Steps:
- Fill trays with moistened seed starting mix
- Plant seeds ¼ inch deep, one per cell
- Cover lightly with mix
- Maintain 70-75°F for germination (7-10 days)
- Provide strong light immediately after germination
- Reduce temperature to 60-65°F after emergence
- Keep soil consistently moist but not waterlogged
- Fertilize with dilute liquid fertilizer (½ strength) weekly after true leaves appear
Transplant Readiness:
- Age: 4-6 weeks
- Size: 4-6 true leaves
- Stem: Pencil-thick, sturdy
- Roots: Well-developed, holding soil together
Hardening Off: Gradually acclimate seedlings to outdoor conditions over 7-10 days:
- Start with 1-2 hours in shade
- Gradually increase time and sun exposure
- Protect from wind initially
- Bring indoors if frost threatens
Step 2: Field Preparation and Planting
Timing:
- Spring: Transplant 2-4 weeks before last frost (cauliflower tolerates light frost)
- Fall: Transplant 10-12 weeks before first frost
- Soil temperature: Minimum 50°F, optimal 60-65°F
Spacing Requirements:
In-Row Spacing:
- 15-18 inches for small heads/early varieties
- 18-24 inches for large heads/late varieties
Between-Row Spacing:
- 24-36 inches (allows cultivation and air circulation)
Planting Density:
- Home gardens: 8-12 plants per 100 sq ft
- Commercial: 14,000-18,000 plants per acre
Transplanting Procedure:
- Water transplants thoroughly before moving to field
- Dig planting holes slightly larger than root ball
- Plant at same depth as in containers (don’t bury stems)
- Firm soil gently around roots
- Water immediately after planting (1-2 cups per plant)
- Apply starter fertilizer (liquid 10-52-10 or similar)
- Install row covers if cold weather threatens
Best Time: Late afternoon or cloudy day to reduce transplant shock
Image Suggestion 5: Proper cauliflower transplanting technique showing depth and spacing
Alt Text: “Demonstration of correct cauliflower transplant depth and spacing in prepared bed”
Irrigation and Fertilization Management
Irrigation Strategy
Consistent moisture is critical throughout the growing cycle, with increased demands during curd formation.
Water Requirements by Growth Stage:
Weeks 1-3 (Establishment):
- Frequency: Every 2-3 days
- Amount: 0.5-0.75 inches per week
- Focus: Establishing root system
Weeks 4-6 (Vegetative Growth):
- Frequency: Twice weekly
- Amount: 1-1.25 inches per week
- Focus: Building leaf canopy
Weeks 7-9 (Curd Initiation and Development):
- Frequency: 2-3 times weekly
- Amount: 1.5-2 inches per week
- Critical period: Never allow stress
Final Week (Pre-Harvest):
- Maintain consistent moisture
- Avoid reducing water (causes hollow stem)
Irrigation Methods:
Drip Irrigation (Recommended):
- Most efficient water use
- Keeps foliage dry (reduces disease)
- Precise water delivery
- Suitable for plastic mulch systems
Overhead Sprinkler:
- Adequate for small plantings
- Water in morning to allow foliage drying
- Less efficient, higher disease risk
Furrow Irrigation:
- Traditional method for larger fields
- Requires level ground
- Less precise than drip
Monitoring Soil Moisture:
- Check soil 4-6 inches deep daily during curd development
- Soil should feel like wrung-out sponge
- Install tensiometers for precise monitoring in commercial operations
Comprehensive Fertilization Program
Cauliflower is a heavy feeder requiring substantial nutrients throughout its cycle.
Pre-Plant Fertilization:
Based on soil test results, incorporate:
- Nitrogen (N): 80-120 lbs/acre (home gardens: 2-3 lbs per 100 sq ft)
- Phosphorus (P): 60-100 lbs/acre
- Potassium (K): 100-150 lbs/acre
Apply 7-10 days before transplanting.
Side-Dressing Schedule:
Application 1 (2-3 weeks post-transplant):
- Nitrogen: 30-40 lbs/acre (0.5-1 lb per 100 sq ft)
- Focus: Supporting leaf development
- Method: Band 4-6 inches from plants or drip-applied
Application 2 (4-5 weeks post-transplant, at curd initiation):
- Nitrogen: 30-40 lbs/acre
- Critical timing: Just as curd begins forming
- Method: Side-dress or fertigation
Organic Fertilization Options:
Pre-Plant:
- Well-composted manure: 40-60 lbs per 100 sq ft
- Blood meal (13-0-0): 3-5 lbs per 100 sq ft
- Bone meal (3-15-0): 2-3 lbs per 100 sq ft
Side-Dressing:
- Fish emulsion: Diluted per label, applied every 2 weeks
- Compost tea: Weekly applications
- Blood meal: 1-2 lbs per 100 sq ft at weeks 3 and 5
Micronutrient Applications:
Boron: Apply when plants have 6-8 leaves via:
- Soil application: 1-2 lbs borax per acre
- Foliar spray: 0.1% borax solution (1 oz per 8 gallons water)
Molybdenum: Often included in complete fertilizers; if deficiency suspected:
- Foliar spray: Sodium molybdate at label rates
Essential Cultural Practices
Blanching: Protecting Head Quality
Many white cauliflower varieties require blanching—protecting developing curds from sunlight to maintain white color and prevent bitterness.
Self-Blanching vs. Manual Blanching:
Self-Blanching Varieties:
- Leaves naturally curl over developing heads
- ‘Snow Crown,’ ‘Amazing,’ and most modern hybrids
- Minimal intervention needed
Manual Blanching Required:
- Open-leaf varieties
- Heritage types like ‘Snowball’
- Necessary in hot climates even for self-blanching types
Blanching Procedure:
When: When curd reaches 2-3 inches diameter (size of a tennis ball)
Methods:
Leaf Tying:
- Choose 3-4 outer leaves
- Gather gently over curd
- Secure with rubber band, twine, or clothes pin
- Ensure curd is dry to prevent rot
- Leave tied for 4-7 days until harvest
Leaf Breaking:
- Snap outer leaf stems partially (don’t detach)
- Fold leaves over curd
- Weight of leaves keeps them in place
- Natural but less reliable than tying
Important: Check tied heads every 2-3 days—growth accelerates under cover. Harvest promptly when mature.
Mulching Benefits
Applying mulch around cauliflower plants provides multiple advantages:
Benefits:
- Moisture retention (reduces irrigation frequency)
- Weed suppression (major labor saving)
- Soil temperature moderation
- Prevents soil splash on curds
- Adds organic matter (organic mulches)
Mulch Options:
Organic:
- Straw (weed-free): 2-3 inch layer
- Shredded leaves: 2-3 inches
- Grass clippings (herbicide-free): 1-2 inches
- Compost: 1 inch
Synthetic:
- Black plastic: Excellent for spring (warms soil)
- White plastic: Better for summer (reflects heat)
Application Timing: Apply 2-3 weeks after transplanting once soil has warmed and plants are established.
Pest and Disease Management
Cauliflower faces numerous pest and disease challenges requiring proactive management.
Major Insect Pests
Cabbage Worms and Loopers: Green caterpillars that chew holes in leaves and contaminate heads.
Identification:
- Imported cabbageworm: Velvety green with faint yellow stripe
- Cabbage looper: Pale green, moves in looping motion
Control:
- Bt (Bacillus thuringiensis): Organic spray, apply weekly
- Row covers: Exclude adult butterflies
- Hand-picking: Effective for small plantings
- Spinosad: Organic insecticide for heavy pressure
Aphids: Small, soft-bodied insects clustering on undersides of leaves.
Control:
- Strong water spray dislodges colonies
- Insecticidal soap: 2-3 applications
- Neem oil: Preventative and control
- Encourage beneficial insects (ladybugs, lacewings)
Flea Beetles: Tiny black beetles creating shothole damage on young plants.
Control:
- Row covers on young plants
- Kaolin clay spray creates physical barrier
- Diatomaceous earth around plant base
- Keep plants vigorously growing (outgrow damage)
Cabbage Root Maggots: White maggots that tunnel into roots, causing wilting and death.
Control:
- Row covers prevent fly egg-laying
- Beneficial nematodes applied to soil
- Collars around stems (cardboard or foam)
- Delayed planting avoids peak fly activity


Common Diseases
Clubroot (Plasmodiophora brassicae): Soil-borne disease causing swollen, distorted roots and stunted plants.
Prevention:
- Maintain soil pH above 7.0 (lime application)
- 4-year rotation away from brassicas
- Use resistant varieties
- Avoid moving contaminated soil
- No cure once present
Black Rot (Xanthomonas campestris): Bacterial disease causing V-shaped yellow lesions on leaves and blackened veins.
Prevention:
- Use certified disease-free transplants
- Avoid overhead irrigation
- Remove infected plants immediately
- 2-3 year crop rotation
- Copper sprays provide some protection
Downy Mildew (Peronospora parasitica): Fungal disease causing yellow patches on upper leaves with gray-purple growth underneath.
Control:
- Improve air circulation (proper spacing)
- Avoid overhead watering or water early morning
- Copper-based fungicides
- Remove heavily infected leaves
Alternaria Leaf Spot: Fungal disease creating circular brown spots with concentric rings.
Control:
- Remove infected leaves
- Avoid working wet plants
- Fungicide applications (copper, chlorothalonil)
- Crop rotation
Integrated Pest Management (IPM) Strategy:
- Prevention: Healthy soil, proper spacing, crop rotation
- Monitoring: Weekly scouting for pests and diseases
- Cultural controls: Row covers, resistant varieties, sanitation
- Biological controls: Bt, beneficial insects, nematodes
- Chemical controls: Only when necessary, choosing least toxic options
Harvesting Cauliflower
Proper harvest timing and technique ensure maximum quality and shelf life.
Determining Harvest Maturity
Visual Indicators:
Curd Characteristics:
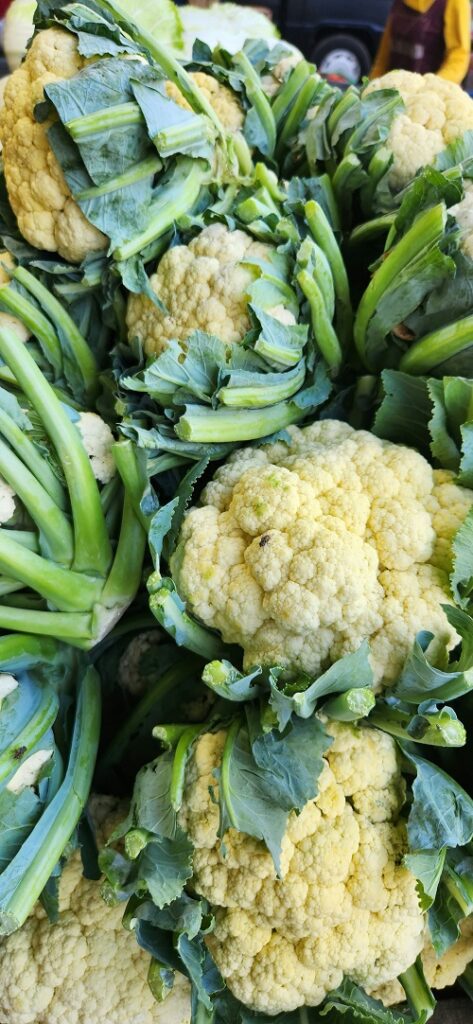
- Size: 6-8 inches diameter (variety dependent)
- Color: Pure white (or appropriate color for variety)
- Texture: Tight, compact florets with smooth surface
- Firmness: Solid, dense when pressed gently
- No discoloration or sunburn
Overmaturity Signs (Harvest Immediately):
- Curds beginning to separate or “rice”
- Yellowing or browning
- Bract development (small leaves within curd)
- Fuzzy appearance
Timeline:
- Early varieties: 55-65 days from transplant
- Mid-season: 70-85 days
- Late varieties: 85-100+ days
Environmental factors accelerate maturity:
- Warm weather speeds development
- Check daily once curds form
- Harvest window: 3-7 days at peak quality
Harvest Technique
Proper Cutting Method:
Tools: Sharp knife or pruning shears (sanitized between plants)
Procedure:
- Check curd quality (firmness, color, tightness)
- Cut stem 2-3 inches below curd
- Leave 2-3 wrapper leaves attached (protects during transport)
- Handle gently to avoid bruising
- Place in harvest container immediately
Best Time: Early morning after dew dries but before temperatures rise
Temperature Considerations:
- Harvest before temperatures exceed 75°F
- Field heat reduces shelf life
- Cool immediately after cutting
Post-Harvest Handling
Immediate Care:
Field Handling:
- Keep out of direct sunlight
- Transport to cool storage within 1-2 hours
- Handle gently (bruises quickly)
Cooling:
- Optimal storage: 32°F with 95% humidity
- Cool within 4 hours of harvest
- Rapid cooling extends shelf life from 2-3 weeks to 3-4 weeks
Preparation for Market:
Home Use:
- Trim wrapper leaves to 1-2 inches
- Do not wash (increases decay)
- Store in perforated plastic bag in refrigerator
Commercial Sales:
- Grade by size and quality
- Remove damaged wrapper leaves
- Pack in waxed cardboard boxes or plastic crates
- Include variety name and pack date
- Refrigerate immediately
Quality Standards:
- US No. 1: Compact, well-formed, 6+ inch diameter
- US No. 2: Reasonably compact, minor defects allowed
Maximizing Cauliflower Production
Succession Planting Strategy
Extend harvest season and maintain consistent market supply through staggered plantings.
Succession Schedule:
Spring Production:
- Planting 1: 6 weeks before last frost (early varieties)
- Planting 2: 4 weeks before last frost (mid-season)
- Planting 3: 2 weeks before last frost (heat-tolerant)
- Result: Harvest window extended 4-6 weeks
Fall Production:
- Planting 1: Mid-July (late varieties)
- Planting 2: Late July (mid-season)
- Planting 3: Early August (early varieties)
- Result: Continuous fall harvest through frost
Interval: Plant every 2-3 weeks for continuous production
Yield Expectations and Economics
Expected Yields:
Home Gardens:
- Per plant: 1-3 lbs
- Per 100 sq ft (9-12 plants): 12-30 lbs
Commercial Production:
- Per acre: 15,000-25,000 lbs (variety and management dependent)
- Marketable percentage: 70-85% of total harvest
Economic Analysis (Per Acre):
Costs:
- Seeds/transplants: $800-1,200
- Fertilizer: $300-500
- Pest management: $200-400
- Irrigation: $150-300
- Labor (planting, maintenance, harvest): $2,000-3,500
- Total costs: $3,500-6,000
Revenue:
- Yield: 20,000 lbs (average)
- Wholesale price: $1.50-2.50/lb
- Gross revenue: $30,000-50,000
Net profit: $24,000-44,000 per acre
ROI varies with:
- Market channel (retail vs. wholesale)
- Organic certification
- Variety selection (colored = premium)
- Growing efficiency
Troubleshooting Common Cauliflower Problems
Problem: Buttoning (Premature Small Heads)
Causes:
- Transplant stress
- Temperature extremes during establishment
- Nitrogen deficiency
- Water stress
Prevention:
- Transplant at appropriate size (4-6 leaves)
- Avoid root disturbance
- Maintain consistent moisture and fertility
- Time plantings for optimal temperatures
Problem: Ricey or Loose Curds
Causes:
- High temperatures during curd development
- Nitrogen excess
- Boron deficiency
- Overmaturity
Prevention:
- Choose heat-tolerant varieties for warm seasons
- Balance nitrogen (avoid excess)
- Apply boron per recommendations
- Harvest promptly at maturity
Problem: Hollow Stem
Causes:
- Boron deficiency
- Rapid growth from excess nitrogen
- Inconsistent moisture
Prevention:
- Apply boron at recommended rates
- Balance fertilization
- Maintain even soil moisture
Problem: Yellowing or Browning Curds
Causes:
- Sun exposure (inadequate blanching)
- High temperatures
- Nutrient deficiency
Prevention:
- Blanch white varieties as needed
- Choose self-blanching varieties
- Ensure adequate nutrition
Problem: Poor Head Formation
Causes:
- Temperature stress
- Insufficient nutrients
- Water stress
- Pest or disease damage
Prevention:
- Time plantings for optimal temperatures
- Maintain comprehensive fertility program
- Consistent irrigation
- Proactive pest/disease management
You may also like: How to Grow Brussels Sprouts: A Complete Guide for Home Gardens and Small Farms
Frequently Asked Questions About Growing Cauliflower
How long does it take to grow cauliflower?
From transplanting to harvest: 55-100 days depending on variety. Add 4-6 weeks for seed starting, bringing total time from seed to harvest to 10-16 weeks.
Can I grow cauliflower in hot climates?
Cauliflower is challenging in hot regions but possible with heat-tolerant varieties (‘Snow Crown,’ ‘Amazing’), shade cloth, and fall/winter timing.
Why do I need to blanch cauliflower?
Blanching protects white varieties from sun exposure that causes yellowing, purple discoloration, and bitter flavor. Modern self-blanching varieties minimize this requirement.
How do I know when cauliflower is ready to harvest?
Harvest when heads are 6-8 inches diameter, firm, compact, and pure white (or appropriate color). Check daily once curds form—the harvest window is short.
Can I grow cauliflower in containers?
Yes, but use large containers (5+ gallons), well-draining soil, and provide consistent moisture and fertilization. Choose compact varieties.
What’s the difference between white and colored cauliflower?
Beyond appearance, colored varieties offer different phytonutrients (anthocyanins in purple, beta-carotene in orange) and slightly different flavors. All require similar growing conditions.

Conclusion: Mastering Cauliflower Production
Growing cauliflower successfully requires attention to detail and understanding of this crop’s specific needs. While more demanding than some vegetables, cauliflower rewards careful management with premium-quality produce commanding excellent market prices.
Keys to Success:
✓ Temperature management: Time plantings for cool growing seasons (60-65°F optimal)
✓ Consistent moisture: Never allow water stress, especially during curd development
✓ Comprehensive fertility: Heavy feeding throughout cycle, emphasizing nitrogen and micronutrients
✓ Variety selection: Match varieties to your season and market
✓ Pest/disease prevention: Proactive monitoring and integrated management
✓ Timely harvest: Check daily and harvest at peak maturity
Whether you’re growing a few plants for fresh eating or cultivating commercial acreage, these principles apply universally. Start small, learn your microclimate’s quirks, refine your techniques, and scale up as you gain experience.
The growing demand for cauliflower—driven by health trends, culinary versatility, and low-carb diets