

Introduction
If you’re seeking a versatile, nutritious vegetable that thrives with minimal effort, leeks deserve prominent space in your garden. This elegant allium relative offers subtle, delicate flavor that elevates soups, risottos, braised dishes, and countless culinary applications. Beyond culinary appeal, leeks are remarkably forgiving plants that adapt to various growing conditions while requiring less intensive pest management compared to related onions and garlic.
Leeks represent an exceptional value proposition for home gardeners. A single row produces abundant harvests with modest inputs. Unlike high-maintenance vegetables demanding constant monitoring, leeks grow steadily with basic care. The payoff arrives in fall and early winter—precisely when fresh garden vegetables become scarce and supermarket prices spike—making leeks perfect for season-extending harvests.
This comprehensive guide demystifies leek cultivation from seed to harvest. Whether you’re a novice gardener with minimal experience or an established grower seeking to expand crop diversity, these proven techniques ensure consistent success. You’ll discover ideal planting windows, soil preparation strategies, spacing optimization, blanching techniques that produce premium white shanks, and harvest timing that maximizes yield and storage quality.
What Are Leeks and Why Grow Them at Home?
Understanding the Leek Plant
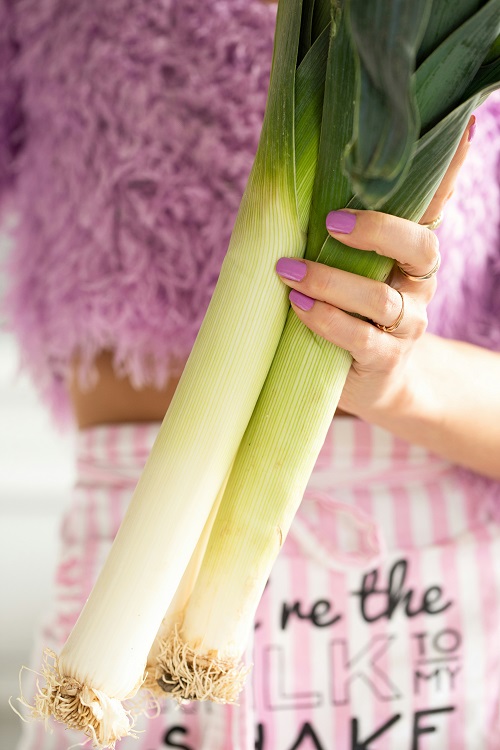
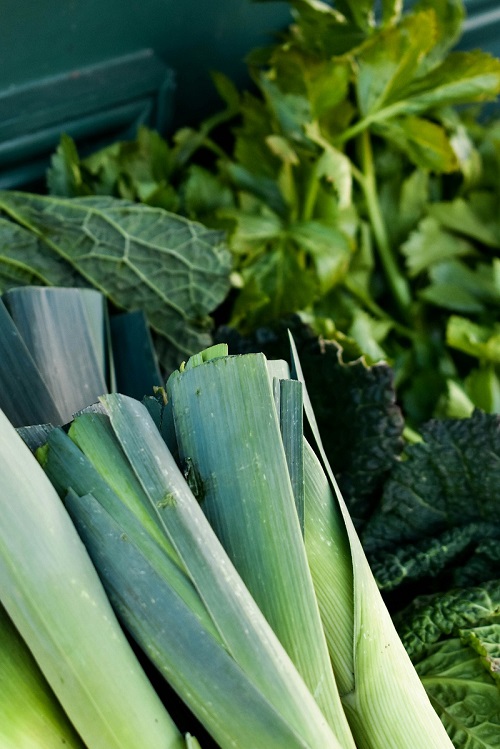
Leeks (Allium porrum) belong to the same botanical family as onions, garlic, and chives. However, leeks develop dramatically differently. Rather than forming bulbs underground, leeks develop long, cylindrical white shanks gradually transitioning to green leaves above soil. This unique growth pattern delivers a mild, slightly sweet flavor distinctly different from pungent onions or garlicky intensity.
The edible portion includes both the white shank (blanched portion) and tender green leaves. Professional chefs prize the tender white section, but resourceful home gardeners utilize the entire plant. Tougher green leaves serve soup bases and vegetable stocks excellently.
Advantages of Home Leek Cultivation
Versatile Culinary Uses: Leeks shine in French potato-leek soup, creamy risotto, elegant braised dishes, and vibrant stir-fries. Fresh leeks elevate simple preparations into restaurant-quality meals. Dried leeks season soups and stews throughout winter.
Mild, Approachable Flavor: Unlike strong onions or garlic, leeks provide subtle allium character without overwhelming palates. This makes leeks ideal for dishes requiring onion flavor without intensity.
Extended Growing Season: Most leek varieties mature in 4-6 months, making them perfect for fall and early winter harvests when fresh garden vegetables become scarce. Many varieties withstand light freezes, extending harvest windows further.
Space-Efficient Production: Leeks grow vertically with minimal lateral spread. Dense plantings in small spaces produce substantial quantities from limited garden real estate. This efficiency makes leeks perfect for urban gardens and container cultivation.
Pest and Disease Resistance: Leeks experience significantly fewer pest problems compared to onions and garlic. Natural pest resistance eliminates many chemical applications, supporting organic growing practices.
Nutritional Density: Leeks provide vitamin K, vitamin C, fiber, and beneficial plant compounds. Culinary portions contain remarkable nutritional value relative to calories consumed.
Extended Storage: Properly stored leeks remain viable for 2-3 months, extending winter supply beyond fresh harvests.
Economic Value: Seeds are inexpensive, plants proliferate from minimal investment, and harvest quantities exceed input costs substantially—making leeks excellent value for budget-conscious gardeners.
Getting Started: Timing and Site Selection
Optimal Planting Windows by Region
Leeks exhibit flexibility regarding planting timing, but fall and winter maturity is ideal for maximizing production and flavor.
Northern Regions (USDA Zones 3-5):
- Start indoors: February-March
- Transplant outdoors: May-June
- Harvest: September-November (before hard freeze)
Temperate Regions (USDA Zones 6-7):
- Start indoors: January-February or direct-seed outdoors March-April
- Transplant outdoors: April-May
- Harvest: October-December
Warm Regions (USDA Zones 8-9):
- Start indoors: August-September
- Transplant outdoors: October-November
- Harvest: December-February
Very Warm Regions (USDA Zones 10-11):
- Start indoors: August-September
- Transplant outdoors: October-November
- Harvest: January-March
Sunlight Requirements
Leeks thrive with minimum 6 hours direct daily sunlight. Eight or more hours produces faster growth and larger, premium shanks. South-facing locations ideal for northern regions; east or west-facing suitable for warmer areas. Afternoon shade benefits very warm climate growers.
Soil Preparation and Site Selection
Leeks demand rich, well-draining soil. Heavy clay soils lead to rot and stunted development. Sandy soils drain excessively, reducing leek size.
Ideal Soil Composition:
- Loamy texture that crumbles easily
- Excellent drainage preventing water accumulation
- Rich organic matter (3-5% by volume)
- pH between 6.0-6.8 (neutral to slightly acidic)
- Consistent moisture availability without waterlogging
Soil Preparation Steps:
- Amend with Organic Matter: Incorporate 2-4 inches aged compost, well-rotted manure, or other organic amendments into existing soil. This improves structure, water retention, and nutrient availability.
- Correct pH if Necessary: Test soil pH using inexpensive testing kits available at garden centers. If pH is significantly above or below target range, apply lime to raise pH or sulfur to lower pH 3-4 weeks before planting.
- Ensure Drainage: If soil remains waterlogged after rain, create raised beds or mounds improving drainage. This single modification ensures success where native soil is problematic.
- Incorporate Slow-Release Fertilizer: Mix balanced organic fertilizer (such as 5-5-5 NPK) into planting beds one week before transplanting.
- Final Preparation: Two weeks before planting, loosen soil 10-12 inches deep using a spade or tiller. Allow soil to settle naturally.
Leek Propagation: Seeds vs. Transplants
Starting from Seed
Starting leeks from seed provides economical advantages and variety options unavailable as transplants.
Indoor Seed Starting (Northern/Temperate Regions):
- Sow seeds indoors 8-10 weeks before transplanting outdoors
- Use sterile seed-starting mix in flats or individual cells
- Maintain 70°F soil temperature for optimal germination
- Germination occurs within 10-14 days
- Seedlings require bright light (grow lights ideal)
- Maintain moist but not waterlogged soil
- Transplant to larger containers when first true leaves appear
- Seedlings are ready for outdoor transplanting when 6-8 inches tall with 3-4 true leaves
Advantages: Broader variety selection, lower cost, educational value
Disadvantages: Requires space, attention, and controlled environment
Purchasing Transplants
Garden centers and specialty seed suppliers offer pre-grown leek transplants, eliminating indoor starting requirements.
Advantages: Minimal space requirements, immediate planting, no seed-starting skill required
Disadvantages: Higher cost per plant, limited variety selection, transportation challenges
Direct Seeding Outdoors
In warm regions with extended growing seasons, direct seeding outdoors is possible.
Procedure:
- Sow seeds directly in prepared beds in early spring (as soon as soil is workable)
- Thin seedlings progressively—initially to 4 inches apart, later to final spacing
- This method is labor-intensive due to thinning requirements but economical
Planting Leeks: Step-by-Step Procedure
Step 1: Prepare Planting Area
Clear existing vegetation from planting area. If planting in rows, create furrows 4 inches deep, 30 centimeters (12 inches) apart. If planting in blocks, establish square-foot grids allowing intensive planting.
Step 2: Position Seedlings
Space transplants 15 centimeters (6 inches) apart for standard cultivation. Closer spacing (10 centimeters) produces smaller leeks suitable for whole-leek presentations. Wider spacing (20 centimeters) produces larger individual shanks.
Critical Positioning Technique:
This step determines blanching success. Insert transplants deep within prepared furrows rather than planting at original soil level. Position so only 2-3 inches of leaf material protrudes above soil. This deep planting naturally blanches developing white shank by eliminating light exposure.
Step 3: Backfill Carefully
Return soil gradually, pressing gently to eliminate air pockets. Soil should contact roots completely without compaction restricting root expansion.
Step 4: Initial Watering
Water thoroughly immediately after planting. Soil should be moist 8-10 inches deep—this ensures root-to-soil contact and initiates establishment.
Step 5: Mulch Application
Apply 2-3 inches mulch (straw, shredded leaves, compost) around transplants. Mulch conserves moisture, moderates soil temperature, and suppresses weeds.
Cultivation and Maintenance
Irrigation Management
Leeks require consistent moisture but not waterlogging. This balance is critical.
Watering Strategy:
- Immediately after transplanting: water daily for first 2 weeks
- Established plants: 1-2 inches weekly (through rain and supplemental irrigation combined)
- During periods without rain: deep watering 2-3 times weekly
- Reduce watering in late fall as growth slows
Moisture Monitoring: Insert finger into soil 4 inches deep. Soil should feel moist but not dripping wet. If dry, water. If wet, wait 2-3 days before checking again.
Watering Technique: Apply water directly to soil level, not overhead. This prevents fungal disease and water waste.
Progressive Blanching (Hilling)
Premium white shanks result from blocking light exposure during growth. Progressive hilling—gradually mounding soil around developing plants—creates this blanching effect.
Hilling Schedule:
- Weeks 4-6: Begin piling soil 4-6 inches around plant bases
- Weeks 8-12: Add another 4-6 inches soil around plants
- Final month: Add final 3-4 inches, burying almost all green leaf material
Each hilling application should completely bury all blanked white shank material from previous application, progressively extending the blanched section. By harvest, individual plants are surrounded by substantial soil mounds.
Alternative Method—Cardboard Tube Blanching:
Insert rigid cardboard tubes (newspaper tubes, commercial leek blanchers, or PVC pipes) over developing plants. Tubes block light while allowing continued growth within confined space. This method prevents soil accumulation that some gardeners find laborious.
Fertilization Program
Leeks are moderate feeders requiring consistent nutrient availability.
Monthly Feeding Schedule:
- Weeks 4-6: Apply balanced liquid fertilizer (5-5-5 NPK) or fish emulsion
- Weeks 10-14: Repeat balanced fertilizer application
- Weeks 18-22: Apply nitrogen-rich fertilizer (10-5-5 or similar) to boost green leaf growth
Application Method: Dilute fertilizers to half-strength. Apply to soil level, not foliage. Avoid application during heat stress or drought.
Organic Alternative: Replace commercial fertilizer with compost tea, worm castings, or well-aged compost side-dressing.
Weed Management
Weeds compete for nutrients and water. Regular removal is essential.
Strategy:
- Hand-pull weeds regularly, particularly early season
- Mulch minimizes weed germination substantially
- Avoid cultivation—digging disturbs plant roots and creates ideal conditions for weed establishment
- Post-hilling, weeds are difficult to remove without damaging plants
Pest and Disease Management
Common Pests
Onion Flies (Delia antiqua):
- Identification: Small gray flies laying eggs near plant bases; larvae tunnel into stems
- Damage: Tunneled stems rot; plants wilt and decline
- Prevention: Cover young plants with row covers until established; keep area clean of crop debris
- Treatment: Remove affected plants; apply beneficial nematodes if problem is severe
Leek Moths (Acrolepiopsis assectella):
- Identification: Small moths; larvae create tunnel galleries in leaves
- Damage: Tunneled leaves yellow and wilt
- Prevention: Row covers during vulnerable periods; crop rotation
- Treatment: Remove affected leaves; apply insecticidal soap if necessary
Thrips:
- Identification: Tiny insects causing stippled, silvery leaf damage
- Damage: Reduced photosynthesis and growth
- Prevention: Strong water spray dislodges thrips; insecticidal soap effective
- Treatment: Spray infested plants weekly with neem oil or insecticidal soap
Common Diseases
White Rot (Sclerotium cepivorum):
- Identification: White, fuzzy mold at plant base; plant wilting despite soil moisture
- Prevention: Plant-resistant varieties; avoid replanting leeks or related crops in contaminated soil for 4-6 years; ensure excellent drainage
- Treatment: Remove infected plants immediately; do not compost
Rust (Puccinia porri):
- Identification: Orange/brown pustules on leaf surfaces
- Conditions: Humid, cool conditions
- Prevention: Ensure adequate air circulation; water at soil level only
- Treatment: Remove affected leaves; sulfur dust application; improved air circulation
Botrytis Leaf Blight:
- Identification: Gray-brown leaf lesions in wet conditions
- Prevention: Ensure excellent air circulation; avoid overhead watering
- Treatment: Remove affected leaves; improve ventilation
Integrated Pest Management Approach
- Prevention First: Proper spacing ensures airflow reducing disease. Healthy soil supports vigorous plants resisting pest pressure. Crop rotation eliminates pest and disease buildup.
- Regular Monitoring: Inspect plants twice weekly. Early detection of problems enables immediate intervention preventing widespread damage.
- Physical Removal: Hand-pick large insects. Remove diseased leaves immediately. These simple interventions resolve most problems.
- Organic Interventions: Neem oil, insecticidal soap, and sulfur dust handle most remaining issues without synthetic chemicals.
- Resistant Varieties: Select pest/disease-resistant varieties when available.
Harvesting and Storage
Determining Harvest Readiness
Leeks are typically ready 120-180 days after transplanting. Individual plant development varies—monitor each plant for maturity rather than relying solely on calendar dates.
Harvest Indicators:
- Shanks reach 1.5-2 inches diameter (or desired size)
- White blanched section extends 8-12 inches
- Plants are firm and compact
- Outer leaves may show minor blemishes (normal)
Harvesting Technique
Gentle Extraction: Loosen soil around plant base using a garden fork, working outward to minimize root damage. Carefully extract entire plant from soil. Roots remain attached initially—these are removed during cleaning.
Cleaning: Remove excess soil by hand or gentle water spray. Trim roots to 1 inch or less. Remove yellowed or damaged outer leaves. A whole leek ready for storage or cooking should appear clean, white, and fresh.
Storage Methods
Refrigerator Storage: Place cleaned leeks in plastic bags in the refrigerator’s vegetable drawer. They remain fresh for 2-3 weeks. Freezing blanched leeks extends storage to 6 months.
Root Cellar/Cold Storage: Unwashed leeks store 2-3 months in 35-40°F, high-humidity conditions. Commercial storage often maintains leeks this way.
Processing and Preservation:
- Freezing: Slice into rounds, blanch 3 minutes, cool, freeze
- Dehydrating: Slice thin, dry at 150°F, store in airtight containers
- Fermenting: Slice and ferment using traditional lacto-fermentation methods
Advanced Techniques for Superior Harvests
Variety Selection
American Flag (Classic Variety):
- Long, white shanks up to 12 inches
- Excellent for blanching
- Stores well
- Widely available
King Richard (Early Maturing):
- Matures rapidly (60-70 days)
- Slightly smaller than standard varieties
- Excellent for areas with shorter seasons
- Superior cold hardiness
Bulgarian Giant:
- Produces large individual shanks
- Exceptional flavor
- Requires longer growing season
- Premium quality
Varna:
- Winter-hardy variety
- Thrives through cold periods
- Excellent for overwintering harvest
- Superior flavor after frost
Choose varieties matching your climate zone and growing season length.
Succession Planting
Rather than single planting, stagger transplanting every 3 weeks. This approach creates successive harvests spanning months rather than concentrated gluts.
Container Growing
Leeks grow exceptionally well in containers.
Container Specifications:
- Minimum 10-12 inches deep
- 6-8 inches diameter per plant
- Excellent drainage holes
- Premium potting soil mix with 25% perlite
Advantages: Portability, easily controllable soil, vertical growing on patios, pest/disease isolation
Disadvantages: Smaller plants, more frequent watering, limited scale
Troubleshooting Common Problems
Problem: Weak, Thin Plants
Causes: Insufficient light, overcrowding, poor soil, low fertility
Solutions: Ensure minimum 6 hours direct sun. Thin plants to proper spacing. Amend soil with compost. Increase fertilizer applications.
Problem: Yellow Leaves
Causes: Nitrogen deficiency, waterlogging, disease
Solutions: Apply nitrogen-rich fertilizer. Verify drainage prevents waterlogging. Inspect for disease symptoms.
Problem: Leeks Bolt Prematurely to Seed
Causes: Temperature stress, day length, poor conditions
Solutions: Select bolt-resistant varieties. Plant at appropriate timing for your region. Maintain consistent moisture and fertility.
Problem: Minimal White Shank Development
Causes: Insufficient blanching, harvesting too early
Solutions: Implement aggressive hilling. Leave plants longer before harvesting.
Problem: Rot at Plant Base
Causes: Waterlogging, disease, improper planting depth
Solutions: Ensure excellent drainage. Verify plants are disease-free. Replant properly positioned transplants.


Seasonal Extension and Year-Round Production
Growing in Cold Regions
Many leek varieties tolerate freezing temperatures remarkably well. Implement these strategies:
- Row Covers: Lightweight fabric covers protect plants through light freezes
- Hoop Houses: Simple PVC structures with plastic sheeting extend seasons 4-6 weeks
- Mulching: Heavy mulch application insulates soil, allowing harvest even through hard freezes
- Cold-Hardy Varieties: Select varieties specifically bred for winter hardiness
Very Warm Climate Strategies
In warm regions, leeks experience challenges:
- Shade Cloth: 30-50% shade cloth prevents bolting in summer heat
- Late-Season Planting: Plant in late summer for fall/winter harvest rather than spring planting
- Heat-Tolerant Varieties: Select varieties with documented heat tolerance
Conclusion: Reliable Leek Production for Year-Round Supply
Leeks represent remarkable value in home vegetable production. Reliable, forgiving, and productive, they deliver abundant harvests with minimal inputs. The blanched white shanks resulting from proper technique rival farmer’s market premium leeks in appearance and quality. Fall and early winter availability extends your garden’s production season precisely when fresh vegetables become scarce.
Begin with quality seed or transplants. Prepare soil with compost and organic amendments. Plant at appropriate timing for your region. Implement progressive hilling for premium white shanks. Maintain consistent moisture and fertility. Monitor for pests and diseases, addressing problems early. Harvest when plants reach desired size.
Within one season, you’ll develop expertise producing spectacular leeks. Subsequent seasons will improve further as you refine techniques specific to your microclimate and preferences.
Ready to plant leeks? This week, research leek varieties matching your growing zone. Source seeds or transplants from reputable suppliers. Prepare planting beds with organic amendments. Calculate planting dates based on your region’s frost dates and desired harvest timing. Begin your leek cultivation journey. Within months, you’ll harvest beautiful, flavorful leeks surpassing supermarket quality at a fraction of commercial costs.
You may also like: The Complete Guide to Growing Garlic at Home: Planting to Harvest