

Introduction: Why Soil Drainage Determines Agricultural Success
Water—essential for plant growth—becomes destructive when it accumulates in soil. Waterlogged conditions create an oxygen-depleted environment where root systems suffocate, fungal diseases proliferate, and nutrient uptake fails. The consequence: stunted growth, reduced yields, crop failure, and significant financial losses.
Yet many North American farmers and gardeners don’t recognize drainage problems until productivity has already suffered. Some operate for years with chronically wet soils, accepting below-potential yields without realizing that proper drainage could dramatically improve outcomes.
The good news: soil drainage is entirely manageable through proven, economical techniques requiring minimal investment compared to the productivity gains they deliver. Whether you manage 50 acres of clay-heavy bottomland, operate a vegetable farm on poorly-draining soil, or maintain a residential garden plagued by standing water, drainage solutions exist at every scale and budget level.
This comprehensive guide walks you through recognizing drainage problems, understanding drainage options, and implementing systems that transform waterlogged soil into productive growing medium—yielding healthier plants, better harvests, and improved profitability.
Understanding Soil Water Dynamics: The Science Behind Drainage Problems
Why Water Accumulates in Soil
Soil contains three types of water: gravitational water (drains freely), capillary water (held by soil particles), and hygroscopic water (bound to mineral surfaces). Problems arise when gravitational water cannot drain efficiently, accumulating in soil pores where roots need oxygen.
Soil Texture and Drainage Challenges
Different soil types drain at dramatically different rates:
Sandy Soils – Large pores allow rapid drainage; water moves through readily but doesn’t retain adequate moisture for plant uptake.
Loamy Soils – Ideal balance of pore sizes; water drains adequately while retaining enough for plant availability.
Clay Soils – Tiny, flattened particles create minimal pore space; water drains extremely slowly or not at all, leading to waterlogging and compaction.
Many agricultural regions, particularly in the Midwest, Eastern states, and parts of the Pacific Northwest, have naturally high clay content. Add heavy rainfall or irrigation, and drainage problems become inevitable without intervention.
Subsurface Water Challenges
Beyond surface drainage, high water tables present ongoing challenges. In some regions, groundwater sits within 12-24 inches of the surface—excellent for plant availability but catastrophic if closer, as it saturates the root zone and prevents oxygen penetration.
Warning Signs: When Your Soil Has a Drainage Problem
Recognizing drainage issues early allows intervention before productivity suffers significantly. Watch for these telltale indicators:
Visual and Olfactory Signs of Poor Drainage
Standing Water After Rainfall – The most obvious sign. If puddles remain 24+ hours after rain, your soil cannot move water efficiently. In clay-heavy soils, water may persist for days or weeks.
Persistent Soil Wetness – Soil remains soggy or muddy throughout growing season despite adequate time for drying. Even in spring, properly-draining soil should be workable; chronically wet soil indicates drainage failure.
Sticky, Compacted Soil – Soil forms dense, brick-like clods when wet; breaks into fine powder when dry. This instability indicates poor structure—typically accompanied by drainage problems.
Unpleasant Soil Odor – Rotten, sulfurous, or musty smells signal anaerobic (oxygen-free) conditions where soil microorganisms decompose organic matter without oxygen. This warns of extreme waterlogging.
Visible Mold, Moss, or Algae Growth – Surface fungal growth thrives in constantly moist conditions. While minor moss growth is normal, extensive coverage indicates persistent wetness.
Plant Health Indicators
Root Rot Symptoms – Pull plants and inspect roots. Healthy roots are white or light-colored and firm. Waterlogged soils produce dark, soft, mushy roots that deteriorate easily—classic root rot.
Wilting Despite Wet Soil – Plants wilt from oxygen deprivation, a counterintuitive symptom. Gardeners frequently assume the wilted plant needs water, applying more moisture and worsening conditions. This contradictory situation (wet soil + wilting plants) clearly signals drainage failure.
Stunted Growth and Yellowing Leaves – Prolonged waterlogging causes chlorosis (yellowing), stunted development, and premature senescence as plants struggle in hostile growing conditions.
Disease Proliferation – Fungal and bacterial diseases thrive in wet soil. Damping-off in seedlings, root rot on vegetables, and fungal leaf diseases cluster on poorly-draining soils.
Crop Failure in Specific Areas – If certain field sections consistently underperform despite identical management, drainage problems are the likely culprit. Low spots where water accumulates will show obvious yield loss.
Assessing Your Drainage Situation: Diagnostic Methods
Before implementing drainage solutions, properly diagnose your specific situation.
The Percolation Test – Simple But Effective
The percolation test (often called a “perc test”) measures how quickly soil accepts and drains water.
Conducting a Percolation Test:
- Dig a hole – Excavate 12 inches deep and 6 inches in diameter in the problem area
- Fill with water – Pour water to the top and let it drain completely
- Refill and measure – Fill again and measure how many inches of water drain in one hour
- Interpret results:
- Less than 1 inch per hour – Very poor drainage; significant intervention needed
- 1-2 inches per hour – Poor drainage; surface and subsurface systems recommended
- 2-4 inches per hour – Marginal; surface drainage may help
- Over 4 inches per hour – Adequate drainage; problems likely caused by topography rather than soil texture
Evaluating Soil Texture
Simple hands-on assessment provides valuable information:
The Ribbon Test:
- Take moist soil and roll it between your hands
- Try to form a ribbon extending from your fist
- Ribbon extends 2+ inches – High clay content; poor drainage expected
- Ribbon forms but breaks – Mixed clay and sand; moderate drainage challenges
- No ribbon forms – Sandy soil; drainage usually adequate
Checking Water Table Depth
In regions with high water tables, understanding groundwater proximity is essential:
Simple Water Table Assessment:
- Dig a hole 24+ inches deep in your problem area during wet season
- If water appears in the hole within 24 hours, your water table is shallow
- Measure distance from surface to water level—this indicates potential subsurface drainage intervention depth
Types of Soil Drainage Systems: Choosing the Right Approach
Drainage solutions fall into two primary categories: surface drainage (removing visible water) and subsurface drainage (managing groundwater and deep soil moisture).
Surface Drainage: Addressing Visible Water Accumulation
Surface drainage systems remove water that pools visibly on soil or remains in upper soil layers.
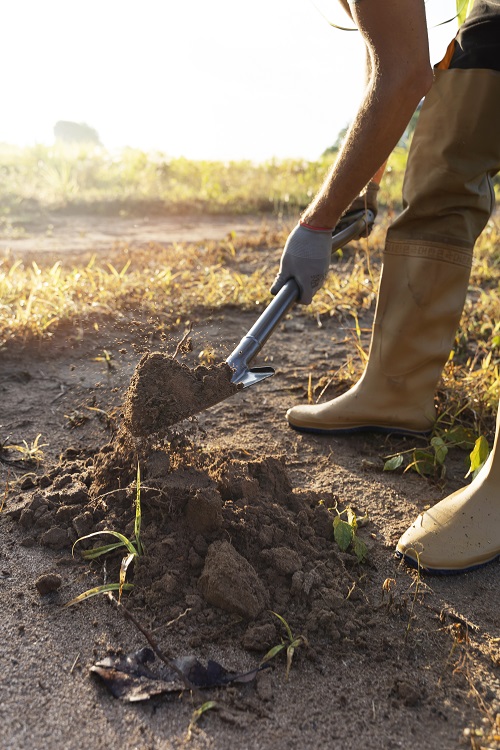
Method 1: Open Ditches and Channels
Description: Excavated channels guide water away from agricultural areas toward natural drainage outlets (streams, swales, or constructed detention areas).
Best For: Large agricultural fields, pastures, and areas where aesthetics are secondary to function.
Advantages:
- Low cost ($500-$2,000+ depending on scale)
- Easy to install and maintain
- Effective for high-volume water removal
- Dual purpose: can serve as boundaries or field divisions
Disadvantages:
- Reduces usable field area (ditches occupy land)
- Requires periodic maintenance (vegetation removal, sediment dredging)
- Creates safety hazards
- Limited effectiveness in clay soils
Installation:
- Excavate channels 30-50 cm deep with gentle slopes (1-2% grade minimum)
- Orient channels to lead water downslope toward natural outlets
- Space multiple channels parallel to each other if needed for entire field coverage
- Maintain smooth slopes allowing water to flow without stagnating
Method 2: Raised Beds and Elevated Planting
Description: Elevating growing areas above the water table creates natural drainage while improving root environment.
Best For: Vegetable gardens, market gardens, and small-scale operations on poorly-draining land.
Advantages:
- Excellent for severe drainage problems
- Improved soil warming in spring
- Better aesthetics than exposed channels
- Ideal for community gardens and residential applications
- Simple to construct and modify
Disadvantages:
- Higher construction cost ($1,500-$5,000+ for substantial beds)
- Requires quality soil import (expense and logistics)
- More labor-intensive than open ditches
- Water loss in very hot climates due to exposure
Construction:
- Build frames 18-30 inches high using wood, composite, or metal
- Fill with quality soil mix (topsoil, compost, peat moss combination)
- Install landscape fabric beneath to prevent mixing with underlying poor soil
- Space appropriately for equipment access and crop management
Method 3: Contoured Terracing and Land Shaping
Description: Reshaping terrain to eliminate low spots and redirect surface water flow.
Best For: Sloped land where topographic problems create localized waterlogging despite decent soil drainage.
Advantages:
- One-time intervention with lasting results
- Improves water retention on slopes while eliminating problematic depressions
- Supports erosion control
Disadvantages:
- Requires heavy equipment operation
- High initial cost ($2,000-$10,000+)
- Significant earth movement involved
- Best performed before establishing permanent plantings
Implementation:
- Hire surveyor to map problem areas and design optimal contours
- Use laser grading and heavy equipment for precise reshaping
- Plan to work with existing topography rather than completely flattening (which creates surface damage and ongoing problems)
Method 4: Perimeter Swales and Bioswales
Description: Vegetated channels directing water through strategic corridors while filtering and slowing flow.
Best For: Larger properties integrating drainage with stormwater management and erosion control.
Advantages:
- Combines drainage with water quality improvement
- Establishes native vegetation habitat
- Aesthetically integrated with landscape
- Slows water movement reducing erosion
Disadvantages:
- Requires adequate space for installation
- Effectiveness depends on vegetation establishment
- Ongoing maintenance for vegetation management
Construction:
- Design channels to follow natural contours
- Excavate 12-18 inches deep with gentle slopes
- Plant with native vegetation adapted to periodic saturation
- Incorporate check dams (logs, stone) to further slow water movement
Subsurface Drainage: Managing Deep Soil Moisture
Subsurface drainage systems remove water accumulating in deeper soil layers, addressing problems beyond surface solutions’ capacity.
Method 1: Perforated Drain Pipes (French Drains)
Description: Perforated pipes surrounded by gravel collect groundwater and conduct it to discharge points.
Best For: Managing high water tables, agriculture on clay soils, and areas with seasonal waterlogging.
Advantages:
- Highly effective for groundwater management
- Can be installed at any depth needed
- Invisible system maintaining aesthetic appeal
- Works in any soil type
Disadvantages:
- Higher cost ($1,500-$5,000+ depending on system length and depth)
- Requires proper installation—mistakes reduce effectiveness significantly
- Maintenance access needed for occasional cleaning
- Professional installation often recommended for large systems
Specifications and Installation:
Pipe Selection:
- Schedule 40 PVC pipe (most common and affordable)
- Corrugated polyethylene pipe (more flexible, adequate for many applications)
- Clay tile pipe (traditional but less common in new installations)
- Typical diameter: 4-inch for most agricultural applications
Perforation Pattern:
- Holes drilled in lower half to three-quarters of pipe (water enters from below, exits through top perforations)
- Typical perforation: 1/2-inch diameter holes spaced 12 inches apart
- Pre-perforated agricultural drain pipe available commercially (easier than DIY drilling)
Installation Steps:
- Excavate trench – Dig to appropriate depth (typically 24-48 inches depending on water table and desired impact zone)
- Establish slope – Trench must slope toward discharge point (minimum 1% grade; 2-3% ideal)
- Layer gravel – Place 4-6 inches of coarse gravel (drainage rock) in trench bottom
- Position pipe – Lay perforated pipe on gravel with perforations facing downward
- Cover pipe – Surround with additional drainage rock (6-12 inches)
- Install geotextile – Lay landscape fabric over gravel to prevent soil infiltration (prevents clogging)
- Top layer – Add topsoil and grade to surface
Discharge Planning:
- Pipes must outlet to lower-elevation drainage point (stream, swale, storm drain)
- Daylight the drain pipe at discharge point to allow gravity flow
- Install clean-out tees at regular intervals (typically every 100-150 feet) for maintenance access
Method 2: Subsurface Sand/Gravel Layers
Description: Amendments incorporating sand and gravel beneath cultivated soil layer improve drainage and moisture retention balance.
Best For: Existing plantings, small garden areas, and where excavation for drain pipes is impractical.
Advantages:
- Less intrusive than pipe systems
- Improves soil structure while addressing drainage
- Can be implemented gradually
Disadvantages:
- Limited effectiveness for severe waterlogging
- Requires material import and incorporation
- Moderate cost and labor intensity
Implementation:
For New Beds or Gardens:
- Excavate 12-18 inches deep
- Install 4-6 inches of drainage rock (1-2 inch diameter gravel)
- Add landscape fabric layer
- Install another 4-6 inches of coarse sand
- Top with quality growing soil
For Existing Plantings:
- Till 8-12 inches of coarse sand into upper soil layer
- Incorporate 3-4 inches of sand into the 12-18 inch depth
- Let system settle for season before assessment
Method 3: Sump Pits and Drainage Catch Basins
Description: Underground catchments collect groundwater with pump systems moving water to appropriate discharge locations.
Best For: Areas where gravity drainage is impossible, basement areas, and localized problem zones.
Advantages:
- Works where gravity drainage is impractical
- Invisible installation
- Can integrate with existing pump systems
Disadvantages:
- Ongoing electricity costs for pump operation
- Maintenance required (sediment removal, pump servicing)
- Higher operating costs than gravity systems
Basic System:
- Excavate sump pit (typically 3-4 feet diameter, 3-5 feet deep) lined with perforated pipe and gravel
- Install submersible pump sized to handle anticipated inflow volume
- Connect pump discharge to appropriate outlet (surface drainage, agricultural area)
- Install float valve to activate pump when water level rises
Step-by-Step Implementation: From Assessment to Installation
Phase 1: Detailed Site Analysis (Days 1-3)
Conduct Soil Testing:
- Perform percolation tests in multiple locations within problem area
- Conduct ribbon test to evaluate soil texture
- Map existing drainage patterns and water flow direction
- Locate water table depth (if applicable) during wet season
Evaluate Topography:
- Sketch field contours noting high and low areas
- Identify natural drainage outlets
- Assess proximity to structures, utilities, and property lines
- Document any existing drainage infrastructure
Consult Professional Resources:
- Contact county soil conservation office for drainage recommendations
- Access USDA soil survey maps for official soil classifications
- Consult local Extension office for regional drainage guidance
- Interview neighbors about their drainage solutions
Phase 2: System Design and Planning (Days 4-7)
Determine Drainage Type Needed:
- Surface drainage alone sufficient? (If water doesn’t persist beyond 24 hours post-rain)
- Subsurface system necessary? (If water table is high or soil texture problematic)
- Hybrid system recommended? (Often most effective for severe problems)
Design Specific System:
- Calculate ditch lengths and elevations if using open ditches
- Plan pipe route, depth, and discharge location if using drain pipes
- Determine required material quantities
- Estimate cost and timeline
Secure Necessary Approvals:
- Check local regulations (many counties regulate drainage installations)
- Verify no conflicts with utility locations (call before you dig)
- Confirm environmental compliance (some jurisdictions regulate wetland drainage)
- Obtain necessary permits
Phase 3: Material Procurement (Days 8-10)
Gather Supplies:
For Surface Drainage:
- Gravel/stone (drainage rock): 10-20 cubic yards per 100 feet of channel
- Landscape fabric (optional): 100+ linear feet
- Soil for backfill
For Subsurface Systems:
- Perforated drain pipe (Schedule 40 PVC): Calculate linear footage needed
- Drainage rock (1-2 inch): 3-5 cubic yards per 100 feet of drain
- Sand (coarse): 2-3 cubic yards per 100 feet of drain
- Landscape fabric: Linear footage matching system length
- Geotextile filter sock (optional): For separation and added filtration
Equipment Rental:
- Excavator (3-4 cubic yards for subsurface systems)
- Laser level (if implementing properly-sloped systems)
- Trench digger (for parallel ditch systems)
Phase 4: Installation (Days 11-21, depending on scale)
Surface Drainage Installation:
- Mark ditch centerlines using string and stakes
- Excavate to designed depth and slope (verify slope with laser level)
- Remove excavated soil to stockpile area
- Smooth ditch bottom and sides
- Install perimeter swales or contour features if using that method
- Grade to ensure proper water flow
- Establish vegetation if using bioswales
Subsurface Drainage Installation:
- Excavate trench to designed specifications
- Verify slope with laser level (critical step—improper slope = ineffective system)
- Distribute drainage rock layer in trench bottom (4-6 inches)
- Position perforated pipe with perforations facing down
- Cover pipe with additional drainage rock (6-12 inches)
- Install landscape fabric over rock layer
- Backfill with excavated soil, grading to level
- Test system by running water through it (should flow to discharge without pooling)
- Install clean-out access points if applicable
Phase 5: Testing and Monitoring (Weeks 4-8)
Initial System Verification:
- Conduct rainfall events or apply water to test drainage function
- Observe water movement and pooling behavior
- Adjust grades or system components if necessary
- Document results for baseline comparison
Seasonal Monitoring:
- Monitor after significant rainfall events
- Check for proper water discharge
- Assess plant response to improved drainage
- Note any maintenance needs
Complementary Practices: Enhancing Drainage Effectiveness
Soil Amendment and Structure Improvement
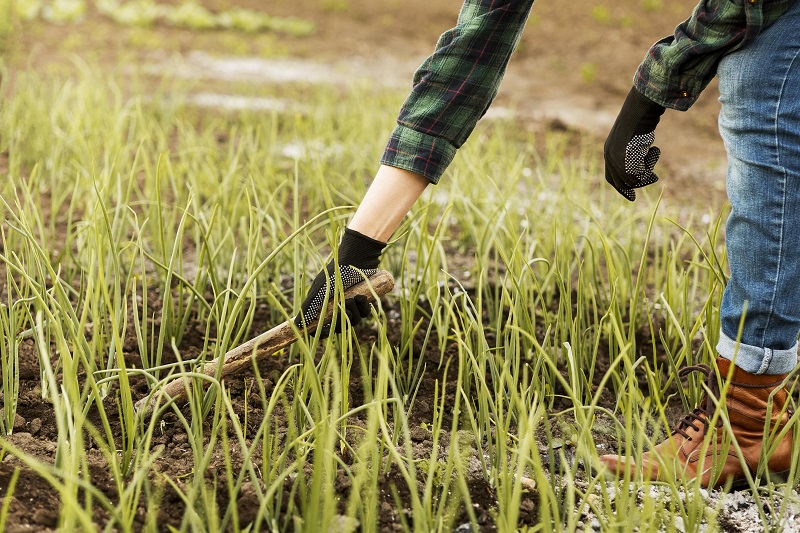
Organic Matter Integration – Adding compost, aged manure, and other organic materials improves soil structure, increasing aggregate stability and pore spaces. Well-structured soil drains better even without physical drainage systems.
Sand Incorporation – In clay-heavy soils, incorporating coarse sand (never fine sand, which compacts) opens pore space, improving drainage and aeration.
Biological Amendment – Plants with deep root systems (vetiver grass, comfrey) create channels improving water movement. Cover crops and perennial plantings build soil structure over time.
Traffic Management
Equipment Compaction Minimization – Heavy equipment on wet soil destroys soil structure and reduces drainage effectiveness. Restrict field operations to periods when soil moisture allows equipment passage without compaction. Use controlled traffic farming (keeping equipment on dedicated paths) to minimize overall soil damage.
Controlled Traffic Farming – Advanced operations implement systematic equipment paths, concentrating compaction to specific zones while leaving remainder uncompacted. This dramatically preserves soil structure and drainage.
Maintenance Practices
Drain Pipe System Maintenance:
- Clean debris from intake areas annually
- Inspect clean-out access points for sediment accumulation
- Clear discharge outlets preventing backups
- Flush pipes every 3-5 years using high-pressure water
Ditch and Channel Maintenance:
- Remove vegetation overgrowth semiannually
- Clear sediment accumulation annually or as needed
- Repair eroded banks
- Maintain proper grades preventing water stagnation


Common Drainage Mistakes to Avoid
Mistake 1: Installing Drainage Without Addressing the Outlet
A perfectly installed drain leading nowhere creates collected water with no escape route—essentially recreating the original problem in a different location. Always plan complete systems directing water to appropriate outlets before installation begins.
Mistake 2: Improper Slope Specifications
Drainage systems without adequate slope (minimum 1%, ideally 2-3%) allow water to sit in low spots rather than flowing toward discharge. Slope verification using laser levels is essential—never eyeball slope specifications.
Mistake 3: Using Inappropriate Material
Fine sand in drain systems clogs quickly; plastic pipes smaller than 4 inches limit flow capacity; gravel too small causes particle infiltration. Using specified materials appropriate for the application prevents system failure.
Mistake 4: Neglecting Maintenance
Drainage systems accumulate sediment, vegetation overgrows channels, and debris clogs inlets. Regular maintenance—often requiring just 2-4 hours annually—preserves system function for decades.
Mistake 5: Implementing Without Professional Consultation
While simple drainage projects succeed with DIY approaches, complex systems benefit from surveyor input and professional design. Spending $300-$500 on professional consultation often saves thousands in avoided system failures.
Calculating Drainage System Cost-Benefit
System Costs by Type and Scale
Surface Ditching (Small Area: 2-3 acres):
- Material cost: $500-$2,000
- Equipment rental: $300-$600
- Labor: DIY or $800-$2,000 professional
- Total: $600-$4,600
Raised Beds (Medium Garden: 20+ beds):
- Materials: $1,500-$4,000
- Labor: $500-$2,000
- Total: $2,000-$6,000
French Drain System (Large Field: 500+ linear feet):
- Materials: $2,000-$5,000
- Equipment: $500-$1,500
- Labor: $1,500-$5,000 professional
- Total: $4,000-$11,500
Productivity Improvements Justifying Investment
Baseline Comparison:
- Waterlogged field productivity: 40-60% of potential
- Post-drainage productivity: 90-100% of potential
- Improvement: 30-60% yield increase possible
Financial Example:
- 100-acre field with drainage issues
- Current yield: 120 bushels corn/acre (vs. 170 potential)
- Improvement potential: 50 additional bushels/acre
- Value at $4/bushel: $20,000 additional revenue
- French drain system cost: $5,000-$8,000
- Payback period: Single growing season
For vegetable or specialty crops with higher value, payback occurs even faster.
Conclusion: Drainage as Foundation for Agricultural Productivity
Soil drainage isn’t glamorous—it lacks the visible appeal of new equipment or genetic improvements. Yet few agricultural investments deliver higher return than solving drainage problems. Waterlogged soil produces waterlogged returns; well-drained soil produces abundant productivity.
The investment required—whether $1,000 for a small garden system or $20,000 for a substantial farm installation—typically returns itself in a single season through improved yields, reduced disease pressure, extended harvest windows, and lower labor costs in fields easier to work.
Beyond economics, proper drainage creates agricultural resilience. Well-drained soils maintain productivity through both wet and dry periods, support consistent crop establishment, and build long-term soil health that sustains productivity across decades.
Your Next Steps:
- Diagnose Your Situation – Conduct percolation tests and assess drainage problems in problem areas
- Research Regional Solutions – Contact county Extension office for recommendations matching your specific soil and climate
- Design Your System – Either DIY simple surface drainage or consult professionals for complex subsurface systems
- Start With Pilot Projects – Implement on smaller areas to prove effectiveness before full-scale adoption
- Establish Maintenance Routine – Plan for regular system maintenance ensuring decades of reliable function
Don’t accept waterlogged soils as permanent constraints. Drainage solutions—accessible, affordable, and proven—are available for every situation. Transform your problem areas into productive zones, one well-drained field at a time.
You may also like: Green Manure Guide: Boost Soil Health & Cut Fertilizer Costs | Sustainable Agriculture