
Introduction: Gardening Without Sacrificing Your Living Space
Urban living and suburban space constraints have created a genuine disconnect: millions of people want to grow their own food, yet lack the traditional backyard garden space to do it. Apartment dwellers watch enviously as neighbors with sprawling properties grow tomatoes and basil. Small-lot homeowners maximize yard space wondering where to fit a vegetable garden. Renters face restrictions preventing ground-level planting entirely.
Vertical gardening solves this paradox. By growing upward instead of outward, you transform unused wall space, fence sections, patios, and even interior corners into productive growing zones. This proven cultivation method multiplies growing capacity—a 4-by-8-foot wall can produce as much as a much larger traditional garden when managed strategically with vertical systems.
The appeal extends beyond space efficiency. Vertical gardens provide superior accessibility (no bending to ground level), improved air circulation reducing disease pressure, easier harvesting and maintenance, and compelling visual appeal that transforms bare walls and empty patios into vibrant green spaces. For urban farmers, apartment gardeners, and anyone seeking fresh herbs and vegetables without dedicated garden land, vertical growing is transformative.
This comprehensive guide explores vertical gardening systems, practical DIY designs, optimal plant selections, and maintenance strategies that deliver abundant harvests from even the most space-constrained locations. Whether you want fresh basil for your kitchen, salad greens for your family, or simple living plant display, vertical gardening makes it entirely achievable.
What Is Vertical Gardening? Understanding the System
Vertical gardening refers to any growing system where plants are cultivated in upright arrangements rather than traditional horizontal beds. This encompasses an enormous range of approaches—from simple single-plant wall-mounted containers to sophisticated multi-tier systems producing hundreds of plants from a compact footprint.
How Vertical Gardening Works
Plants typically grow in containers, pockets, or planting modules arranged vertically—stacked upward or arranged in tiered rows. Water typically drains downward through layers, or independent irrigation systems deliver moisture directly to each planting zone. Roots remain confined to small containers or growing media, allowing plants with modest root systems to thrive in limited soil volumes.
The vertical orientation serves multiple purposes: maximizing sunlight exposure to each plant through improved air circulation, concentrating plants densely in limited floor space, improving accessibility for harvesting and maintenance, and creating striking visual displays that transform everyday spaces.
Who Benefits Most from Vertical Gardens
Apartment and Condo Dwellers – Limited or no outdoor space makes vertical systems the only practical option for home food production.
Urban Farmers – Rooftop and balcony space expands dramatically when organized vertically rather than horizontally.
Small-Lot Homeowners – Even 4-by-8-foot wall space produces substantial harvests without consuming precious yard real estate.
Patio and Deck Gardeners – Vertical systems anchor patio perimeters and pergolas, creating productive zones in otherwise ornamental space.
Renters – Many vertical systems mount without permanent installation, allowing portable food production across different properties.
Community and Commercial Gardens – Limited plot space serves more gardeners when systems grow vertically.
Accessibility-Focused Gardeners – Elevated planting eliminates bending, kneeling, and ground-level strain for gardeners with mobility limitations.
Benefits That Extend Beyond Space Savings
While space efficiency is vertical gardening’s most obvious advantage, multiple additional benefits make this approach compelling even for gardeners with traditional space available.
Maximized Harvest per Square Foot
A standard 4-by-8-foot ground-level bed produces roughly 32 square feet of planting area. A vertical system occupying identical wall space while extending upward eight feet produces equivalent or superior harvests in 32 square feet of wall surface, freeing ground space for pathways, seating, or additional growing systems.
Superior Growing Conditions
Vertical systems inherently provide several growing advantages:
Improved Air Circulation – Elevated plants experience better airflow around foliage, reducing fungal disease pressure substantially. Powdery mildew, leaf spot, and other moisture-dependent diseases decrease significantly in vertical systems.
Enhanced Light Penetration – Unlike dense ground-level plantings where lower leaves sit in shade, vertical systems expose foliage to direct light, improving photosynthesis and vigor.
Better Drainage – Gravity naturally drains excess water downward, preventing waterlogging. Vertical systems rarely experience the root rot and soil-borne pathogens affecting poorly-drained traditional gardens.
Reduced Pest Pressure – Elevated growing reduces some pest populations; slugs and groundborne insects struggle accessing higher plants. However, some flying insects (like whiteflies) may access vertical gardens more readily, requiring attention.
Aesthetic and Lifestyle Benefits
Beyond production, vertical gardens transform spaces emotionally and visually:
Living Walls – Bare concrete walls transform into vibrant green displays. Vertical gardens create biophilic spaces—environments incorporating natural elements that measurably improve wellbeing and reduce stress.
Air Quality Improvement – Plant foliage actually improves indoor and enclosed-space air quality through photosynthetic gas exchange and dust particle interception, though effects are modest unless systems are substantial.
Neighborhood Impact – Visible vertical gardens inspire neighbors, demonstrate urban agriculture viability, and contribute to community beautification.
Edible Landscaping – Productive plants add visual interest comparable to decorative plants while providing actual food production—maximizing landscape utility.
Economic Advantages
Fresh Produce Availability – Growing herbs and vegetables eliminates consistent grocery expenses. Fresh basil alone, regularly purchased at $3-$5 per bundle, can cost $36-$60 annually—easily recouped through home production.
Chemical-Free Cultivation – Home-grown produce avoids pesticide residues and artificial preservation treatments affecting commercial produce.
Reduced Waste – Home harvesting produces exactly needed quantities, eliminating produce waste from over-purchasing.
Planning Your Vertical Garden: Essential Considerations Before Building
Successful vertical gardens require thoughtful planning matching systems to specific site conditions. Assess these factors before investing time and resources:
Light Assessment – Your Critical Foundation
Sunlight Requirements by Plant Type:
Most edible herbs and vegetables require substantial direct sunlight:
- Full Sun Plants (basil, oregano, thyme, lettuce, arugula, tomatoes, peppers): Minimum 6-8 hours direct sunlight daily; 8-10 hours ideal
- Partial Shade Tolerant (mint, parsley, spinach, chard): 4-6 hours sufficient; some afternoon shade beneficial in hot climates
- Shade Tolerant (chives, sorrel, certain leafy greens): 3-4 hours acceptable
Light Mapping Exercise:
Observe your intended vertical garden location at different times—morning (8 AM), midday (12 PM), and afternoon (4 PM)—noting direct sun exposure and shade patterns. Track changes through seasons; summer sun patterns differ dramatically from spring and fall. Even south-facing locations experience winter shade if buildings or trees block low-angle winter sun.
Supplemental Lighting Options:
If natural light proves insufficient, supplemental grow lights extend growing seasons and enable indoor vertical gardening. Full-spectrum LED panels (popular increasingly as costs decline) provide adequate plant-growing wavelengths. Position lights 12-18 inches above foliage; operate 12-16 hours daily depending on plant requirements.
Ventilation and Air Circulation
Good air movement prevents fungal disease, strengthens plant stems, and improves overall vigor. Vertical systems on open patios naturally benefit from air circulation. Interior locations or enclosed balconies may require supplemental air movement through simple fans.
Assessment: Observe plant movement in wind; gentle leaf movement indicates adequate circulation. Stagnant, humid conditions (no air movement, sheltered locations) increase disease risk significantly.
Water Access and Delivery Planning
Vertical gardens require water-delivery consideration before installation:
Watering Method Options:
- Hand Watering: Simple, economical, requires daily presence or moisture-sensitive monitoring
- Soaker Systems: Drip lines deliver precise water to individual plants; requires timer control for consistent moisture
- Reservoir Systems: Self-watering systems with built-in water storage reduce frequency to every few days; initially more expensive but reduces labor
- Wicking Systems: Capillary action from water reservoir maintains soil moisture passively; works well for smaller systems
Proximity to Water Source:
Locate vertical gardens within practical hose-reach or plan for hand-carrying water. Long-distance water transport becomes impractical quickly, especially if daily watering is necessary.
Support Structure Evaluation
Physical infrastructure must support vertical garden weight:
Load Calculations:
A typical container with moist soil weighs 10-15 pounds. A vertical system with 20 plants carries 200-300 pounds—substantial weight requiring proper support.
Mounting Options:
- Wall-Mounted Systems: Require wall framing capable of supporting loads (NOT drywall alone); stud-mounted brackets or concrete anchors essential
- Freestanding Structures: Trellises, A-frames, and shelving units require stable feet and wind resistance
- Railing-Mounted Systems: Balconies and porch railings can support modest systems if properly designed
- Pergola Integration: Existing pergolas provide natural support for hanging systems
Professional Consultation:
For walls or installations exceeding modest scale, consult structural information or test-mount small sections before full installation. Catastrophic failure of overloaded systems creates safety hazards and property damage.
Five Practical Vertical Garden Systems: From Simple to Sophisticated
System 1: Wooden Pallet Wall Garden – The Rustic Classic
Description: Repurposed wooden pallets mounted on walls or fences, with plants inserted between slats or in mounted containers.
Best For: Rustic aesthetics, budget-conscious builders, and herb production.
Advantages:
- Extremely affordable ($0-$50 for salvaged pallets; $50-$150 for new treated pallets)
- DIY-friendly construction requiring basic carpentry skills
- Adaptable to various wall types and locations
- Substantial capacity (20-30 plants possible on single pallet)
- Rustic appearance appeals to many aesthetic preferences
Disadvantages:
- Limited lifespan (untreated pallets rot within 2-3 years; treated ones last longer)
- Heavy when waterlogged (requires robust wall mounting)
- Irrigation challenging; water running off upper plants wastes resources
- Susceptible to pest harboring in pallet crevices
Construction Steps:
- Source Quality Pallets – Select pallets marked “HT” (heat-treated); avoid “MB” stamped pallets (treated with toxic methyl bromide)
- Prepare the Pallet – Sand rough surfaces; apply rot-resistant sealant if desired
- Create Backing – Attach landscape fabric to pallet back, stapling firmly to prevent soil escape
- Line Interior – Additional landscape fabric layer prevents premature clogging
- Mount Securely – Attach to walls using heavy-duty brackets or mounting systems; ensure full weight support
- Fill Growing Medium – Use quality potting soil or planting mix
- Plant Densely – Insert seedlings between slats; space appropriately for mature size
Ideal Plants: Herbs (basil, oregano, thyme, mint), lettuces, arugula, sedums (succulents).
System 2: PET Bottle Wall Planter – The Eco-Friendly Budget Option
Description: Repurposed plastic beverage bottles mounted on frames or directly to walls, creating pockets for individual plants.
Best For: Budget-conscious gardeners, sustainability advocates, and small-scale trials.
Advantages:
- Extremely economical (free if using discarded bottles)
- Highly accessible; nearly everyone can source materials
- Lightweight (critical for renters and limited-support walls)
- Educational value; demonstrates recycling principles
- Modular design allows easy expansion or rearrangement
Disadvantages:
- Small volume limits plant size; suitable only for herbs and small greens
- Limited aesthetic appeal (plastic appearance; some find unattractive)
- UV degradation requires periodic replacement
- Capacity typically 20-40 plants maximum per installation
- Prone to debris accumulation; interior cleaning challenging
Construction Steps:
- Clean Bottles Thoroughly – Remove all labels and residue; ensure proper drying
- Cut Planting Openings – Cut 4-5 inch diameter circles on bottle sides using knife or heated tool
- Create Drainage – Drill 2-3 small holes in bottle bottom for water escape
- Mount Support Structure – Create frame using PVC pipe, wood, or rope, arranged vertically
- Secure Bottles – Attach bottles to structure using hose clamps, cable ties, or rope threading through openings
- Fill with Growing Medium – Use quality potting mix; add nutrient-balanced fertilizer initially
- Plant Seedlings – Insert small plants through openings
Watering Strategy: Top bottles function as water reservoirs; open tops allow hand watering or drip irrigation feeding. Water gradually percolates downward through system, irrigating lower bottles.
Ideal Plants: Herbs, small lettuces, decorative succulents, trailing plants.
System 3: Wall-Mounted Fabric Pocket Organizer – The Apartment Solution
Description: Hanging fabric storage organizers (typically shoe organizers) repurposed as vertical planting systems.
Best For: Apartments, balconies, and renters seeking non-permanent solutions.
Advantages:
- Extremely affordable ($15-$40 per organizer)
- Installation requires only hooks; no wall damage with proper mounting
- Lightweight (suitable for renters and weight-limited applications)
- Compact footprint (fits standard wall space)
- Easy seasonal relocation and storage
- Modular; stack multiple organizers for expanded capacity
Disadvantages:
- Limited soil volume per pocket; restricts plant size
- Fabric degrades over time (particularly with constant moisture)
- Typically 12-20 plant capacity per organizer
- Water distribution uneven; lower pockets receive runoff; top pockets dry quickly
- Aesthetic limitations; plastic appearance not appealing to all
Installation and Use:
- Select Quality Organizer – Choose heavy-duty fabric with reinforced pockets and hanging loops
- Mount Securely – Hang from sturdy hooks rated for total weight (approximately 15-25 pounds when waterlogged)
- Line Pockets – Insert plastic liners or landscape fabric preventing soil escape while maintaining drainage
- Fill Growing Medium – Use lightweight potting mix; pockets should be fully packed preventing settling
- Plant Appropriately – Insert small seedlings; one plant per pocket typically optimal
- Water Carefully – Water top pockets thoroughly; runoff irrigates lower pockets; daily watering often necessary
Ideal Plants: Herbs (basil, parsley, chives, dill), small lettuce varieties, microgreens, decorative succulents, ornamental trailing plants.
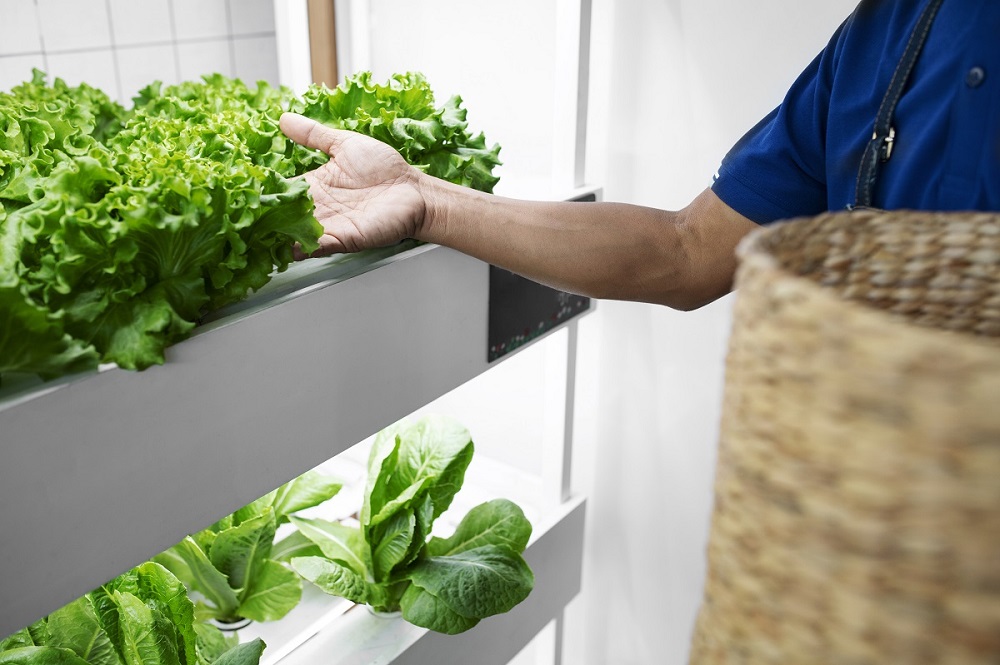
System 4: Tiered Shelf System – The Maximized Production Approach
Description: Multi-tier shelving units or DIY constructed platforms creating vertical growing layers.
Best For: Serious home production, commercial small-scale operations, and indoor growing.
Advantages:
- Substantial production capacity (50-100+ plants possible)
- Superior accessibility; each tier easily reachable
- Flexible plant sizes; accommodates various container sizes
- Professional appearance suitable for indoor environments
- Expandable; additional tiers added as needed
- Optimized for supplemental lighting integration
Disadvantages:
- Higher initial cost ($200-$1,500+ depending on construction and scale)
- Requires structural support; must be freestanding or properly wall-anchored
- Floor space consumed; less efficient space-wise than wall-mounted systems
- Irrigation complexity increases with multiple levels
Construction Options:
Commercial Metal Shelving: Pre-manufactured systems available; typically $300-$800 for 4-5 tier units. Durable, professional appearance, easily expandable.
DIY Wooden Shelving: Construct from 2×10 boards and 4×4 posts; costs $150-$400 depending on wood quality and finish. Customizable height and capacity but requires carpentry skills.
Hydroponic Shelving: Integrated drip systems and reservoirs create complete growing systems; highest cost ($800-$2,000+) but most automated and productive.
Construction Steps (DIY Wooden):
- Construct Frame – Build sturdy 4×4 post frame, 6-8 feet tall, 3 feet wide, 18 inches deep
- Install Shelves – Space 18-24 inches apart depending on plant height requirements
- Waterproof Surface – Apply protective finish preventing rot from constant moisture exposure
- Secure Anchoring – Anchor to walls with diagonal bracing or floor-to-ceiling tension
- Install Lighting – Mount LED grow lights 12-18 inches above each shelf tier
- Add Irrigation – Install drip systems with timers delivering water consistently to each tier
Ideal Plants: All suitable vertical-garden species; three-tiered systems with proper lighting support basil, lettuce, spinach, chard, herbs simultaneously.
System 5: Vertical Hydroponic Tower – The High-Tech Production System
Description: Stacked growing chambers with integrated nutrient delivery and recirculation systems.
Best For: Intensive production, year-round growing, commercial operations, and technology enthusiasts.
Advantages:
- Extremely high production density (50-100+ plants per square foot floor space)
- Fully automated water and nutrient delivery
- Minimal water waste through recirculation
- Year-round production capability with lighting integration
- Highly scalable; systems expandable through modular additions
- Professional-grade reliability
Disadvantages:
- Highest cost category ($500-$3,000+ for quality systems)
- Requires electricity for pumps and controls
- Steeper learning curve; system management more complex
- Maintenance includes pH monitoring, nutrient balancing, and equipment servicing
- Not suitable for traditional soil growing; requires hydroponic expertise
System Components:
Reservoir – Holds nutrient solution; typically 10-50+ gallons depending on tower size
Growing Towers – Stacked chambers with planting pockets; usually 4-6 feet tall
Circulation System – Pump delivers oxygenated nutrient solution to upper chamber; gravity return irrigates all levels
Monitoring Equipment – pH meter, EC (electrical conductivity) meter, timers, and automatic controls
Lighting – Full-spectrum LED panels (if indoor); integrated mounting supports
Ideal Plants: Leafy greens (lettuce, spinach, arugula), herbs, strawberries, small fruiting plants (cherry tomatoes, peppers).
Plant Selection for Vertical Growing: Choosing Success
Vertical systems impose unique constraints limiting which plants thrive. Successful vertical gardens focus on species with shallow root systems, compact growth habits, and relatively consistent moisture tolerance.
Premium Choices for Herb Production
Basil – The vertical-garden superstar. Compact growth, frequent harvesting extends production, fragrant foliage maximizes aesthetics. Requires 6+ hours sun; tolerates pot culture excellently. Prolific production justifies system investment alone.
Parsley – Attractive foliage, shade-tolerant (4+ hours sun acceptable), consistent productivity. Italian flat-leaf superior to curly varieties for production.
Chives – Delicate appearance, shade-tolerant, perennial growth provides multi-season production. Stunning purple flowers add ornamental value while pollinators benefit.
Mint Species – Aggressive growth ideal for contained pockets; container restriction prevents invasiveness. Multiple varieties (peppermint, spearmint, chocolate mint) offer flavor diversity. Shade-tolerant; forgiving of neglect.
Oregano and Thyme – Mediterranean herbs thriving in sunny vertical systems. Compact growth, seasonal dormancy minimal, long productive lives (multiple years possible).
Cilantro and Dill – Bolt-prone; require consistent harvesting. Compact before flowering; succession planting every 2-3 weeks extends continuous supply.
Optimal Leafy Greens for Vertical Systems
Lettuce Varieties – Shallow-rooted, compact growth, rapid maturity (30-45 days seed-to-harvest). Loose-leaf varieties (buttercrunch, oak leaf) superior to head varieties in vertical systems. Shade-tolerant; ideal for lower shelf tiers.
Arugula – Peppery leaves, 25-30 day maturity, productive over months with regular harvesting. Prefers cooler weather; reduces productivity summer heat extremes.
Spinach – Dense nutritious foliage, cool-season preference, shallow roots. Dense planting possible; 40-50 day maturity.
Swiss Chard – Larger than most greens but surprisingly vertical-compatible. Multicolored varieties (rainbow chard) add visual appeal. Extended harvest period; individual leaf harvesting allows weeks of production.
Mustard Greens – Rapid growth, heat-tolerant (unlike many greens), peppery flavor. 20-30 day maturity; prolific production.
Specialty and Fruiting Options
Cherry Tomatoes – Surprisingly viable in vertical systems if given adequate support and sunlight (8+ hours). Determinate varieties (limited growth height) superior to indeterminate sprawlers. Select compact varieties (Tiny Tim, Window Box Roma).
Peppers (Mini Varieties) – Compact varieties (ornamental peppers, mini sweet peppers) thrive in vertical systems. Requires 8+ hours sun; heat-loving (ideal for summer production). Dramatic visual appeal with colorful fruit.
Strawberries – Trailing growth pattern ideal for hanging vertical systems. Shallow root systems accommodate vertical pockets; decorative flowers and fruit. Alpine varieties superior to large varieties.
Microgreens – Incredibly high-yielding specialty crops. Ready for harvest in 7-14 days; no established root systems necessary. Grows at exceptionally high density; technically not long-term vertical systems but maximize production per square foot.
Plants to Avoid in Vertical Systems
Deep-rooting Plants – Carrots, beets, radishes require deep soil unsuitable for shallow containers
Large Vining Plants – Melons, squash, larger cucumbers overwhelm typical vertical structures
Large Fruiting Plants – Standard tomato varieties, large peppers require excessive water and support
Slow-Maturing Plants – Where quick turnover maximizes production, slow crops (cabbage, broccoli) underutilize space
Irrigation Strategies: Delivering Water Efficiently
Successful vertical gardens require reliable water delivery matching plant needs while minimizing waste and labor.
Hand Watering: Simple but Labor-Intensive
Method: Traditional watering can or hose with gentle spray.
Best For: Small systems (under 20 plants), frequent gardener presence, and budget-constrained installations.
Advantages: No equipment beyond watering can; completely flexible; immediate observation of plant conditions.
Disadvantages: Daily attention necessary (often multiple waterings during hot weather); inconsistent moisture if schedule disrupted; labor-intensive for large systems.
Best Practices:
- Water early morning or evening to minimize evaporation
- Saturate soil thoroughly without oversaturation (soil moist but not waterlogged)
- Top pockets first; allow water to drip through irrigating lower levels
- Observe lower plants carefully—often receiving less water than upper levels
Drip Irrigation Systems: Balanced Efficiency
Method: Tubing with individual emitters delivering precise water amounts to each plant.
Best For: Medium systems (20-50 plants), regular gardener oversight, and consistent production priority.
Advantages:
- Precise water delivery; minimal waste
- Automated through timers (daily or multiple-times-daily watering without presence)
- Even moisture delivery creates optimal growing conditions
- Lower disease pressure from dry foliage
Disadvantages:
- Initial installation time and cost ($50-$200)
- Occasional maintenance; emitters occasionally clog with sediment
- Requires water timer installation and monitoring
Installation:
- Plan water routes from connection point through all plants
- Lay main supply line (typically 1/2-inch drip tubing)
- Branch into individual lines to each plant (1/4-inch tubing)
- Install emitters; typically 0.5-2 GPH (gallons per hour) flow rates
- Connect timer to water source; program watering frequency
Programming Guidelines:
- Morning watering (6-8 AM) delivering 5-10 minutes per day typical starting point
- Adjust based on plant appearance; dry plants indicate insufficient watering; wilting may indicate excess
- Summer months require more frequent watering than spring/fall
- Monitor system first week intensively; adjust until optimal moisture achieved
Wicking Systems: Passive Capillary Action
Method: Cloth or cord pieces contact both soil and water source; capillary action draws water upward maintaining consistent moisture.
Best For: Small systems, renters, and gardeners seeking completely passive systems.
Advantages:
- No moving parts; completely passive operation
- Extremely affordable ($0-$20 even with new materials)
- Suitable for renters; temporary installation
- Perfect for vacations when systems require no attention
Disadvantages:
- Limited to small plants and containers
- Wicks eventually degrade; periodic replacement necessary
- Water volume limited by reservoir size
- System capacity depends on ambient temperature and plant water demand
Construction:
- Fill container or basin with water
- Cut cloth strips (old t-shirts, towels) creating wicks
- Place one end in water source; thread other through soil to plant roots
- Position plants to receive consistent moisture; add soil as needed
- Monitor water level; refill as needed
Self-Watering Containers: Integrated Reservoir Systems
Method: Dual-chamber containers with built-in water reservoir and wicking layer.
Best For: Individual plants, renters with minimal setup tolerance, and consistent moisture priority.
Advantages:
- Completely integrated; no separate irrigation equipment
- Reliable 5-7 day watering intervals without attention
- Excellent for plant health; consistent moisture optimal for production
- Portable; relocate easily if needed
Disadvantages:
- Higher cost per unit ($15-$50 each)
- Limited to individual plants; expensive at system scale
- Reservoir filling adds frequency monitoring task
- Less appropriate for moisture-sensitive plants (some succulents prefer drying between waterings)

Maintenance and Year-Round Success
Successful vertical gardens require consistent care beyond initial installation.
Daily/Weekly Tasks
Watering – Establish consistent schedule matching system type and climate conditions. Check soil moisture daily; adjust watering based on plant appearance and weather.
Pest Inspection – Scout for common problems: whiteflies, spider mites, aphids. Catch infestations early; small populations respond to water spray or organic treatments.
Harvesting – Regular harvesting stimulates bushy growth, extends production window, and maximizes yield. Pinch off leaf tips regularly; harvest outer leaves first allowing centers to continue growing.
Monthly Tasks
Nutrient Replenishment – Potting soil gradually depletes nutrients through repeated watering. Every 4-6 weeks, apply balanced liquid fertilizer (10-10-10 NPK ratio typical). Follow product directions; avoid over-fertilizing.
Pruning and Cleanup – Remove dead leaves and stems. Cut back excessive growth maintaining plants at manageable sizes. Vigorous pruning stimulates new productive growth.
Soil/Media Assessment – Check for compaction; roots may have densely filled containers. Refresh with additional potting mix if needed. Consider container exchange every 1-2 years for long-term perennials.
Seasonal Adjustments
Spring/Early Summer: Increase watering frequency as daylight extends and temperatures rise. Expect peak growth and harvesting productivity.
Mid-Summer Heat: Monitor closely; plants under heat stress require more frequent watering. Consider temporary shading during extreme heat waves; provide afternoon shade in very hot climates.
Fall: Gradually reduce watering as daylight decreases. Prepare cold-sensitive herbs for winter storage or final harvest.
Winter: Most tender herbs (basil, tender mints) cease growth. Focus on cold-tolerant options (hardy herbs, winter greens); reduce watering substantially; ensure adequate lighting if growing indoors.
Pest and Disease Management
Common Vertical Garden Pests:
Whiteflies – Tiny white flying insects; sticky coating on foliage indicates infestation. Spray affected plants with water forcefully; repeat weekly. Insecticidal soap as backup.
Spider Mites – Fine webbing on foliage, yellowing leaves. Increase humidity; spray water to dislodge. Mite predators (phytoseiulus persimilis) effective natural control.
Aphids – Green, brown, or black soft-bodied insects; sticky residue. Spray vigorously with water; neem oil effective if infestation severe.
Fungal Issues: Powdery mildew (white powder on leaves), leaf spot (brown lesions). Improve air circulation; remove affected leaves; fungicide treatment if severe.
Prevention Strategy: Healthy, vigorous plants resist pests most effectively. Maintain optimal moisture, adequate light, and nutrient balance; minimize stress factors.
Getting Started: Your Action Plan
Step 1: Assess Your Space (Days 1-3)
- Identify potential vertical locations (walls, fences, balconies, patios)
- Measure available space
- Determine sunlight exposure throughout day
- Verify water access proximity
- Check structural support adequacy
Step 2: Select System Type (Days 4-7)
- Match system to available space, budget, and commitment level
- Research specific model reviews if purchasing commercial systems
- Source necessary materials (salvage pallets, gather bottles, etc.)
- Plan installation timeline
Step 3: Acquire and Prepare Materials (Days 8-14)
- Obtain growing containers, framework, or system components
- Gather potting soil, seeds/seedlings, tools
- Prepare mounting hardware if necessary
- Test water delivery system functionality
Step 4: Install and Establish System (Days 15-21)
- Mount framework securely; verify stability
- Install irrigation system if applicable
- Fill containers with potting mix
- Plant seedlings or direct-sow seeds
Step 5: Establish Care Routine (Weeks 3+)
- Develop consistent watering schedule
- Implement daily inspection habits
- Begin regular harvesting once plants establish
- Adjust practices based on plant performance


Conclusion: Vertical Gardens Transform Available Space Into Productive Reality
Vertical gardens demolish the barrier preventing food-production participation for people lacking traditional garden space. Whether apartment dweller craving fresh basil, balcony gardener seeking salad greens, or renter wanting to produce food without property damage, vertical gardening delivers practical solutions.
Systems range from budget-friendly DIY pallets costing under $50 to sophisticated hydroponic towers exceeding $2,000. Every budget and commitment level has appropriate options. Start small, prove success, expand gradually.
The combination of vertical-growing benefits—exceptional space efficiency, superior air circulation reducing disease, accessibility advantages, striking aesthetics, and genuine food production—makes vertical gardens increasingly popular across residential, commercial, and community-gardening contexts.
Your Path Forward:
- Start This Week – Identify one potential vertical location on your property
- Choose Your System – Select one option matching your space and budget
- Gather Materials – Source or build growing framework
- Select Starter Plants – Choose 3-5 compatible species; start with proven performers (basil, mint, lettuce)
- Install and Observe – Set up system; carefully monitor first weeks; adjust practices based on results
- Scale Gradually – Expand based on success; add additional systems or varieties as confidence grows
Transform neglected walls into productive zones. Convert empty patio corners into herb gardens. Grow the fresh produce you want exactly when you want it—regardless of property size constraints. Vertical gardening makes it possible.
Start today. Grow upward. Harvest abundance from unexpected spaces.